Monthly project - September
Posted
#127374
(In Topic #6687)
Guest user
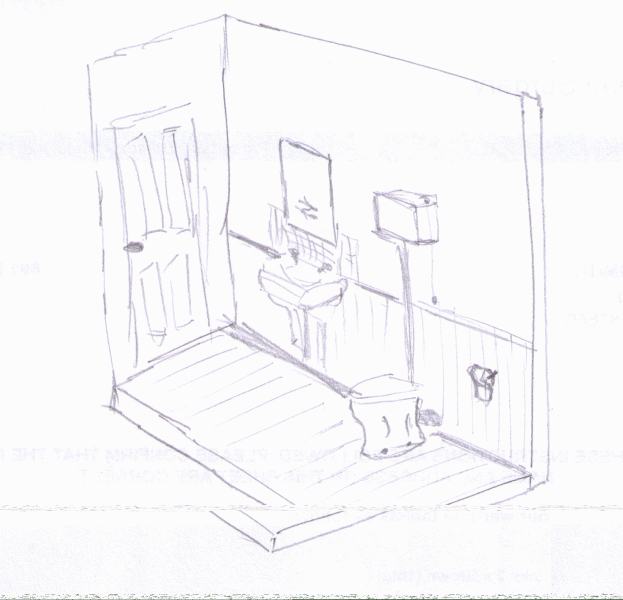
A Grotty Washroom - Stu's words !!
Right, over to any member to start this off for September.I will add the second line of the project description when you let me know.
Posted
Guest user
Posted
Legacy Member
I realy like the idea sol, but my modelling is too slow to get anything worth looking at in one month.

reg

Posted

Full Member
I'm hoping to start tonight, so if required I can post progress photos and how-to notes.
The encouragement is for others to have a go at something completely different to what you'd normally model, in a very small space, just to stretch yourself.
Stu
Stubby47's Bespoke Model Buildings
All photos I post are ©Stu Hilton, but are free for use by anyone.
Posted
Guest user
I will add the second line of the project description when you let me know.
Now done - that is the second line of the description.
Thanks Stu
Posted
Full Member
Ok, from my point of view this is intended to be a very quick build - even by my standards - I hope to start and finish this tonight, in a single modelling session of about 4 hours…
To help with this, I needed a parts list, so I know what to use where and so I can plan in my head in non-modelling time how I'll tackle each bit.
So :
Parts checklist :
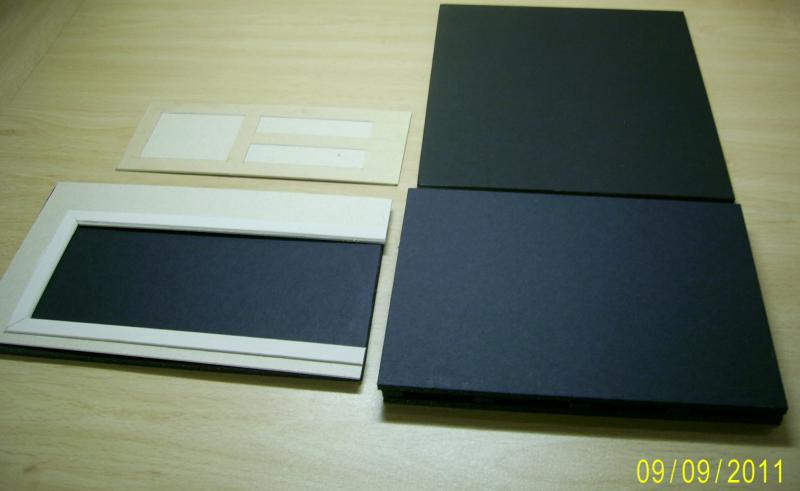
Basic wall & floors - foam board
Wooden floor - lollipop sticks
Lower walls - plasticard planking
Upper walls - card
Dado rail - coffee stirrers
Mirror
Tiles around mirror - plasticard tiles
Door - card
Toilet cubicle - card
Toilet door - yet more card
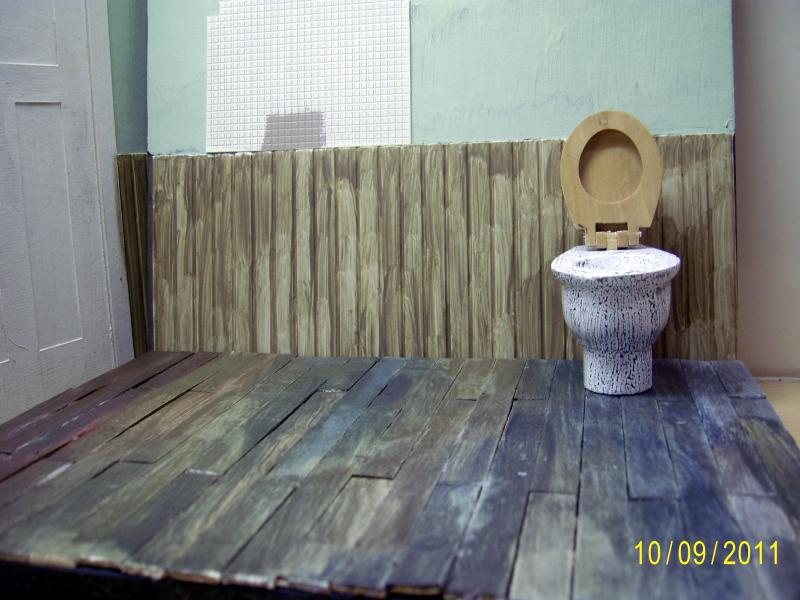
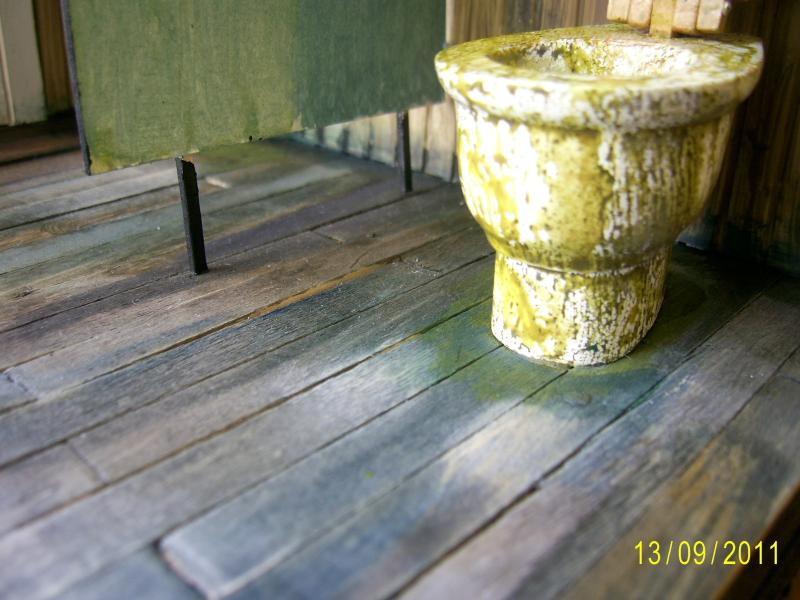
Toilet
Header tank - fabricate from plastic sheet
Header tank brackets - 'T' plastic strut
Sink
Sink supports / side towel rail - paper clips
Pipes - various plastic tubes
Watercolours & acrylics for making everything grotty
The toilet & sink are the only items I've pre-bought, from a wonderful website called Elf Miniatures.
Stubby47's Bespoke Model Buildings
All photos I post are ©Stu Hilton, but are free for use by anyone.
Posted
Full Member
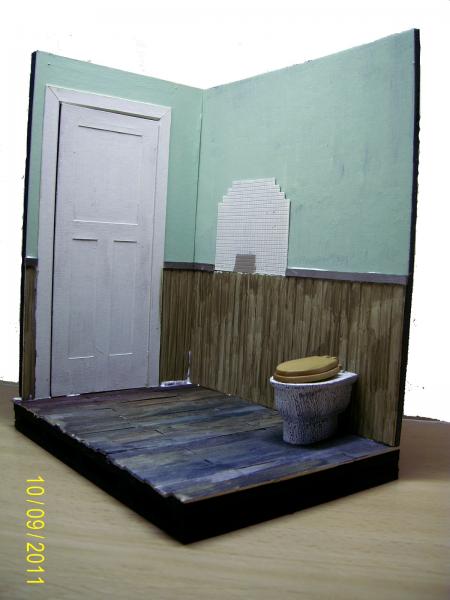
Sub-Floor - two layers of foam board, with foam board spacers to make a sandwich construction.
Sub-Walls - foam board - with these glued to the floor and each other I'll get a three sided (1/2 cube) box, which should be rigid enough.
Floor - lollipop sticks, rounded ends cut off, laid side by side, with one or two having joints. These may need sanding down after glueing.
Lower Walls - Clad in plasticard planking - should just need painting, but could distress lower edge as rotten wood, skirting board ?
Upper walls - either use a piece of card, or just the foamboard itself - need to add damp patches, flaking paint - needs more thought how…
Dado rail - could use coffee stirrers (depends on scale ) or plastic rod
Door - 4 panel door - thin card cut out for each panel, if possible multiple layers to give more detailed relief - door handle - use bead, door lock - not sure, but should be broken (brass tube ?)
Cubicle wall - card, with short legs to leave gap to floor - legs from old plastic sprue - possibly have hole/s in
Cubicle door - off hinges, leaning against cubicle wall
Header tank - either make out of plastcard, or find a suitable small box. Needs wire / lever for 'chain', feed and drain pipes. Supports made from 'T' plastic strut, with wood battens on the wall from split coffee stirrers
Toilet - needs waste pipe (large dia plastic tube)
Sink - side supports / towel rail from paper clips - painted white
This is not a complete list, nor necessarily one I'll stick to, but I find it helps me to visualise each element of the project, so when I come to the build itself I can just get on with it. Obviously, practical differences with what I'd imagined cause deviation in this plan, but it seems to work for me…
Stubby47's Bespoke Model Buildings
All photos I post are ©Stu Hilton, but are free for use by anyone.
Posted
Full Member
First thing is to work out some dimensions…
A real toilet is approx 15" from floor to seat - the model version is 1.5" = i.e. a very convenient 1:10 ratio.
So, the the door at 2'6" (30") will be 3" across and at 6'6" (78") 7.8" high.
This gives a rough overall size of 8" x 5.5".
Now to cut the foamboard to fit.
 Last edit: by Stubby47
Stubby47's Bespoke Model Buildings
All photos I post are ©Stu Hilton, but are free for use by anyone.
Posted

Full Member
Posted
Full Member
Wooden floor now laid :
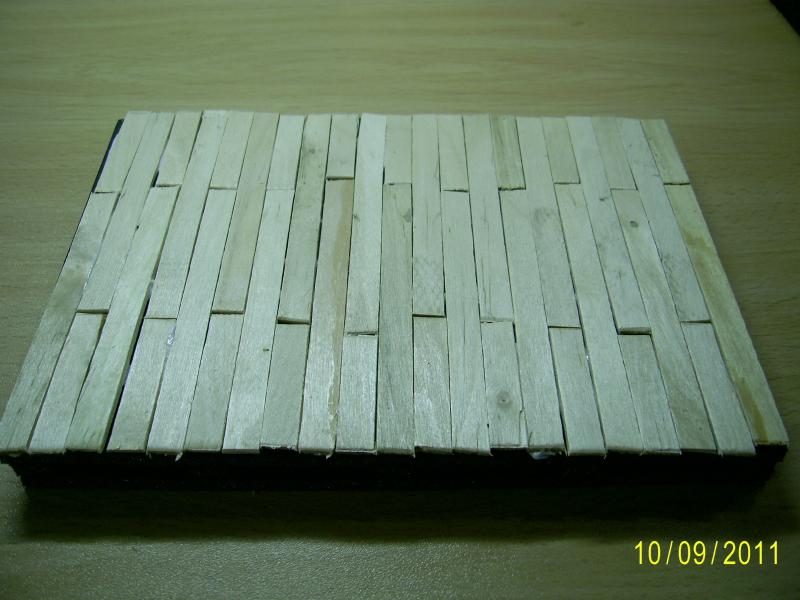
These are lollipop sticks (£1.00 for about 60) with the ends trimmed off and then laid to alternative floor edges, then smaller pieces cut to fit the gaps.
Stubby47's Bespoke Model Buildings
All photos I post are ©Stu Hilton, but are free for use by anyone.
Posted
Full Member
Stubby47's Bespoke Model Buildings
All photos I post are ©Stu Hilton, but are free for use by anyone.
Posted
Full Member
Stubby47's Bespoke Model Buildings
All photos I post are ©Stu Hilton, but are free for use by anyone.
Posted
Full Member

Stubby47's Bespoke Model Buildings
All photos I post are ©Stu Hilton, but are free for use by anyone.
Posted

Inactive Member
Max
Port Elderley
Port Elderley
Posted
Full Member
Stu
Edit: It is also nowhere near grotty enough yet.
Last edit: by Stubby47
Stubby47's Bespoke Model Buildings
All photos I post are ©Stu Hilton, but are free for use by anyone.
Posted

Legacy Member
Posted
Full Member
Pipework going in this evening - just glad it dosen't have to pass water…
Stubby47's Bespoke Model Buildings
All photos I post are ©Stu Hilton, but are free for use by anyone.
Posted
Guest user
Quite glad I don't need to!… Pipework going in this evening - just glad it dosen't have to pass water…
Cheers
Dave
Posted
Full Member


Stubby47's Bespoke Model Buildings
All photos I post are ©Stu Hilton, but are free for use by anyone.
Posted
Guest user
1 guest and 0 members have just viewed this.