Monthly Project - December - 2011
Posted

Site staff
Stu's Tumbledown Shed.
I am watching !!
Ron
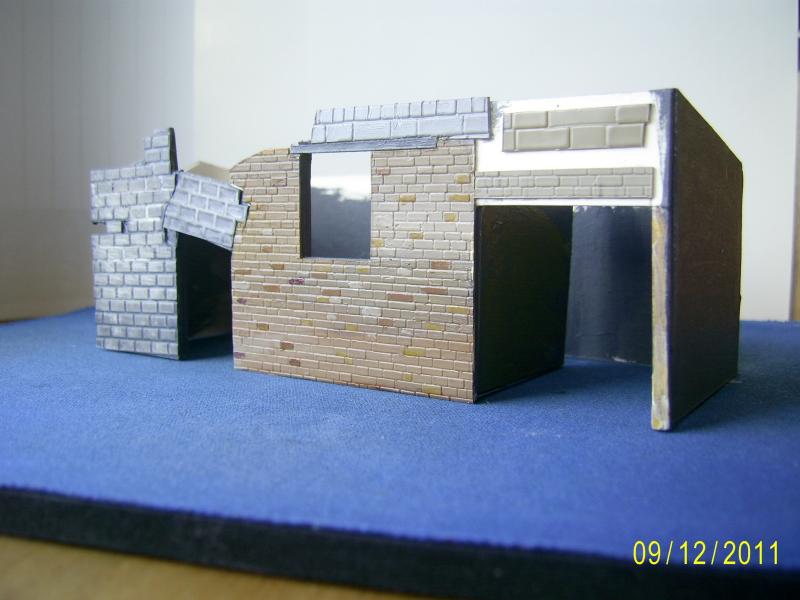
NCE DCC ; 00 scale UK outline.
NCE DCC ; 00 scale UK outline.

Posted

Full Member
'Petermac
Posted

Full Member
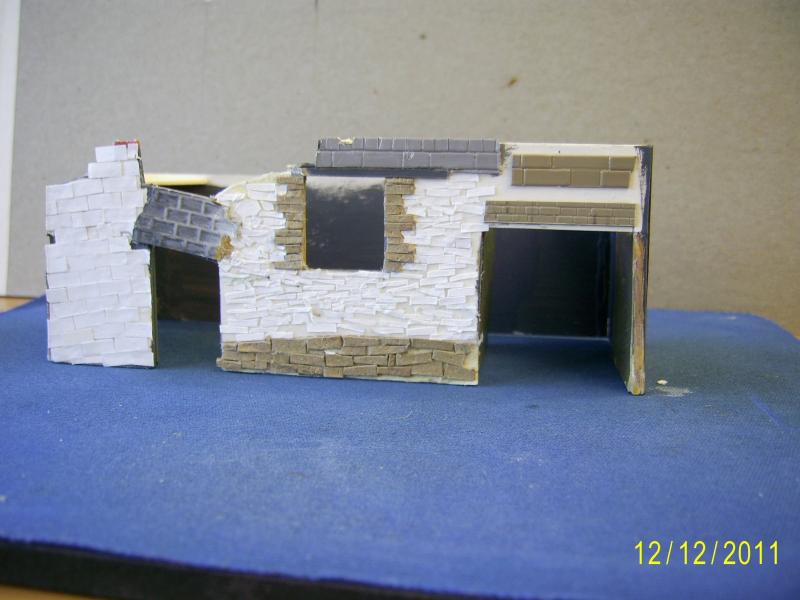
I've not done anything to the plasticard, that's how it comes. It is, I think, 2mm scale, not 4mm scale, as I wanted smaller stones. The window lintel is from the same sheet, but on in reverse ( as you said there is very little detail on this side) and the blocks above the lintel are from another sheet. The upper row of blocks has had extra mortar joins added with a knife.How did you get the relief effect on the brick walls Stu - it looks good ?
 Last edit: by Stubby47
Stubby47's Bespoke Model Buildings
All photos I post are ©Stu Hilton, but are free for use by anyone.
Posted
Full Member
:thumbsI am watching !!
Stubby47's Bespoke Model Buildings
All photos I post are ©Stu Hilton, but are free for use by anyone.
Posted
Full Member
'Petermac
Posted

Legacy Member
Posted
Legacy Member
Posted
Full Member
The grey part has been added, then wiped, then added again and wiped, then finally gone over with the end of a paper clip to scratch the mortar joins back to white and to give some patchyness to the blocks.
The stone wall has had a wash of earthy-browny-mustardy colour, with some white and dark red added in places, then individual bricks have been picked out in another selection of shades of the same colours. The rest of the building, inside and both ends, has had a basic wash of sludgey-grey to prvode a base coat.
I'm not happy with the regularness of the brick work between the smaller door and the window, the original is far more rougher and irregular. One option is to cover this area in a thin skim of DAS or similar, then carve a more uneven surface 7 re-paint.
Stubby47's Bespoke Model Buildings
All photos I post are ©Stu Hilton, but are free for use by anyone.
Posted
Full Member
:oops::cool::mrgreen:This project has been added to the forum index under Buildings and Scratchbuilding.
Stubby47's Bespoke Model Buildings
All photos I post are ©Stu Hilton, but are free for use by anyone.
Posted
Full Member
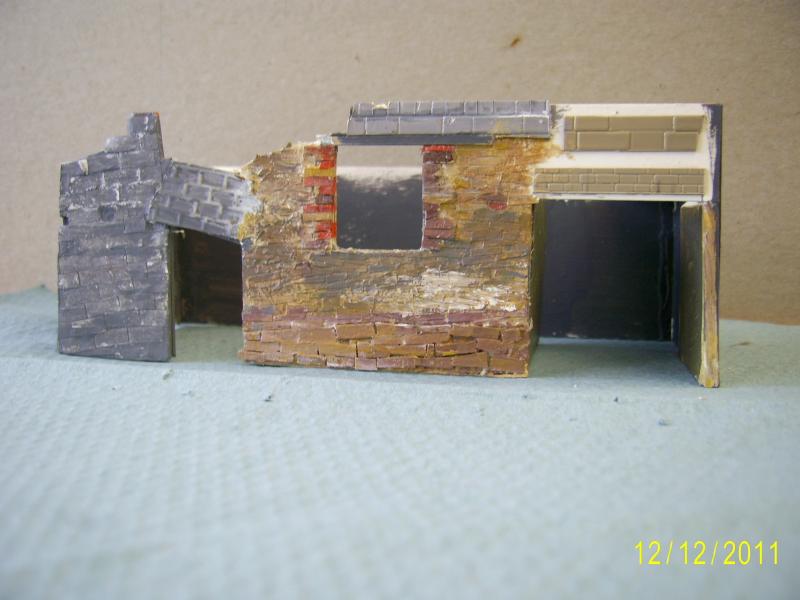
A more square-on and cropped view of the left hand end of the shed highlights some more areas to consider for detailing.

The bricks in the window frame will be cut out from either a Scalescene's print, or a home-made bespoke job, before the window filling corrugated iron is added.
The rusty iron/metal bar supporting the lower edge of the corrugated iron cladding will be a piece of plasticard, shaped and painted before adding.
The post supporting the telephone insulators (who'd have put a phone in THIS shed ???) can be made from a matchstick, with some isulators cut from a standard 4mm scale telelgraph pole.
The large beam supporting the roof can be made from a either a lollipop stick or a coffee stirrer.
Most of the bottom parts of the walls are covered in brambles or ivy - this will help bed the model into the sub-baseboard and should also improve the transition from model to realistic model.
Last edit: by Stubby47
Stubby47's Bespoke Model Buildings
All photos I post are ©Stu Hilton, but are free for use by anyone.
Posted
Full Member
The front wall was far too neat and tidy, so most of it has come off.
The left hand blockwork will be replaced by individual paper rectangles and the irregular stone wall will be represented by slivers of plasticard.
Hopefully this won't take too long…
Stubby47's Bespoke Model Buildings
All photos I post are ©Stu Hilton, but are free for use by anyone.
Posted
Full Member
I'm a lot happier with this now. The blocks to the left side are the 'chad' from a binding machine, the stones in the middle section are slivers of paper or card, stuck on individually.
Stubby47's Bespoke Model Buildings
All photos I post are ©Stu Hilton, but are free for use by anyone.
Posted
Full Member
A much better representation of the original but I don't envy you sticking all those chads and paper bricks on :shock::shock:
I seem to remember Alan Downes did his brickwork using the, now obsolete, computer chads and they looked wonderful although I suspect he could have built the prototype in quicker time !!!
'Petermac
Posted
Full Member
Stubby47's Bespoke Model Buildings
All photos I post are ©Stu Hilton, but are free for use by anyone.
Posted
Full Member
(I hope some of you are having a go at your own model….)
Stubby47's Bespoke Model Buildings
All photos I post are ©Stu Hilton, but are free for use by anyone.
Posted

Full Member
I am also watching this closely I think you made the right decision when you removed the front panel and did it over.
I have two small old buildings that have bricks that have crumbled, so I am really learning here. I may be starting them sooner than I thought I would be!
Wayne
Posted
Full Member
And if it looks too neat, get Ianbo to build it for you ;-).
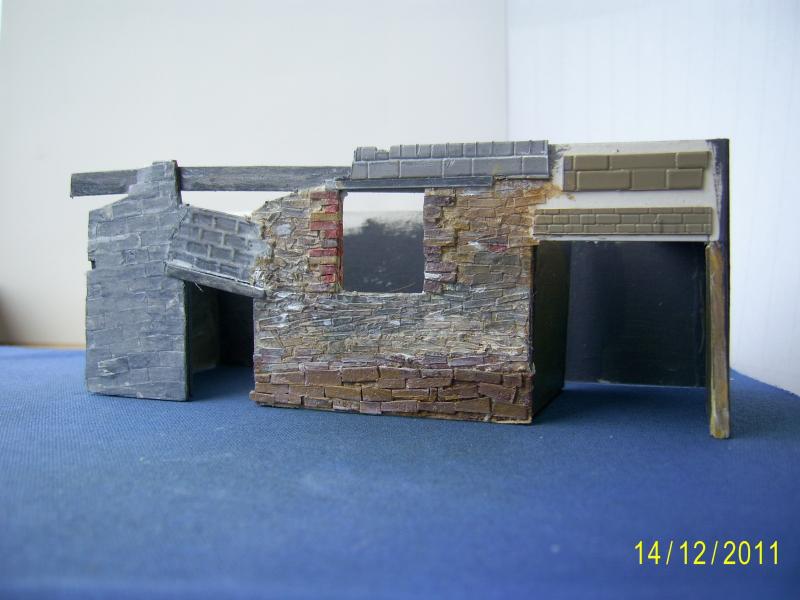
I've started to tone down the brickwork - though I still think the colour is too dark compared to the original. I've also added the roof supporting beam and the small doorway lintel - both made from strips of cardboard.
Stubby47's Bespoke Model Buildings
All photos I post are ©Stu Hilton, but are free for use by anyone.
Posted
Full Member
'Petermac
Posted
Full Member
Just the roof to do for the building, plus the final little bits of detailing, then it's on to the surrounding groundworks.

The clading was first given a wash of light cream, then some orrangy rusty colour was added then mostly wiped off again. I also washed some light grey over small areas as well.
Stubby47's Bespoke Model Buildings
All photos I post are ©Stu Hilton, but are free for use by anyone.
Posted
Full Member
wayne
1 guest and 0 members have just viewed this.