Monthly Project - January 2012
Posted
#132491
(In Topic #7027)

Legacy Member
Max's Yard Lamps.
We finished off 2011 with a great project from Stu with his 'Tumbledown Shed' project. Can we begin 2012 with another goodie. We need volunteers for this as soon as we can. Doesn't matter what the subject is, as long as it's related to our hobby of course, anything you like that you think will benefit members, whether it be for experienced modellers or beginners.
Posted
Legacy Member
Posted

Inactive Member
The basic principle is the same for all of them, but the style and shape is only limited by the imagination.
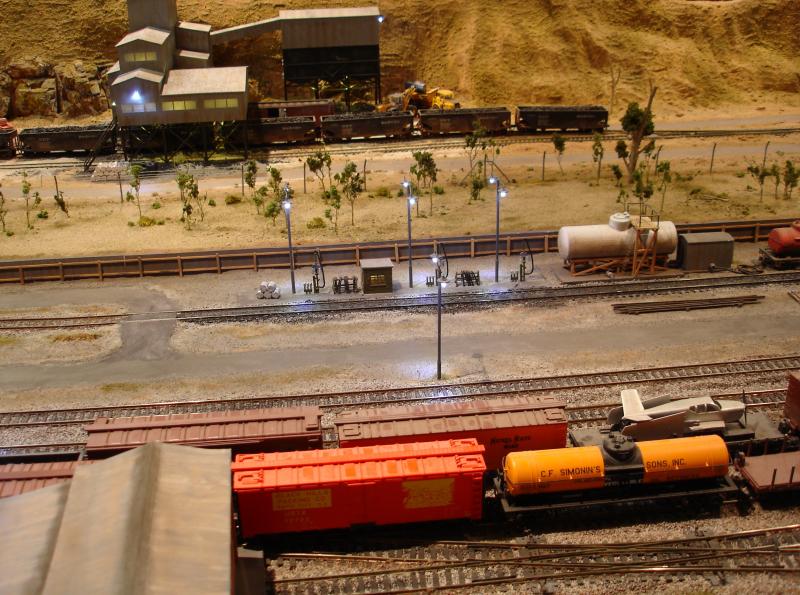
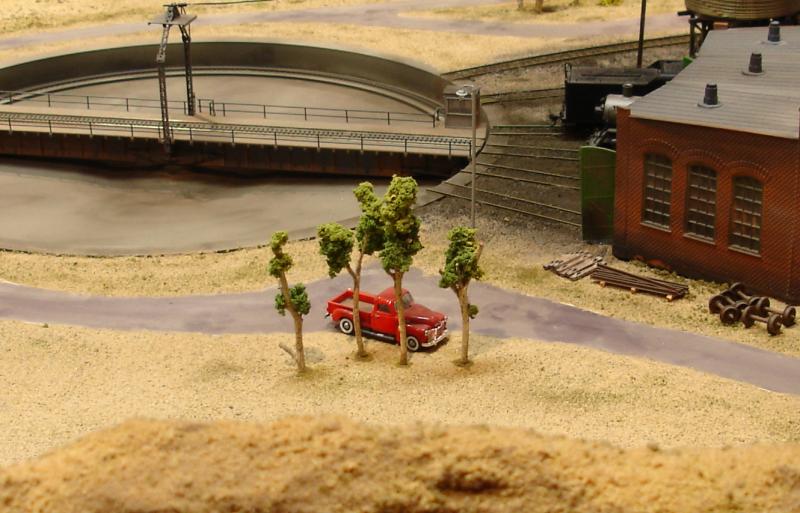
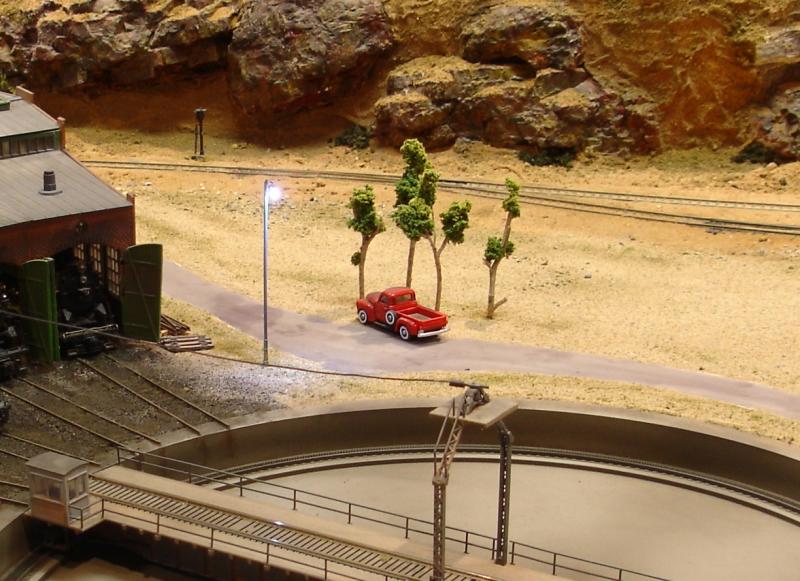
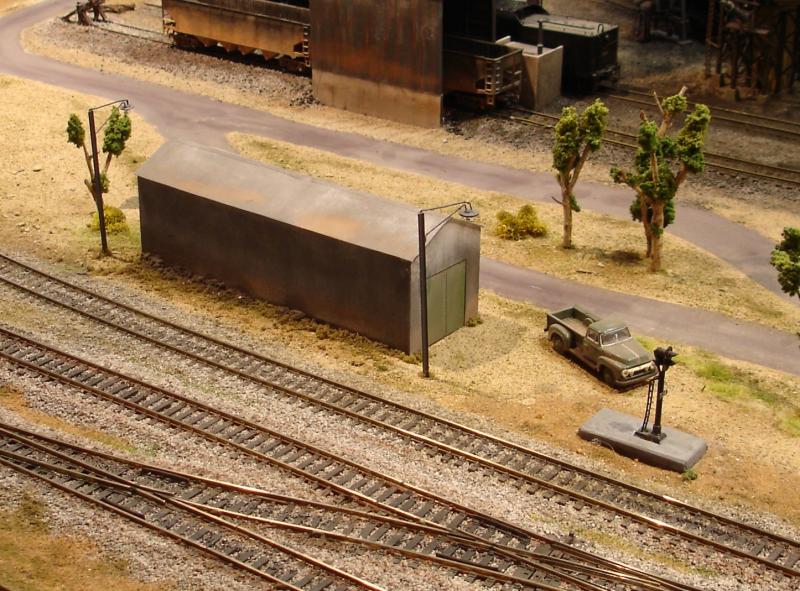
Here are a few examples of ones I've made . . .

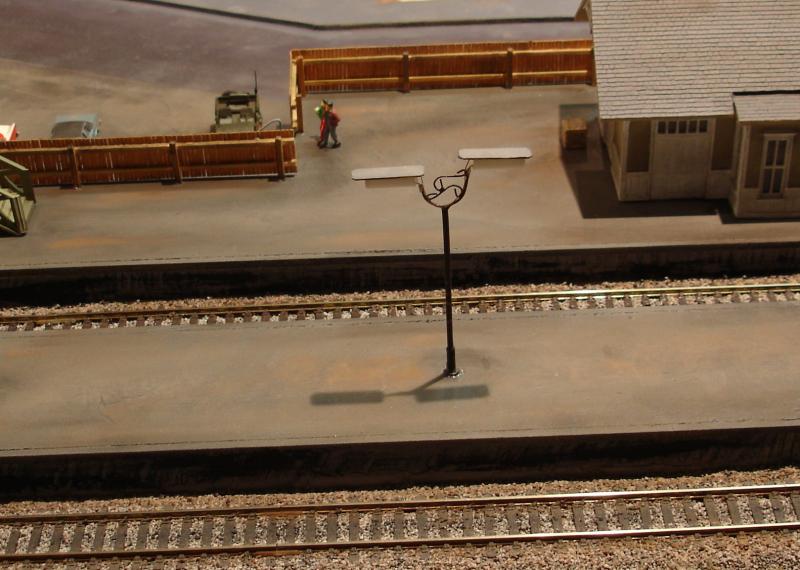
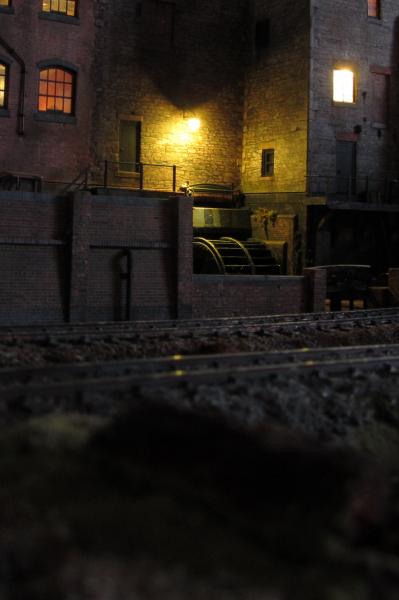
Some yard lights - OFF. Now - ON.
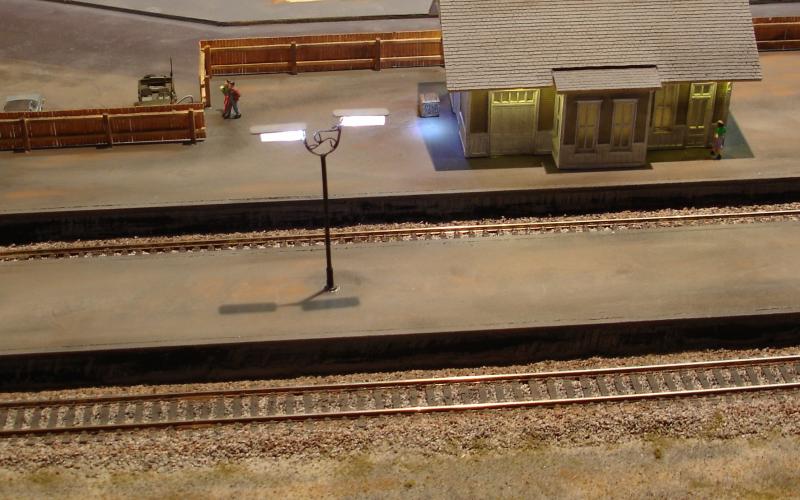
One with a short arm . . . OFF
. . . now - ON.
These have been made with brass tubing so far. The next ones are reclaimed rail . . .
OFF - now ON . . .
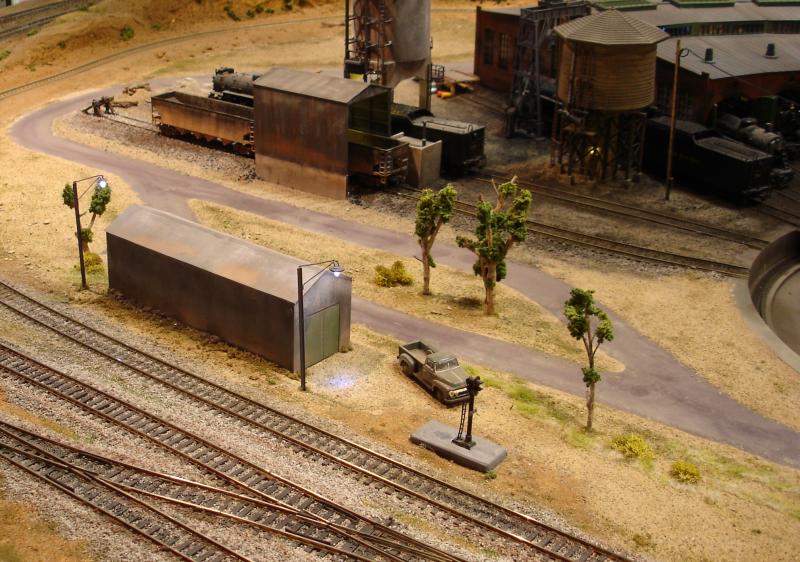
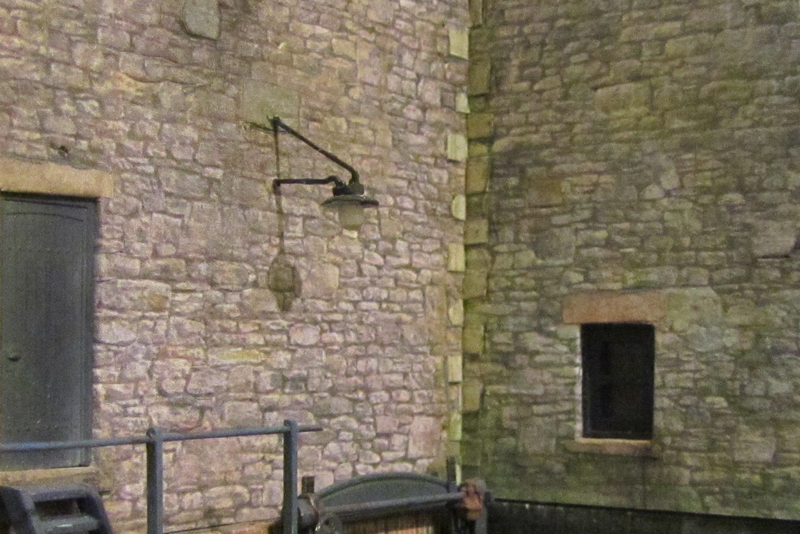
. . . and lastly, some made from old poles which had lamps on them which burned out.
. . . and had styrene tubing slipped over the LEDs to look a bit like fluros.
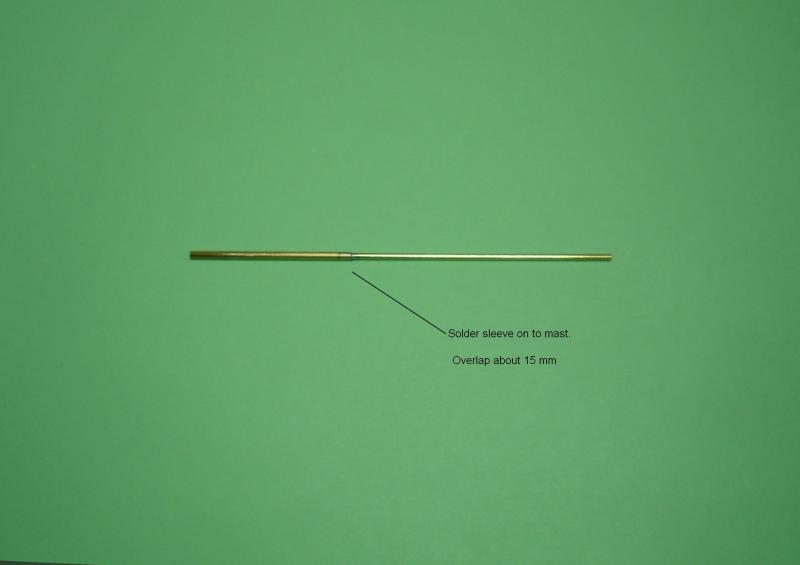
Next, the materials required to do a basic one.
Max
Port Elderley
Port Elderley
Posted
Inactive Member
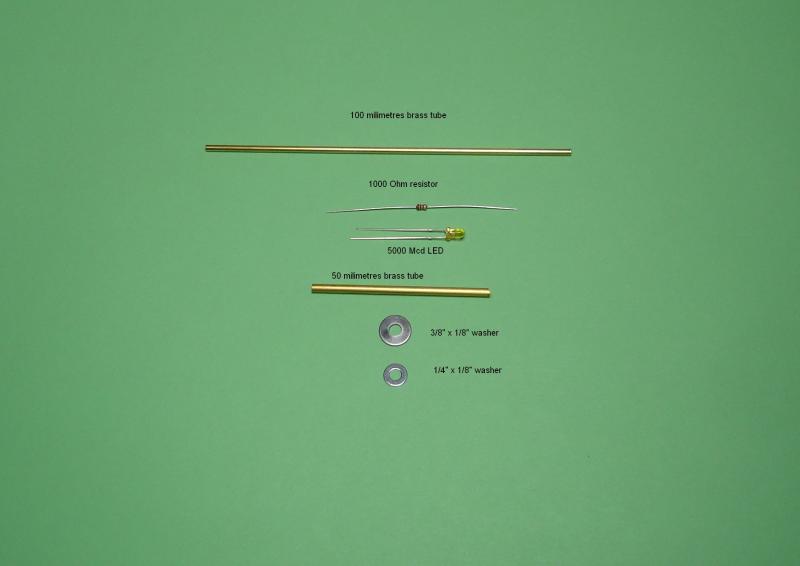
Resistors come in some tiny sizes.
I find it makes a nicer finish if I polish the solder joint with some 1200 grit paper.
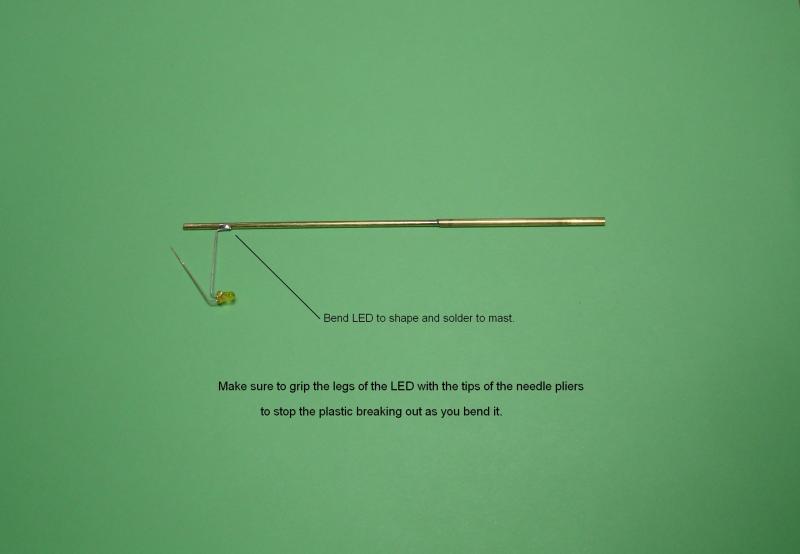
Here you can see it starting to take shape. It's important to support the plastic part of the LED.
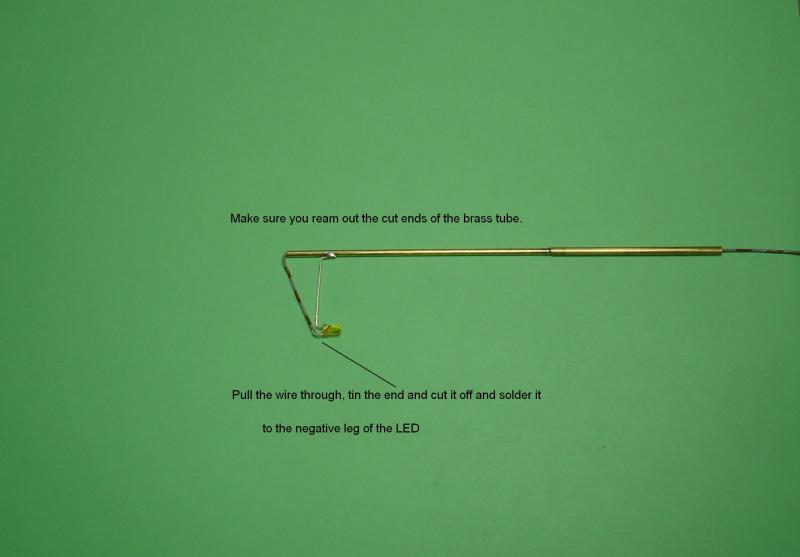
I find the Dremel wheel leaves a swarf which can block the hole. If you forget to ream out the bottom of the mast before you solder it together, it can make life difficult getting the wire through.

The positive leg of the LED is longer, so that's my choice for soldering to the mast. The resistor is soldered to the bottom of the mast and becomes the positive terminal.
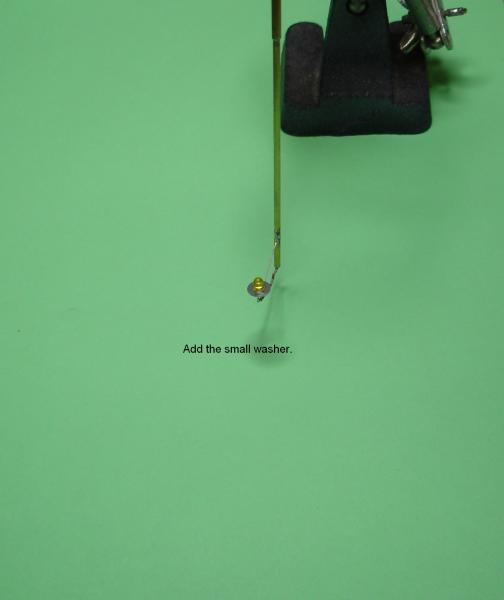
Turn the assembly upside down and drop the small washer over the LED.
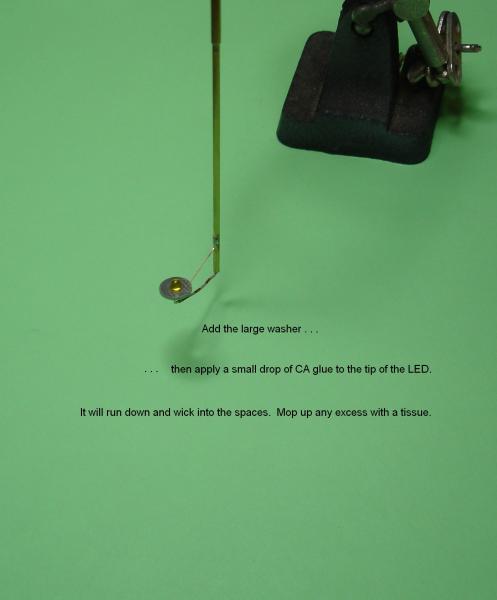
Then drop the large washer over the LED. If you have a different lens in mind, now is the time to add it.
One drop of CA glue will do the job.
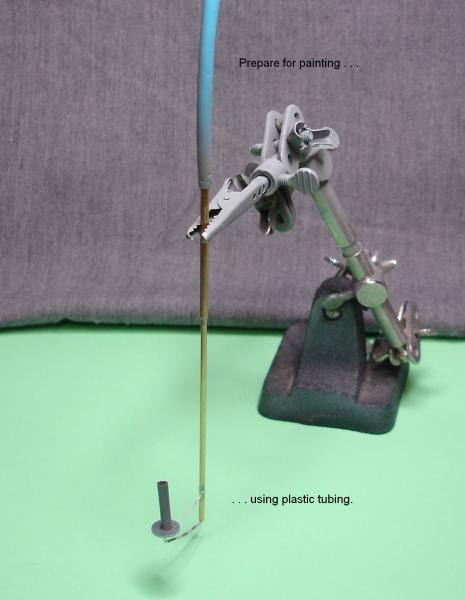
Cut a small length of heat shrink tubing and place it over the LED. Another peice protects the cable and resistor.

Back from the paint shop, it's ready to take pride of place on the layout.

Just another couple of ideas. Go for it. :chicken
Max
Port Elderley
Port Elderley
Posted

Site staff
Ron
NCE DCC ; 00 scale UK outline.
NCE DCC ; 00 scale UK outline.
Posted
Legacy Member
Posted
Inactive Member

Having seen Barchester, I don't forsee any problems. :lol:
Max
Port Elderley
Port Elderley
Posted

Full Member
Here you go, Max, your yard lights inspired me to play wiv LEDs and do these wall mounted lights, an, an….they work! I made the little holes with a needle, twiddled a felt tip in the holes to imitate a circular plate and stuck the wires from the bck with Poxy resin. I used a card circle for the shad as I couldn't source 1/8" washers here.
Doug
'You may share the labours of the great, but you will not share the spoil…' Aesop's Fables
"Beer is proof that God loves us and wants us to be happy" - Benjamin Franklin
In the land of the slap-dash and implausible, mediocrity is king
"Beer is proof that God loves us and wants us to be happy" - Benjamin Franklin
In the land of the slap-dash and implausible, mediocrity is king
Posted
Inactive Member
Max
Port Elderley
Port Elderley
Posted

Full Member
What's the diameter of the brass tubing you've used ?
'Petermac
Posted
Inactive Member
I'm not sure what that is in the old money.
Max
Port Elderley
Port Elderley
Posted
Full Member
I'll see what I can play with …………..:cheers
'Petermac
Posted
Guest user
Posted
Inactive Member
You're welcome. :thumbs
Max
Port Elderley
Port Elderley
Posted
Guest user
I have been playing about for a while making yard lamps and wall lamps using styrene tube but a scale diameter tube wouldn't fit both wires from the LED.
I never thought of using brass tube as one of the conductors.
Terry
Posted
Inactive Member
Max
Port Elderley
Port Elderley
1 guest and 0 members have just viewed this.