Making a Lemon Ernestly.
Posted
#227209
(In Topic #12395)

Full Member
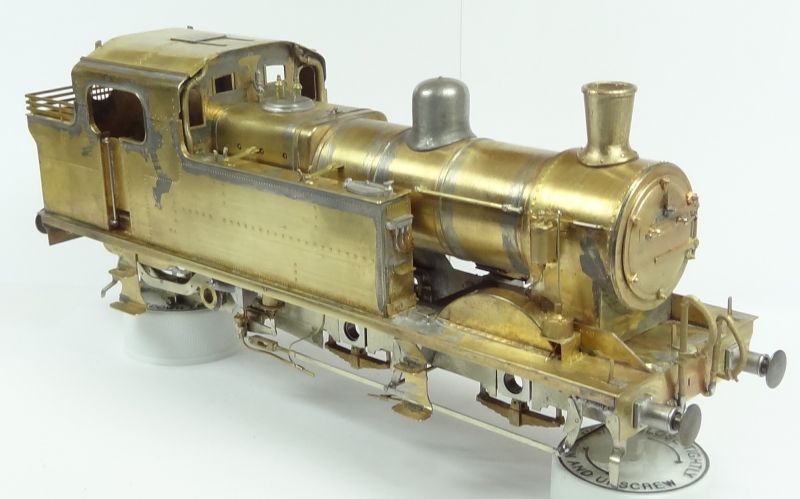
From a 7mm Gladiator Models kit.
Ernest Lemon was Director General of Aircraft production during the second world war.In 1931 he began a brief tenure as Chief Mechanical Engineer of the LMS prior to which he had been a very innovative production manager as a Carriage and Wagon Superintendent at Derby.
Shortly before Stanier took over as CME , the LMS built a series of 0-4-4 passenger tank locos which were considered the last of an ex MR design.
last December I chose a Gladiator Models rendition of this loco as my last MR/LMS loco kit build.

This is the journey……………………………………
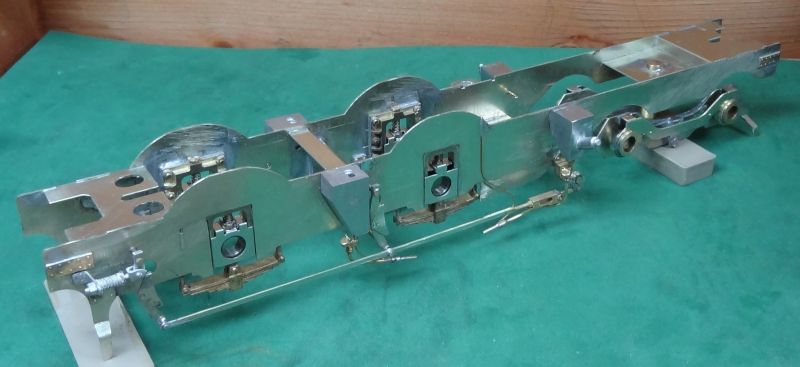
The kit has thick gauge nickel silver etches for the chassis and thick brass for the superstructure.
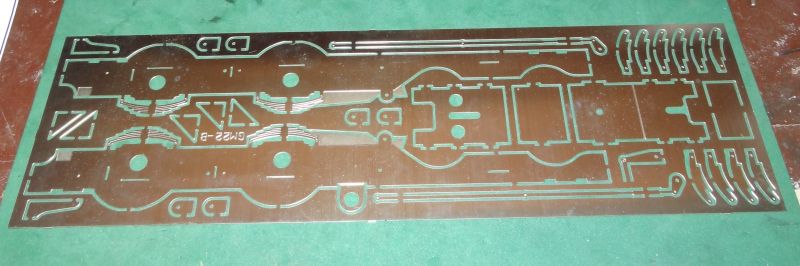
There is no provision for chassis compensation, but the hornblocks and rideheight is half etched.

I found the brake pull-rod parts to be too basic for me. Fortunately, Laurie Griffin produces many replacement parts for this particular class of loco. I used these and parts from Peter Roles to upgrade the entire loco kit to match the standard of my other LMS loco builds.
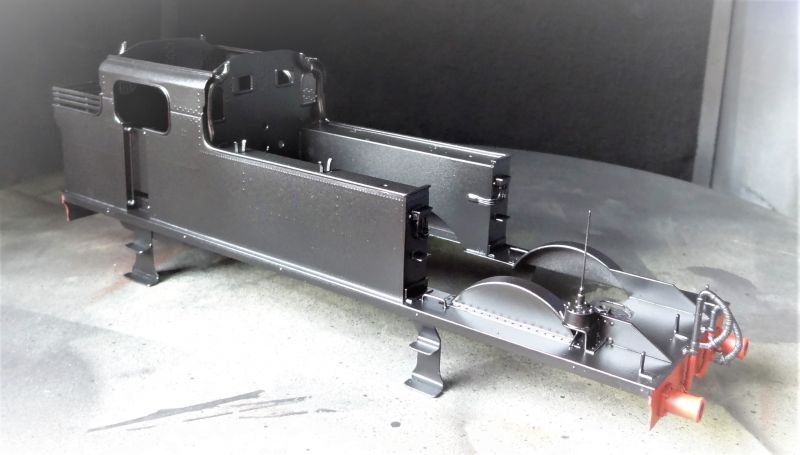
I always start a loco kit by making the coupling rods and with the use of axle jigs and sprung hornblocks from HobbyHolidays, it is relatively simple to assemble a trouble free running accurate chassis.
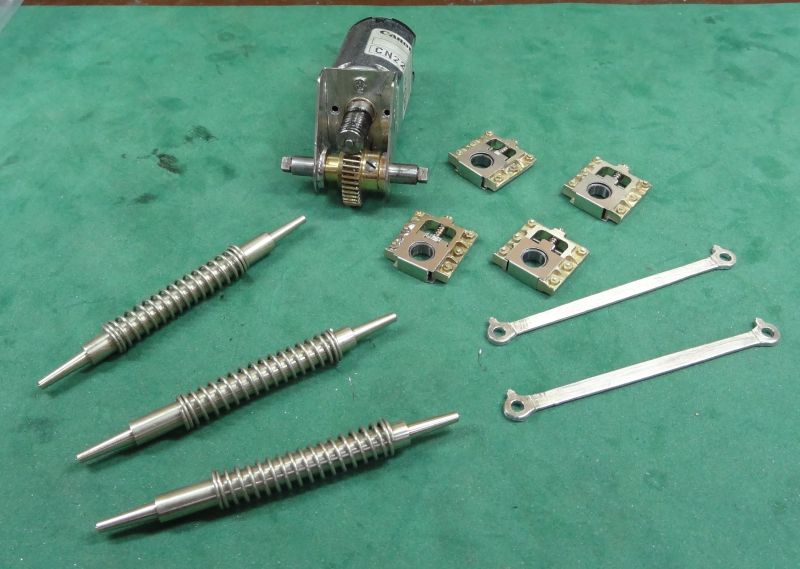
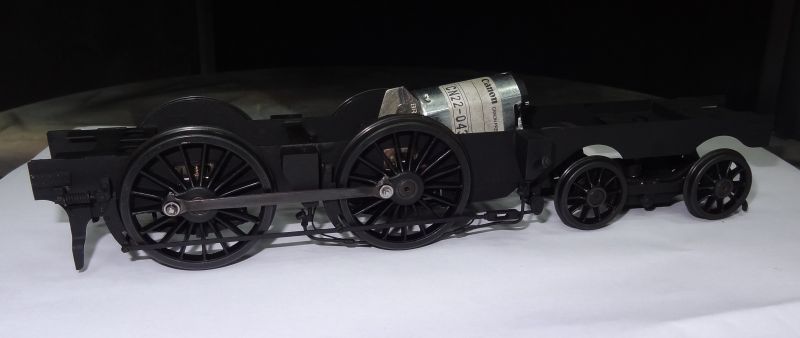
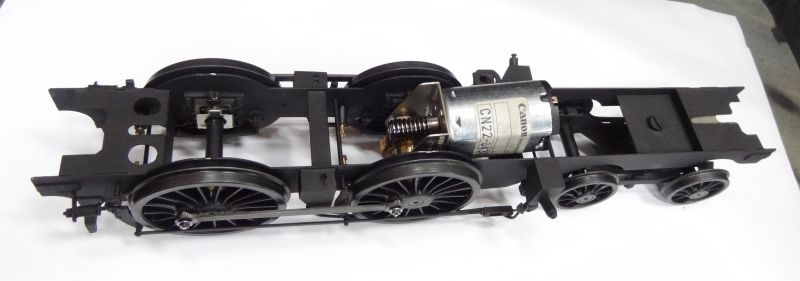
Now that Mashima motors are no longer in production I chose a Canon 1833 and Branchline models 40.1 fold up gearbox.
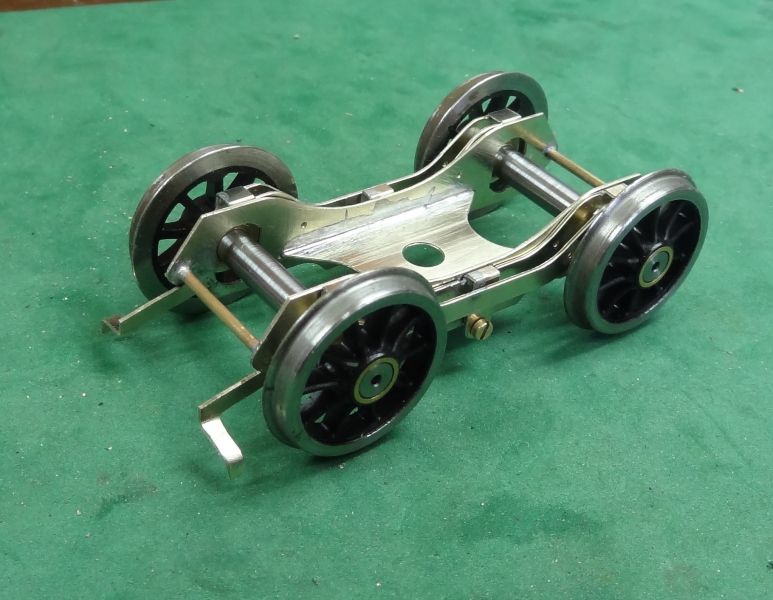
The rear bogie is not compensated and is a simple but robust build……………………………………………..
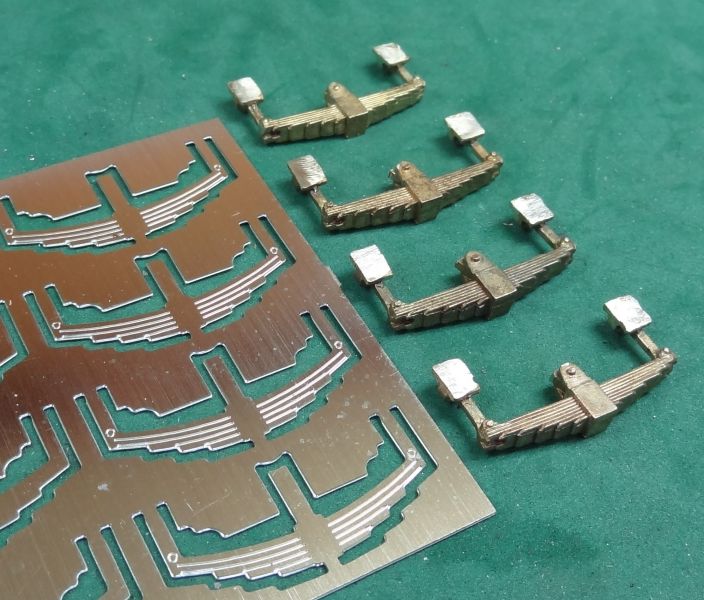
I`m not a great fan of etched spring details and replaced these and other chassis parts with those from Laurie Griffin.

Painting the chassis is a combination of Clostermanns black etch primer and chemical blackening…………
……………………..next installment…………………
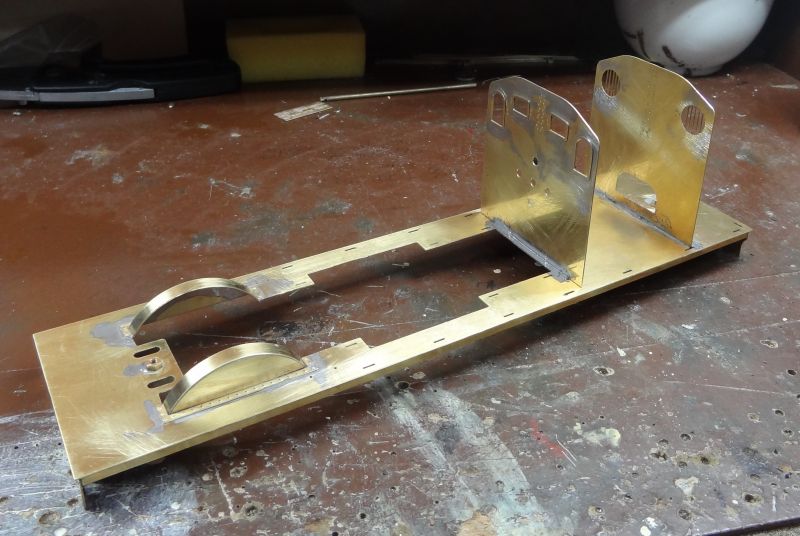
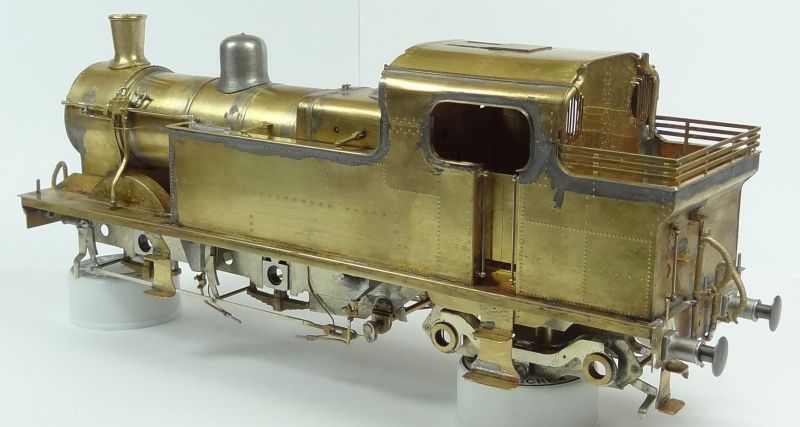
THE SUPERSTRUCTURE
I have never purchased a `perfect kit` whatever that is and this example proved to have it`s own idiosyncrasies.
Rather like my experiences with Slaters loco kits which use thicker gauge material( which is a good thing) construction needed an 80watt soldering iron to make construction easier.
Because of the thicker material used, you will need to be proficient/confident about annealing certain parts to make shaping them easier. So you will need a `flame thrower`
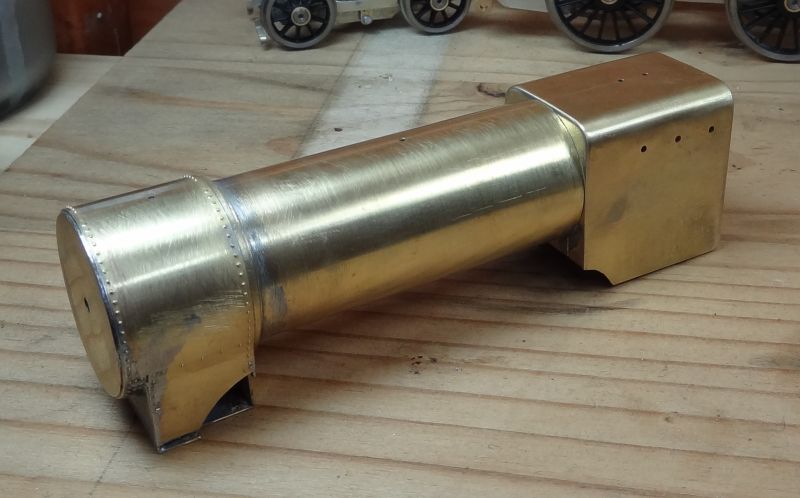
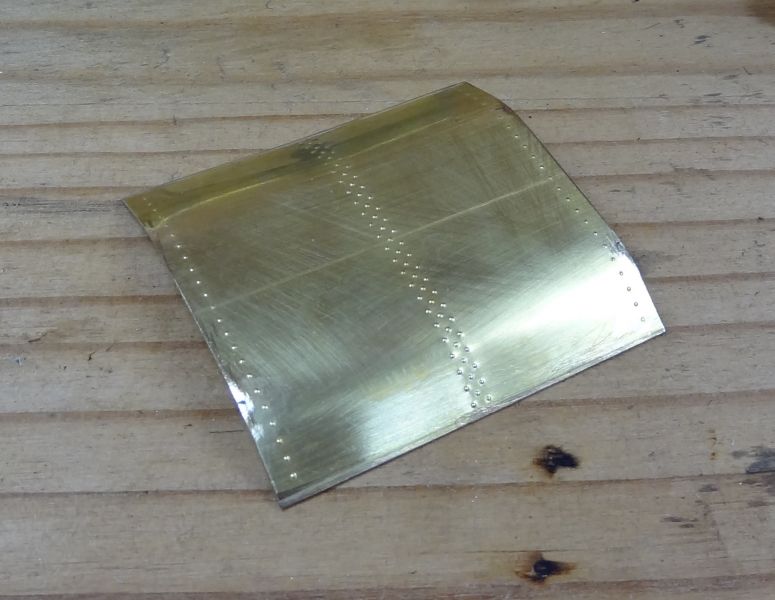
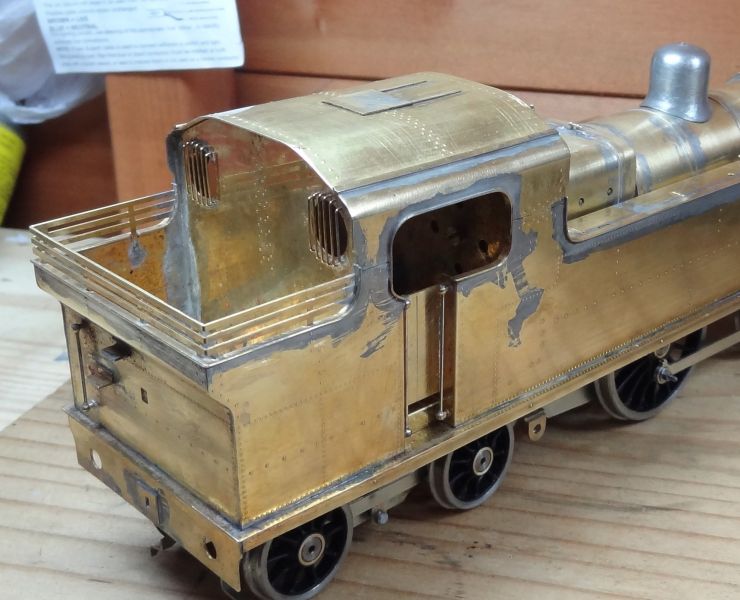
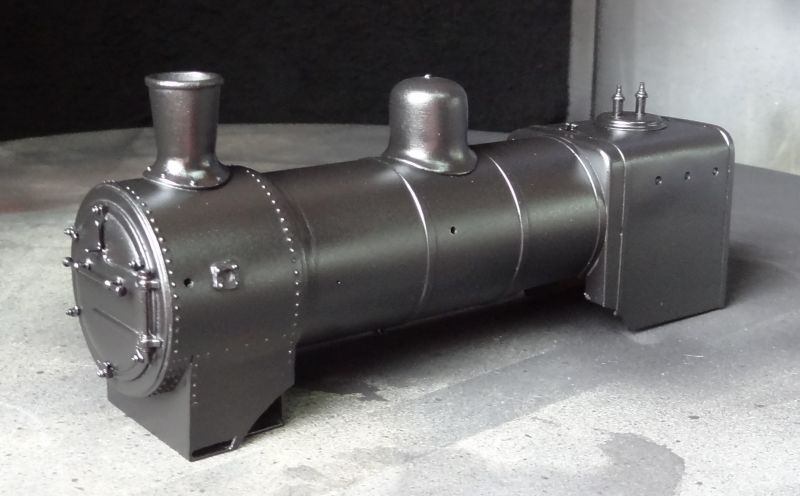
I liked the smokebox/boiler/firebox could be built as a seperate `bolt on` unit, and I liked the quality of the half etched rivet detailing.
I also liked the slot and tab construction method provided with the footplate and cab.
………………………………………………
What I did`nt like , ….bearing in mind of course….. that there is no preserved example…… , is that the boiler and firebox diameters are about 1.5mm too narrow. The side tanks are probably 1mm too narrow which gives too wide a gap between boiler and side tanks.
The smoke box wrappers ( four in total) are etched too small and need a lot of fettling to hide the gaps.
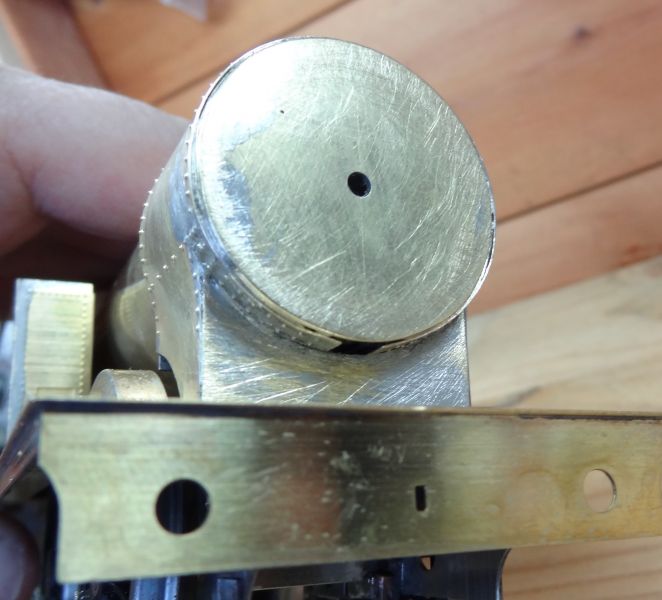
There is an etched part missing….. the front inside cylinder access cover.
The choice of two types of whitemetal chimneys provided in the kit are too small in scale. The white metal smoke box door provided is too wide in diameter.
…………………………………….
There was a moment, when I had discovered these issues, when I came close to binning the whole project !!
However, I`m not one to give in easily and there seem to be very few examples of this loco being built in 7mm scale, that I persevered. And I liked the utilitarian/uglyness of the protoype.
It also helped that I had discovered replacement/extra parts available through Laurie Griffen and Peter Roles components.
( which added an extra £100 to the project)
as this is a `hobby` and not a `habit` I felt better after considering an average smoker will be spending at least £150 per month on `ciggies`.
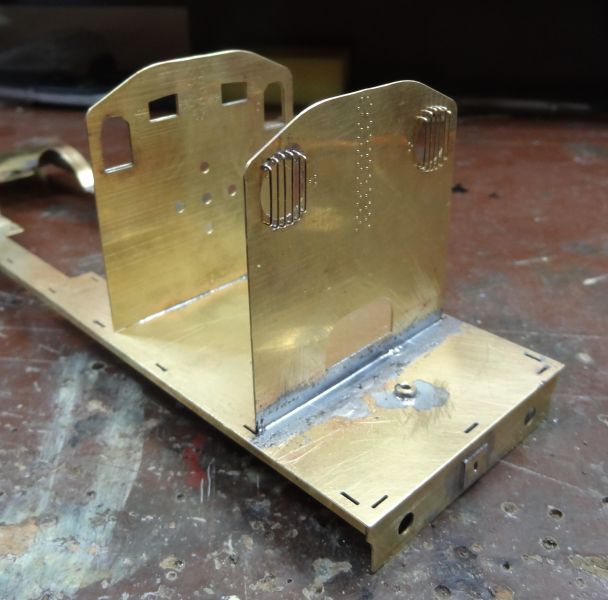
The kit encourages you to add the detailing to the main body parts as you go along. There is no rivet detailing on the cab front/back provided for in the kit so i did these myself.
A nice idea to have this as a seperate unit, but there are a number of assembly issues to be wrestled with.

There be gaps aplenty…………………………………………………….
……………………. not good …………………………………
If you have made cr@p etched kits in your modelling journey you will be able to rescue the situation

The cab roof definitely needs annealing to get the shape profile right
BUT….. those bl@*dy pre etched grooves are in the wrong places …………
SO….. will need to be sorted…………………….
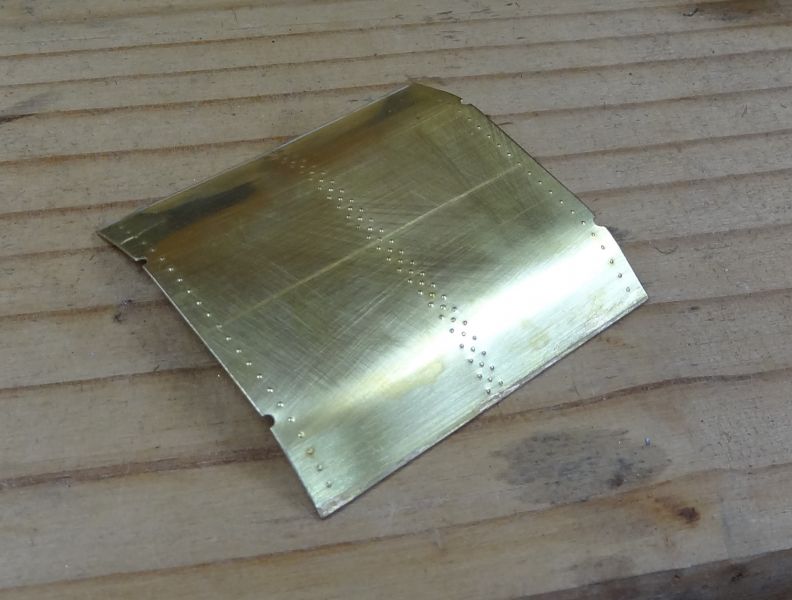
The rear bunker plate also needs annealing to get those reverse curves right.
As built these tank locos had ugly `flowerpot` chmineys and the kit has a scaling issue with the parts provided.
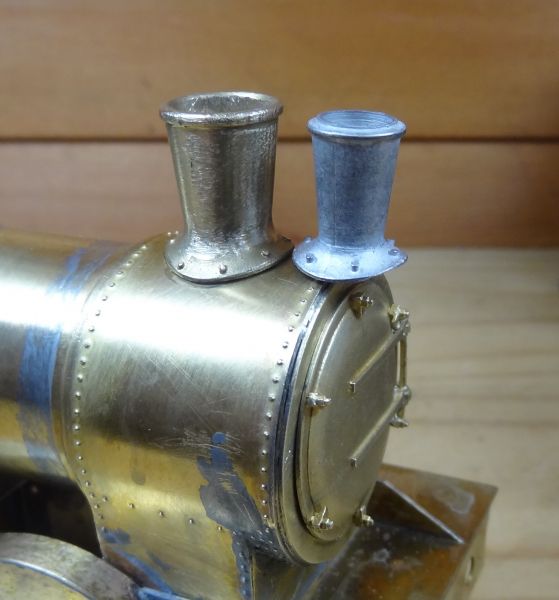
I did`nt think there was much option than to replace………………….
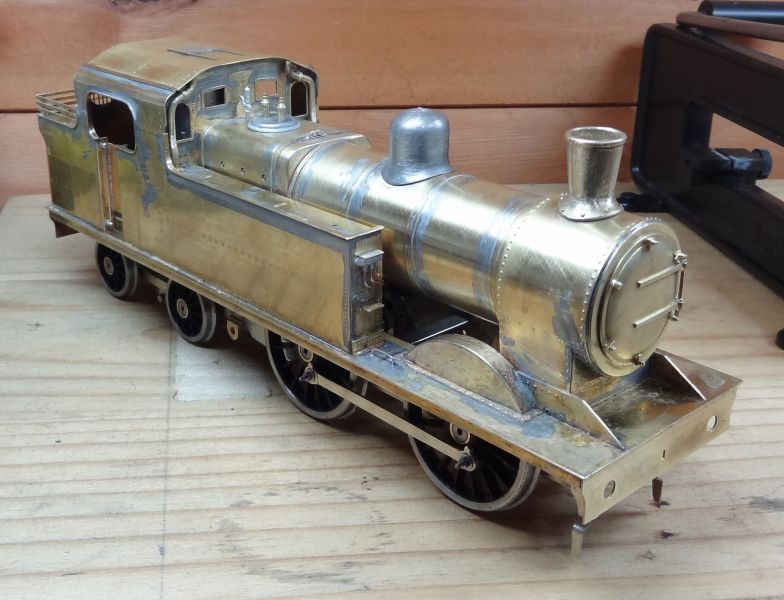

The rest is down to adding detailing……………………………………………………………………………………………….
I opted for a pull-push fitted varient which is not catered for in the kit………………………………………..
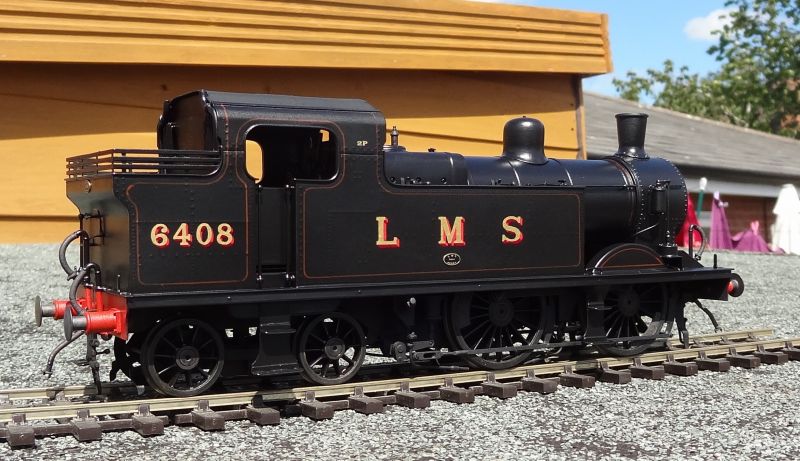
She is currently in the paint shop waiting to be lined in LMS intermediate livery…………………….

 Last edit: by Twobolt
Twobolt John

Posted

Full Member
I'm gradually getting to know the people in the trade and what they offer. Good experience.
John
John
Posted
Full Member
Thanks for this John. I do like the 0-4-4T. Grateful to know about parts for upgrade too…that is if I ever do a loco kit.
Now come along John!!….. stop what your doing, clear your workbench and get that 1F started…………………
Once you`ve read my experience with this kit`s superstructure however, you might decide to try something else !!!!
john
Twobolt John
Posted
Legacy Member
John, you're an inspiration to us all and, even if I knew what the parts were and where they went, I doubt that I would even attempt to open the box let alone attempt to build what's inside.
Magnificent.
Allan
Posted

Inactive Member

Max
Port Elderley
Port Elderley
Posted
Full Member
Ha ha. I'll be standing by for that. Having only started in 0 gauge a few months ago, the list of to dos is almost overwhelming. I have been working on wagons and coaches and then there's a layout to build. It's a matter of trying get the priorities right.[user=565]Brossard[/user] wrote:Thanks for this John. I do like the 0-4-4T. Grateful to know about parts for upgrade too…that is if I ever do a loco kit.
Now come along John!!….. stop what your doing, clear your workbench and get that 1F started…………………
Once you`ve read my experience with this kit`s superstructure however, you might decide to try something else !!!!
john
John
John
Posted
Legacy Member
Allan
Posted
Full Member
John, I see what you mean about the body. How many would even know that there are errors. Remarkable that you resolved everything. The finished result is stunning as usual.
I hope you keep posting your builds and providing details on how you sort out deficiencies.
John
BTW here's a link to Laurie Griffin: LG Miniatures – LG Miniatures castings and parts
Last edit: by Brossard
John
Posted
Full Member
Allen
Your architectural modelling skills are legendary…………. there are no mystic skills to assembling an etched loco kit and I`m sure you`d have no problems with your abilities….. it`s all down to plenty of heat, proper acidic(yes dangerous ) fluxes and lead ( also dangerous) solder and a willingness and desire to get the job done, plus burnt finger tips !!!
I don`t even have a workshop or a lathe and everything has been done on the `kitchen table` Peter Denny style

Although now I`ve retired the `kitchen table` has moved into a drafty shed………………………………..
And this is me in the 1980`s learning how to make mistakes……………………………………..
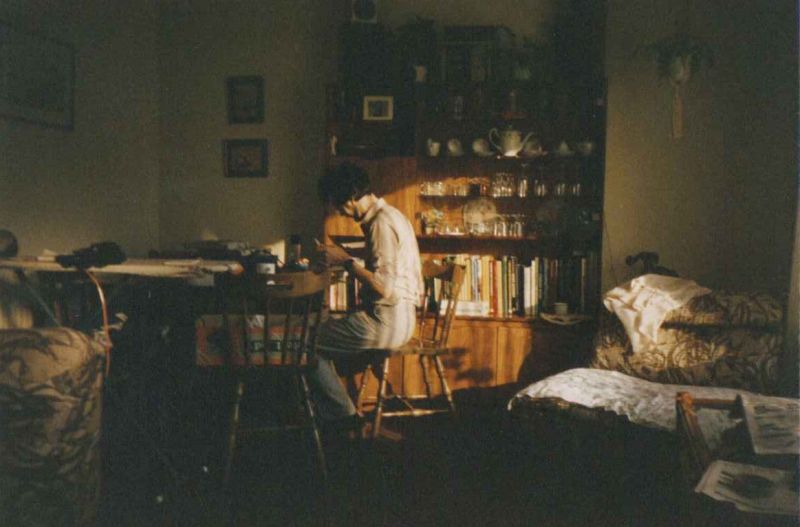
….my entire toolbox contained in one large cardboard box…………… not a lot has changed………………..
So John……. no excuses you can get on with it all in front of the TV……………………………..
Last edit: by Twobolt
Twobolt John
Posted
Full Member
I've got a basement and a separate workshop (used to be a spare bedroom) where I keep everything more or less to hand. I even tidy up now and then and then curse under my breath when I can't find this or that.
From what you say, working in 7mm is somewhat different than 4mm so I will be paying attention.
John
John
Posted
Full Member
Not my finest paint finish but I`m pleased she looks like a Stanier loco.
Still needs buffers, couplings , and whistle plus works plates and
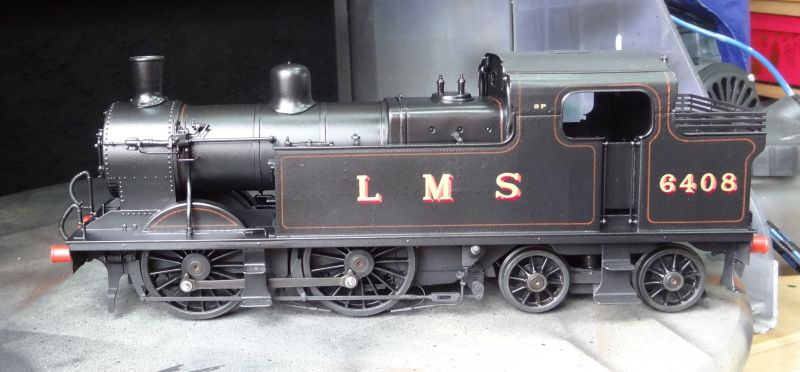
number plate.

Last edit: by Twobolt
Twobolt John
Posted
Legacy Member
Superb.
Allan
1 guest and 0 members have just viewed this.