Kadee magnetic uncoupling
Posted

Full Member
Using neodymium magnets between the sleepers
It's just a case of orienting the magnets the way you need them, Owen. That's the reason I settled upon cube-shaped ones. The round ones have the poles on the flat surfaces, so would have to be mounted on edge - something I didn't fancy trying to do.The ideal would have been a 15mm x 3mm x 3mm magnets with the opposing poles on the 3mm x 3mm ends. I couldn't locate a source for any like this though. They all had the poles on the 15mm faces. :sad:
Perry
Due to cutbacks, the light at the end of the tunnel has been switched off.

Posted
Guest user
I found the same as Perry- a couple of magnets confused the arms.
Sol also tried other ways of doing it, but I believe he also settled on the three rows of five. Yes I did
…………………..but after lots of testing, the rows of five seemed to work best for me. and me
Perry
Posted

Full Member
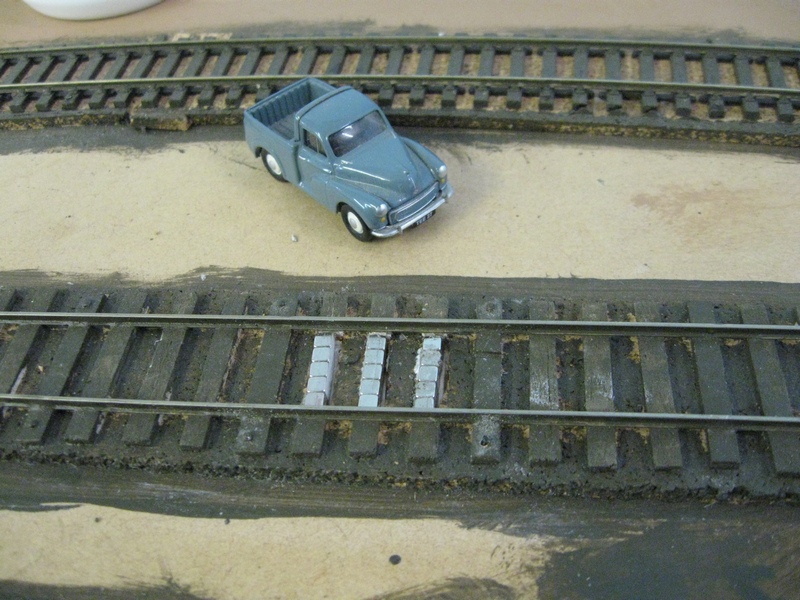
Looking at how you've laid the magnets between the sleepers, would it be possible to remove a set of 3 sleepers and replace them with the magnets, maybe with a paper cover to hide the magnet joins, so leaving the ballast in between as if they were normal sleepers ?
Stu
 Last edit: by Stubby47
Stubby47's Bespoke Model Buildings
All photos I post are ©Stu Hilton, but are free for use by anyone.
Posted
Full Member
I can't think of any reason it wouldn't work. Just be aware that these magnets are very strong, and unless they are securely held in place whilst the glue dries, you will return later to find that a whole row has cleared off to join it's mates all by itself. :shock: Don't ask me how I know this……..:oops:Ah, I didn't think of that… makes sense now you've said it.
Looking at how you've laid the magnets between the sleepers, would it be possible to remove a set of 3 sleepers and replace them with the magnets, maybe with a paper cover to hide the magnet joins, so leaving the ballast in between as if they were normal sleepers ?
Stu
The sleepers may be of help in keeping them in place, but I'm sure you could come up with some other way of retaining them in position temporarily. I used a 2-part epoxy glue but Sol used ordinary PVA. Both seem to have worked OK.
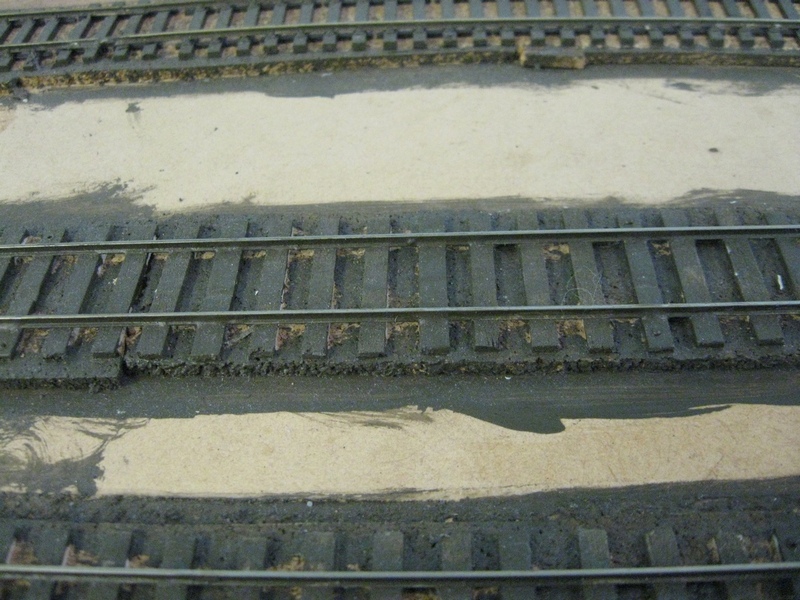
Having said all that, once the ballast and some mucky paint has been thrown about, they are quite hard to see at normal viewing distances.
Perry
Due to cutbacks, the light at the end of the tunnel has been switched off.
Posted
Guest user

I am very satisfied with these.
Posted
Full Member

I had to look hard to spot them, Sol. :thumbs I suppose they could be painted the same colour as the ballast if required - not that I see any need to do it personally.
Perry
Due to cutbacks, the light at the end of the tunnel has been switched off.
Posted
Full Member
Posted
Guest user
But saying that, yes, I think it would work if one is not impatient ! And as I type this, Peco track pins SL14's should, if using a hard baseboard, do the job of keeping the magnets strips apart while glue is drying & they will disappear in the ballast.
Posted

Full Member
I quickly discovered that the idea of using the rare earth magnets just to extend the magnetic area of an existing Kadee magnet would not work. I experimented and found that four magnets placed at alternate sleepers does the trick - since I had already removed sleepers to accommodate the Kadee magnet I placed the four magnets at alternate sleepers and replaced the sleepers in between.
The four magnets fit nicely where the sleeper has been cut and there is no worry about creating shorts. I used super glue which sets in seconds and by using 24 magnets have created a length of 75mm compared to the Kadee magnet length of 50mm. Its nowhere near as ugly and at A$15.00 per 100 I can replace four Kadee's with an area that is longer and meets my needs.
It has taken me 30 minutes to replace an existing Kadee, dig out some of the ballast, replace with the new magnets replace sleepers and cut out new sleepers where I required the extra length of magnetic field and then re-ballast the area. I feeling quiet pleased with myself as it has been a very productive half hour and means I get some time to "play trains"
Thanks guys:doublethumb
.
Posted
Guest user
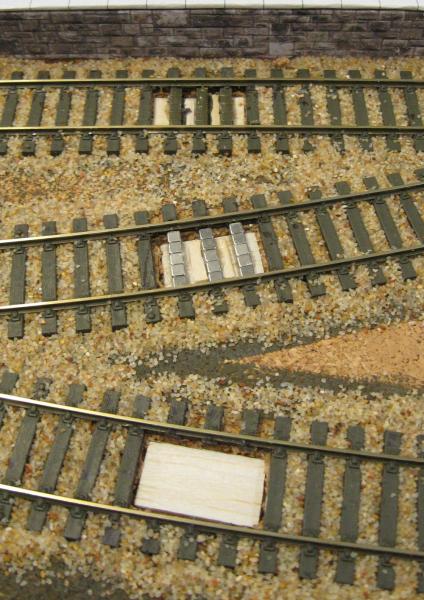
Before cutting sleepers out
Sleepers are 1mm balsa now gone:
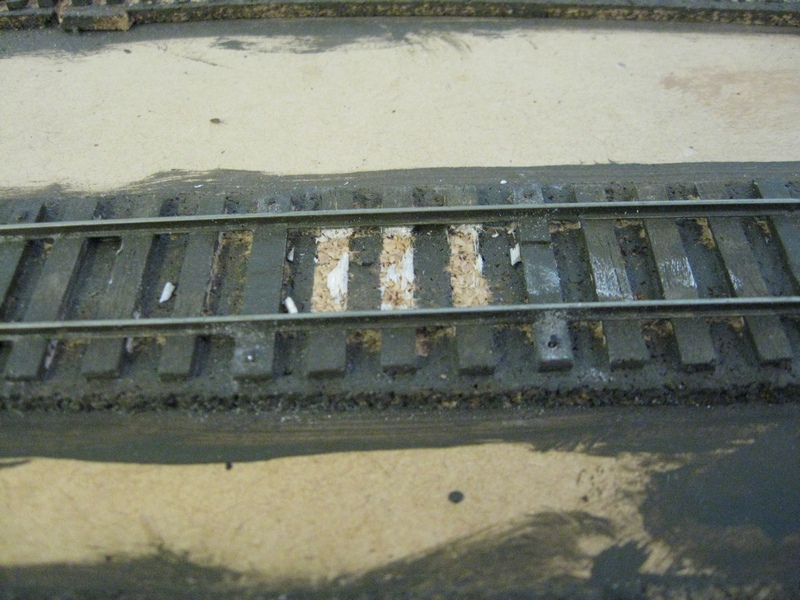
With 3mm cork, cut out the slots for the magnets
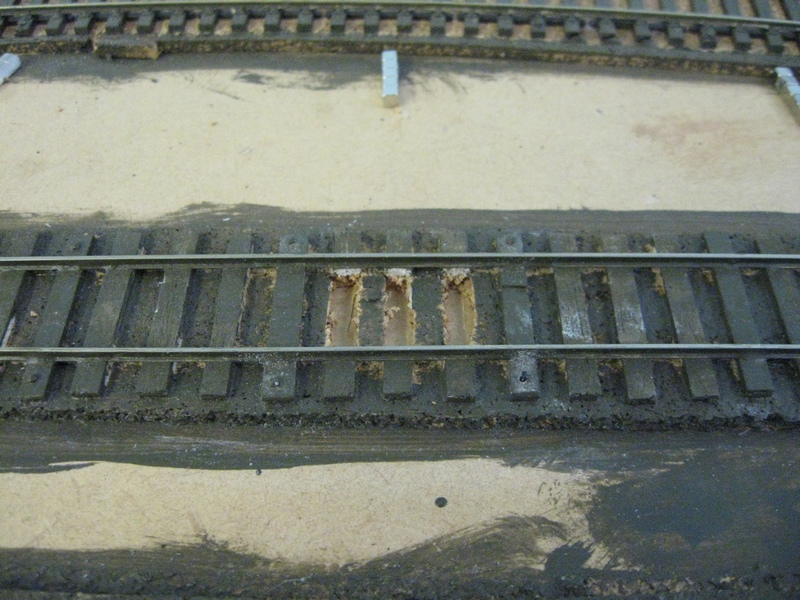
Added some 1mm Balsa into the slots - glued with PVA & smeared over the top as well to seal the balsa wood
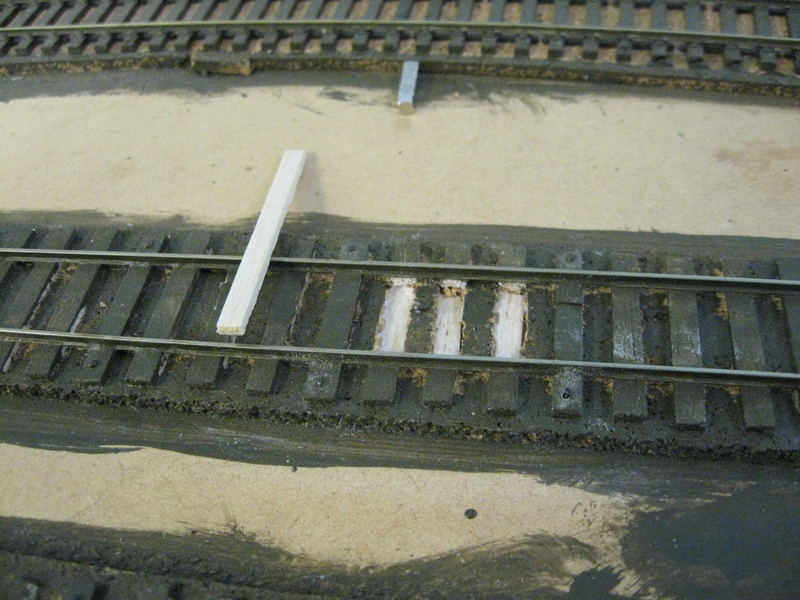
Glued in the magnets using Super Glue
These are level with adjacent sleepers - now painted.
Now where have they gonequest:
They work like a dream BUT with a short range, you need to be slow & precise with shunting. I did have momentum in one loco & it is great fun to get it stopped exactly where you need it so I removed the electronic slowdown & let the control knob do the trick ( just like DC days).
Posted
Full Member
I find it quite amusing how we find ways to hide and disguise things, then have to put markers in to show us where we put them. :shock:
I'm glad that others are finding this method useful and are developing it futher. :thumbs
Perry
Due to cutbacks, the light at the end of the tunnel has been switched off.
Posted
Guest user
Posted
Full Member
Suppliers of these magnets across the world must wonder what is going on.I am replacing another Kadee bar magnet with these units & putting more in other selected locations & CraigSR has ordered 200 of the little devils to instal as well.
Perry
Due to cutbacks, the light at the end of the tunnel has been switched off.
Posted

Inactive Member
I saw Ron's in real life yesterday and he has done a first class job!
Craig
Craig SR
Posted
Guest user
Part of Charde and I have just ordered another 200 to finish the station off plus spares for Mynend & Watchit. The main station of Tawnton will be last.
Posted

Inactive Member
Max
Port Elderley
Port Elderley
Posted
Guest user
close up
PVA nearly dry.
From the normal viewing distance
Thanks Perry for doing all the spadework on these magnets.
Posted
Full Member
Perry
Due to cutbacks, the light at the end of the tunnel has been switched off.
Posted
Guest user
USA & Aust outline are catered well for non-magnetic wheels.
Posted
Full Member
Perry
Due to cutbacks, the light at the end of the tunnel has been switched off.
1 guest and 0 members have just viewed this.