Going large - building large layouts
Posted

Site staff
Barry Miltenburg said
The first photo captures the inner city feel of Trinity Square but does rather show up the distance between buffers on the coaching stock. This is a compromise I guess I will have to live with until I bite the bullet and start changing couplings on all 850+ pieces of rolling stock
From “Post #292,149”, 8th May 2025, 4:29 pm
I didn't notice until you mentioned it and I scrolled back.
See what you mean, but 850+ pieces of rolling stock………………… agreed, not worth it.


Full Member


I have acquired a few of these, some of the single "Home" signals and some "Home and Distant" versions with two arms on a single post. Immediately, I should say that the NER loved signals and had an arm for everything and every move. They probably had a "Brewing Up" signal somewhere on the system! Yarslow, if signalled in NER fashion would be a forest of arms, so I have assumed that BR(NE)Region have done something of a rationalisation job and reduced the number of arms to a more manageable number.
The HD signals are pretty crude with only a representation of the lamp, oversized arms, no ladders or platforms and chunky balance weights/operating gear. However, they are bomb-proof and the examples I have all work (although I did have them in bits to clean out the dead spiders and squirrels). They work from a Hornby plug transformer producing 16V ac but are simple enough mechanisms not to require a CDU or similar assistance.
My guide for converting these units into something useable has been this work;
 Not sure on the author but there are plenty of good pictures to inspire.
The job has involved (1) removing the supports from the bracket signals, although I have kept the cross-beams despite not looking brilliant, to ensure the integrity of the structure, (2) converting 2 of the Home & Distant signals into Home + "Shunt Forward" arms so that locos can run round at Yarslow, (3) adding new thinner operating wires, (4) adding platforms for access to the lamps, (5) adding handrails and hoops where required on said platforms, (6) adding ladders, Track Circuit diamonds, back-blinds etc, and (7) a major repaint. The additioanl bits of bracket support, platforms etc have come from the Ratio LNER plastic signal kit, now available from Peco I believe. These are pretty old mouldings so there is a lot of flash to sort out, but the end result is a piece that looks better than anything I could produce. On both bracket signals, I have extended the platforms with microstrip.
Here is progress to date


 Firstly is the Home & Distant simply improved with the ladder, platform and new operating wire. Next, similar treatment but the lower arm has been made smaller to represent to a Shunt signal. Thirdly, one arm of the bracket removed to produce a biased single arm that will allow freight trains to exit the goods loop on their way to Northbrough. The cross beam under the platform is not too noticeable. And finally, the bracket signal with its platform, handrails, ladder, hoops etc. The handrails are painted cotton super-glued on - and in need of a trim!.
My favourite Peco PL-27 passing switch levers will be used to operate the solenoids and I am building a new bothy to sit beside the stable block to house the frame with the 11 levers. Like the stables, this building will only have half a roof for access to the levers.
The signal units will be mounted into the baseboard to reduce the visual impact of the heavy bases and scenic material will be used as well. In some cases, this involves digging underneath a siding, the point rodding and the platform ends, but I hope the final result will be rewarding, if a bit of a compromise.
I'm claiming Rule 1 of course!!
Bashing on………………..
Shed dweller, Softie Southerner and Meglomaniac
Posted

Full Member
Cheers,
Claus
www.wct.payne-ellef.dk
www.flickr.com/photos/ellef/
Claus
www.wct.payne-ellef.dk
www.flickr.com/photos/ellef/
Posted
Site staff

Posted
Full Member
You have completely changed the apperance, for the better, I bet they were fidly little devils to do.
Well done mate.
John.
Full Member
Thank you for your kind comments.
The upgrades have been fiddly but I tackled them in small stages adding platforms, then handrails etc, letting each stage dry before moving on. Ladders are laser-cut MDF and went weird shapes when painted. Luckily they dried (sort of) straight. The hardest bit was the operating wire. The original units had wires running in obvious places whereas I was keen to keep them tight to the posts. That meant that I couldn't just copy the originals. I started at the top and worked down, twisting, bending and tweaking as I went. Each wire took about 20 minutes!!
In a change of heart, I was making a few final tweaks this afternoon and added a CDU into the operating circuit. This gave all the arms a much more positive snap and so I have ordered a 4700mu unit (single coil). For the sake of £5, it will prevent sticking mechanisms.
The new bothy is done and ready to go - pictures of the set-up will follow.
Tomorrow's job is drilling out the baseboard to fit the signals. They will be sitting on a plywood base screwed to the underside of the layout top. A spacer of card will mean that the top of the signal base will sit about 1mm above ground level. 3 units sit in platform ramps or on platforms so it will be easier to hide the bases
Bashing on.
Shed dweller, Softie Southerner and Meglomaniac
Posted
Full Member
Here is a picture of one of the Hornby Dublo signals installed at Yarslow. Since this was taken, I have added a low wall around the base with some stone capping. Three of the units sit in open country so 1 1/.4 inch square holes had to be dug into the plywood surface and a baseplate added underneath the hole to support the signal.
A bit of repair work covered the area around the base
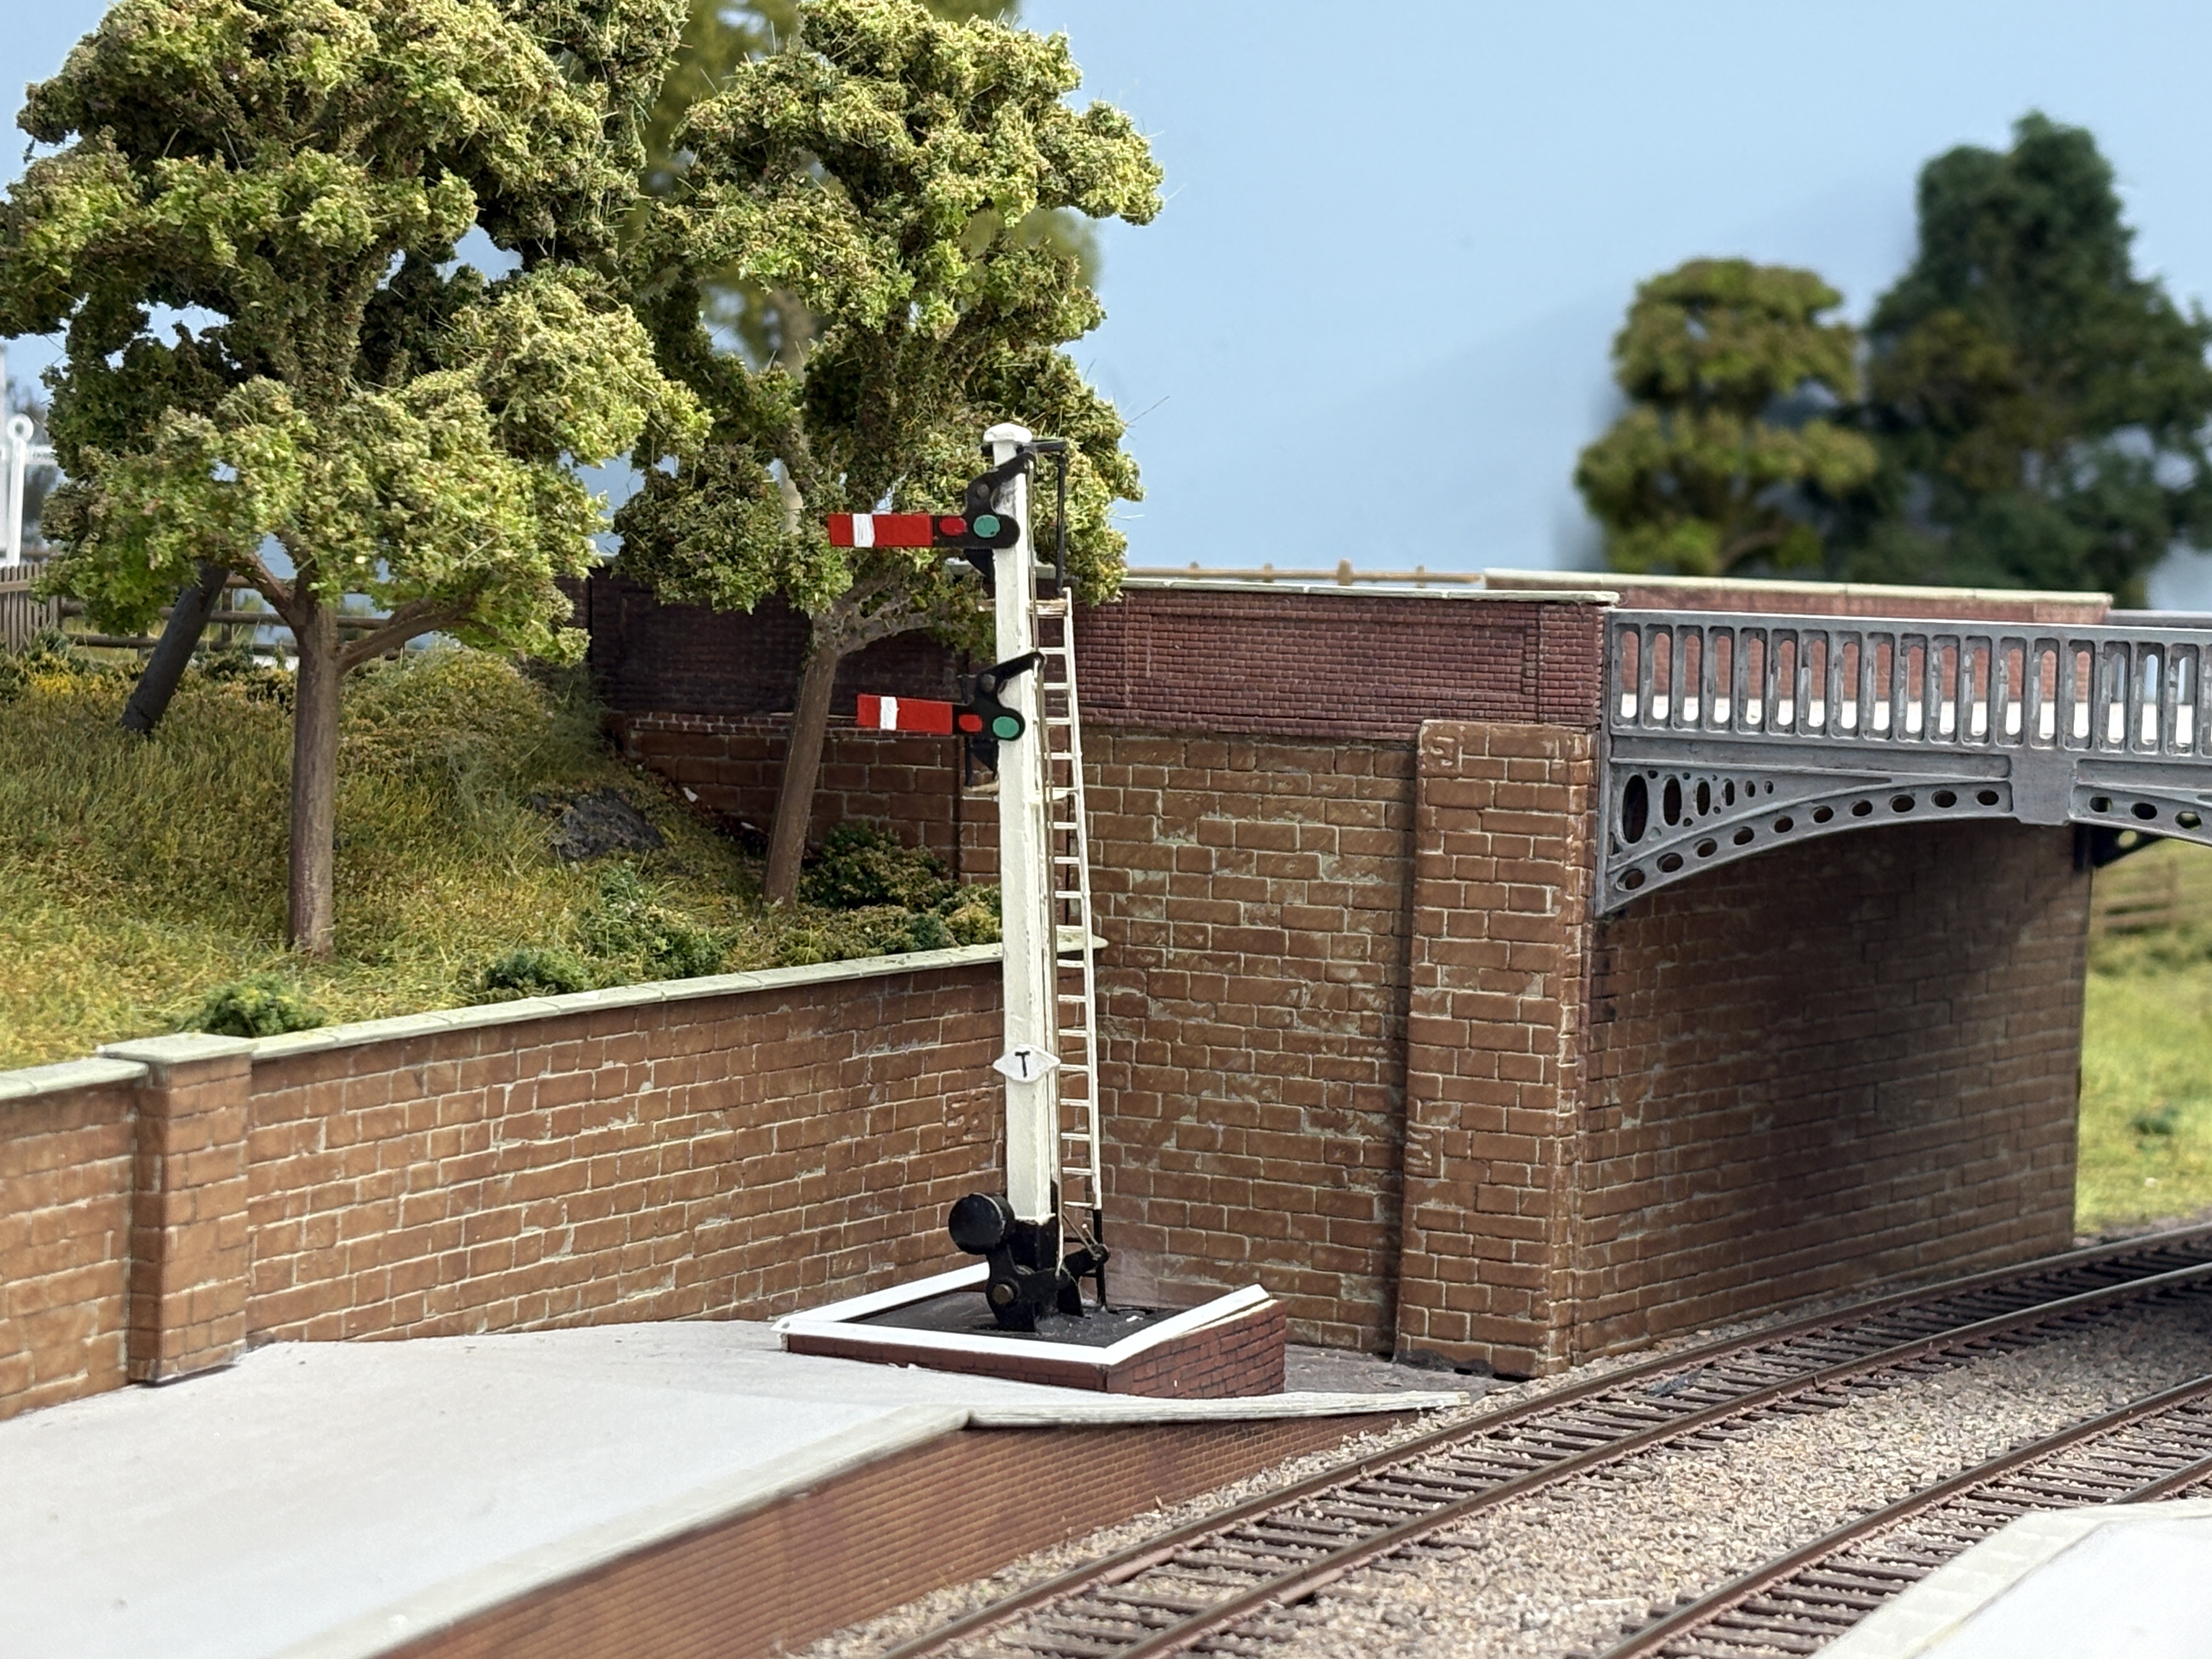 to make the signals blend in.
Shed dweller, Softie Southerner and Meglomaniac
Posted

Full Member
Interesting brickwork on the bridge and back retaining wall - what is it ?
'Petermac
Posted
Full Member

Shed dweller, Softie Southerner and Meglomaniac
Posted
Full Member
Cheers Pete.
Posted
Full Member
'Petermac
Posted
Full Member
The brickwork is Slaters embossed plasticard - dressed stone if I recall correctly. It is painted all over with the mortar colour - Humbrol acrylics - and when dry, I "flat-brush" the brick colour on. I was shown how to flat-brush when I was a mere teenager! Essentially, it's a cross between dry-brushing and painting. Using a wide, flat brush, load up the brush and wipe off any running excess onto a piece of cardboard. Hold the brush flat to the job and stroke it across the surface making sure to paint just the top surface and avoid the mortar level. Several light coats is better than one heavy one.
A bit of practice makes perfect.
If required, a wash of black or umber or whatever
Hope that helps
B
Shed dweller, Softie Southerner and Meglomaniac
Posted
Full Member
'Petermac
Posted
Full Member
Forgot to mention that the time taken to ensure that the stone/brick courses line up at corners, pillars etc is well worth it. Nothing looks worse than a building or wall where the brickwork does not match on an obvious corner!
Barry
Shed dweller, Softie Southerner and Meglomaniac
Posted
Full Member

If one uses Wills plasticard, it can prove to be an expensive build ……………………………….
'Petermac
Posted
Full Member
Barry
Shed dweller, Softie Southerner and Meglomaniac
Full Member

Another signal upgrade. This is as built by Hornby Dublo, just tarted up with the Ratio signal parts and some fresh paint. I had to create a square hole in the baseboard and provide a sub-base on the underside of the 9mm ply on which this signal sits. The wiring passes through holes in the sub-base and a bit of scenic scatter will hide the joins. I replaced all of the operating wires and, clearly, didn't quite get this pair right as the signals come off at different angles. I have found pictures of similar discrepenceies but perhaps not this large. Modellers licence!!!
B
Shed dweller, Softie Southerner and Meglomaniac
Posted
Full Member


The "Controllers" station is armed with a laptop, projecting the timetable as a Powerpoint presentation on the screen above. He also controls the Master Cab Control Panel, allocating sections of track to controllers as required to drive the trains - this is analogue of course. Finally, he works the points at Middle Junction which is the point at which main line trains, trains from the storage sidings and tracks to Trinity Square all meet.
My latest YouYube video - A Day In The Shed - runs through the sequence of running a train from the storage sidings to Trinity Square via Yarslow and includes the actions of the "Controller" as well as the use of the signal bell codes by operators.
Enjoy!! [Dont forget to Like and Subscribe
 ]
]B
Shed dweller, Softie Southerner and Meglomaniac
Posted
Full Member
It's all highly detailed and fairly technical given the screens and working signals - a long way for me to go yet ………………..
How much time do you spend working on it all ?
'Petermac
Posted
Full Member
Thank you for your kind comments. Until this year, it was a three day a week job for me - I dedicated specific days to the layout, leaving other days for the essentials of life! This year, it has been harder as the layout really only needs details and that is something that can be done in little bits as you acquire stuff at shows and shops. I go to a show knowing that I dont need a loco or rolling stock any more. I look for people, sign posts, vehicles and just see what there is - a wonderful way to tour the traders!!
The layout took about 4 years of 3-day weeks so I guess thats about 600 days or around 4500 hours. No idea if those number are accurate but they sound good.
These days, its more about playing trains, maintenance and repairs. There are a few fragile loading gauges and scenic items that I have levelled off with a sleeve more than once.
I have also started a new series on the YouTube channel called "Maykin" - a small exhibition layout that is bare boards at one end and completed layout the other. Track, ballast, platforms, buildings and scenery are shown as Work-In-Progress style to demonstrate my building techniques. The idea at shows is to engage with people who need to know how to do things. I am not saying my way is the right way, but it might give someone an idea or a starting point. I plan to have it ready for the Nomads MRC show in Merseyside May 2026 and it already has an invite to Yorkshire later that year.
When I can, I must also build a long promised 009 layout - The East Barset Light Railway - which has been sitting as bare boards and a pile of track for about 2 years!!
Bashing on
Barry
Shed dweller, Softie Southerner and Meglomaniac
1 guest and 0 members have just viewed this.