Going large - building large layouts
Posted

Full Member
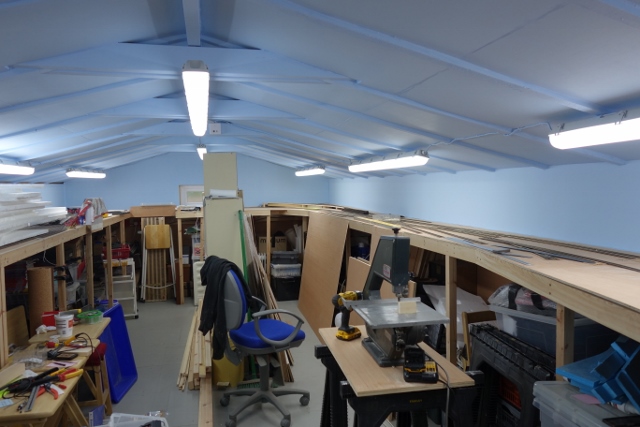
(Note to self - don't submit or use photos that include anything work-in-progress!! Even the plugs in the corner are neater than they looked in this picture.)
Barry
Shed dweller, Softie Southerner and Meglomaniac

Posted
Full Member
Don’t worry about the wiring, keep up the great work!
Posted
Full Member
I cannot find out how to view the gallery of another member.
Can someone pleases tell me what buttons to press?
Many thanks
Barry
Shed dweller, Softie Southerner and Meglomaniac
Posted

Full Member
'Petermac
Posted

Site staff
HELP!
I cannot find out how to view the gallery of another member.
Can someone pleases tell me what buttons to press?
Many thanks
Barry
Barry,on both Home & Recent pages, on the RHS side of the main photo is Photo gallery & all members are listed there; for instance click on S & all members whose member name starts with S appears
Ron
NCE DCC ; 00 scale UK outline.
NCE DCC ; 00 scale UK outline.
Posted

Full Member
You can also click on the 'view photos in Gallery' option under the member's avatar, to the left side of any of their posts.HELP!
I cannot find out how to view the gallery of another member.
Can someone pleases tell me what buttons to press?
Many thanks
Barry
Bill
 Last edit: by Longchap
At 6'4'', Bill is a tall chap, then again, when horizontal he is rather long and people often used to trip over him! . . . and so a nickname was born :)
Posted
Full Member
You live and learn …………………… :cheers
'Petermac
Posted
Full Member
Shed dweller, Softie Southerner and Meglomaniac
Posted
Full Member
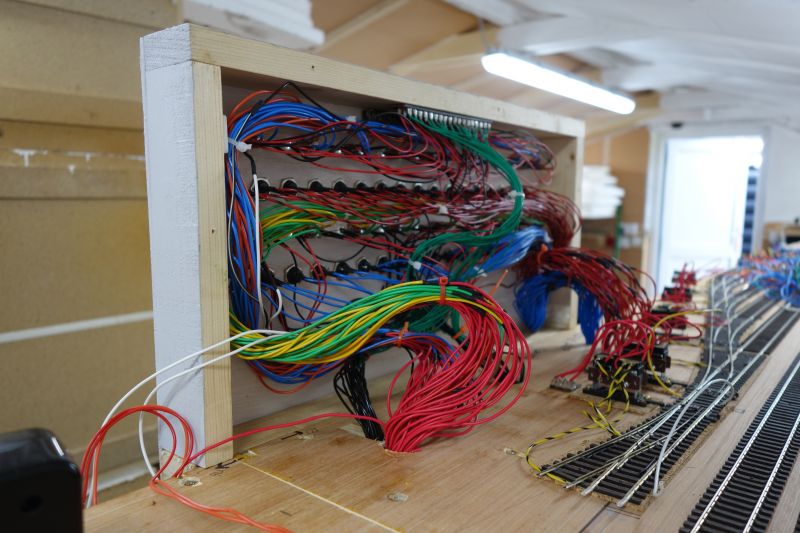
Having taken a bit of stick for my wiring, I thought I had better sort myself out. Therefore, I have re-wired the storage area control panel - removing the tag-strip and making end-on soldered connections for the wires. Now that it has been finished and tested, I didn't really need to have the tag anyway. Hopefully, the couple of days spent will be appreciated by the complainants (via my YouTube video channel comments as mentioned previously). The funny thing is, I think it works better without the tag-strip. Perhaps I had a few dodgy soldered joints?

This is what came out of the back of the panel once it had been rewired. You can see why its neater!!

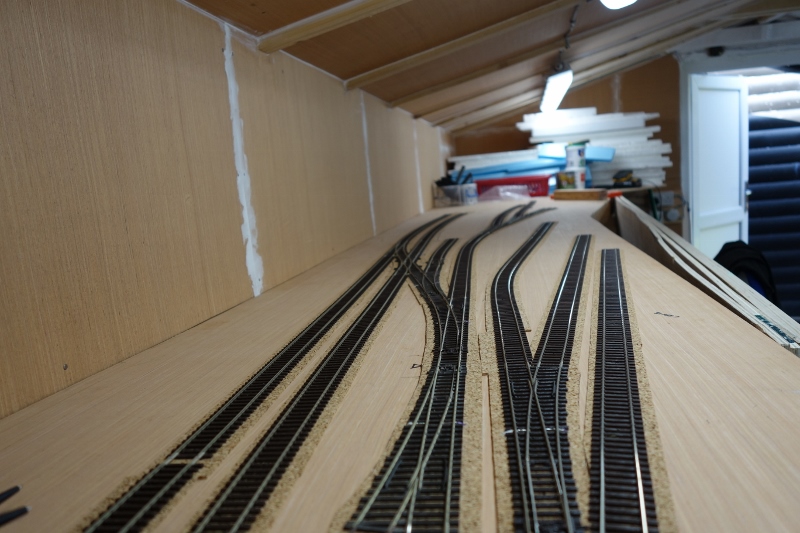
This is how far the layout has got. The two tracks on the right are the up and down main lines - the Yarslow platform starts at the end of the short brake van siding in the middle of the picture. This is all wired so an engine can run from here, right round into storage. Platforms 2/3 between the main lines and the loop will be about 6 inches wide here, giving that spacious look so common on interchange stations. The storage loops are also complete now that the right colour wire has arrived. The slow-down zones and isolator sections are all wired and tested.
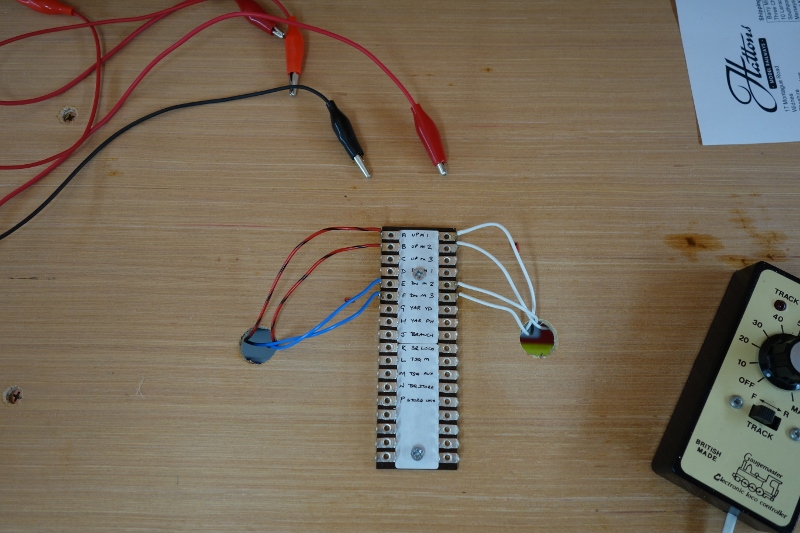
All of the track feeds put in so far now congregate at this tag-strip, situated inside the approach curve to Trinity Square. There are 14 sections in all. By connecting the controller to this tag-strip using test leads, I can make sure the track is OK and the frogs are wired correctly. The face of the Master Cab Control Panel is being made for me by a local graphic design company. I have given them the dimensions and layout of the switches and knobs and they will print that design onto a sheet of 3mm metal. I drill out the holes and each switch will then have its own legend. It is going to cost about the same as a Mk I coach - I thought that was a bargain considering the importance of this panel for the layout.
Bashing on……….
Last edit: by Barry Miltenburg
Shed dweller, Softie Southerner and Meglomaniac
Posted
Full Member

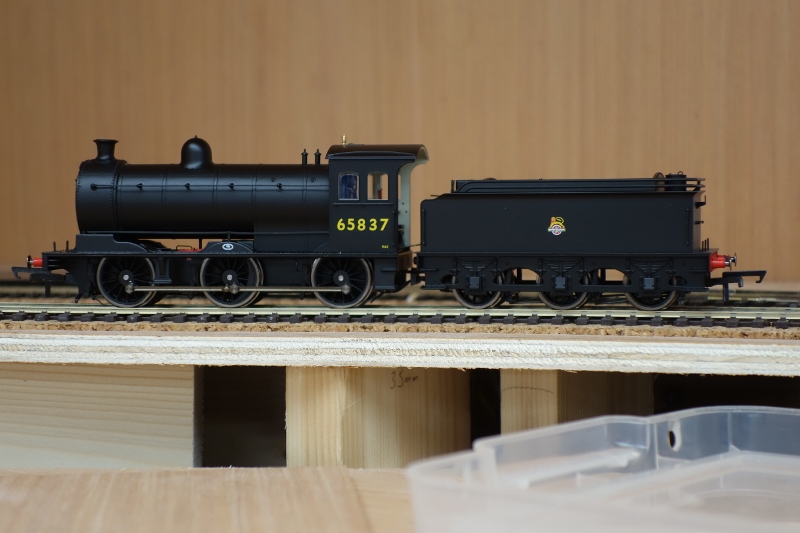

I mentioned that Oxford Rail had finally released their J27 and that I had received the first of the two I had ordered. This week, the other one turned up. They are both very good runners although the tenders are extremely light and will need some weight under the real coal load when its added. Magazine reviews expressed concerns about the fall-plate, suggesting that it interfered with the loco as it went into corners. My sharpest radius is 24 inches and I have not had any problems.
The third engine is a Hornby Q6 0-8-0. I have one of these already and although its a noisy runner, it would have pulled the old shed down if required!! This latest one is a poor runner. I have oiled it round and will take it to the club tonight for a good run on our test track which, luckily, is the same size as my shed. Half an hour there should sort it out hopefully.
I am still waiting for two J26's from Oxford Rail - promised Xmas 2019 and now due for delivery later this year or Q1 2022. Hattons are also having issues with their Genesis coaches - my ex-GNR full brake is now due 2022 as well. I cannot get excited about these delays. After all, if the worst thing I suffer from is a delayed engine or two after all that has gone on during the past 18 months, I am truly a lucky boy………..
Shed dweller, Softie Southerner and Meglomaniac
Posted
Full Member
Garden railways and outside extensions to Yarslow have been vetoed


Shed dweller, Softie Southerner and Meglomaniac
Posted
Full Member
Hahaha, same here!Garden railways and outside extensions to Yarslow have been vetoed
Great update, it looks really neat now. Glad it has given you some performance improvements also.
Posted
Full Member
I wish I'd had your clean sheet to work with when I started Maxmill. It was built rather piece-meal from ideas way to grand for the space I had at my disposal. I also envy you your patience in getting things right before continuing. My aim was to get something running as quickly as possible, then add to it ………….
I pondered waiting for the OR Class 27 recently - I'd read some glowing reviews of it although, as you say, there had been adverse comments about the fall plate. I'm awaiting delivery of their N7 to which I shall fit a sound chip. I do hope it turns out to be a good purchase - returning stuff to UK isn't a simple operation anymore.
'Petermac
Posted

Full Member
I think you made the correct decision re wiring the storage panel. There is nothing more frustrating than being forced to trouble shoot wiring once the layout is up and running.
Best wishes
Posted
Full Member
I have had a few suggestions about reducing the storage area and adding more scenic sections but that is not going to fulfill my requirement for "Variety of Traffic" - the ability to show a range of trains covering the major types (A, B, C etc).
In each direction I wanted 2 x A class through trains, 2 or 3 x B class ordinary passengers, 2 x C class freights (oil, fish etc), 2 x E class fast freights, 2 x F class slow freights, 2 x H class positively pedestrian freights and 2 x J class minerals. Thats 28 trains to start with. Add in a couple of J class empties and specials like the Bolsters train (class H) and you soon end up with my 34 main line offerings. On top of that I have the "specials" - engineering, Inspection saloon, "Boys" school train, Horse Box special, Pigeon special - occupying the cartridges. Trinity Square needs 3 passenger trains, the "Coastal", a trip freight and a parcels. The reason I wanted a behemoth of a shed is to fit all this in.
Us meglomaniacs need space, you know :twisted: :twisted:
Peter - the mess I made of the control panel was exactly because I was trying to rush it through and get something to move. Had I taken my time at the outset, I would have saved myself a load of time and grief of course.
The upside of all this is that my soldering skills are on the up and I am feeling more confident about tackling an MSE brass signal kit that I bought in a fit of bravado about 3 years ago. At the time I thought "how difficult can it be" - and then I opened the packet!!! At least now, armed with my iron and a bit of confidence, I am happy to give it a go.
Barry
Shed dweller, Softie Southerner and Meglomaniac
Posted
Full Member
Will it be an LNER lattice post signal I wonder ……… :hmm
'Petermac
Posted
Full Member
Shed dweller, Softie Southerner and Meglomaniac
Posted
Full Member

:chicken :chicken :chicken
'Petermac
Posted
Full Member
Today is the last day that I will be in the shed for a couple of weeks as we make a trip cross country and then two of my best mates from "down south" come up for a few days. I spent the day completing the track joins to this board and wiring everything through to the tag-strip for the Master Cab Control Panel. I have now added the Yarslow Yard and Branch Loco feeds meaning that every piece of track on the layout is powered. I can run an engine from the end of the storage yard (just off camera to the right) to the track ends seen here. That includes crossing back from the up line into the yard and departing from the loop up to the branch loco shed.
When I get back out here, I will complete the filling, sanding and caulking ahead of painting the entire upper half of the shed in blue emulsion. I should have done it yonks ago but, as usual, rushed ahead to get some track down.
September has been nominated as my "consolidation" month. All those jobs I should have done will be done - like the control panel and the painting. Then, I will get back to the tracklaying to complete the circuit and get Trinity Square built knowing that there are no "little jobs" waiting to bite me!!
Bashing on (but away for a while) ………..
Shed dweller, Softie Southerner and Meglomaniac
Posted
Full Member
With the help of Mrs M, the inside upper portions of the shed have been painted with two coats of blue to represent sky. I will, in due course, summon my less-than-O-level art skills to paint some clouds. Wish me luck!!
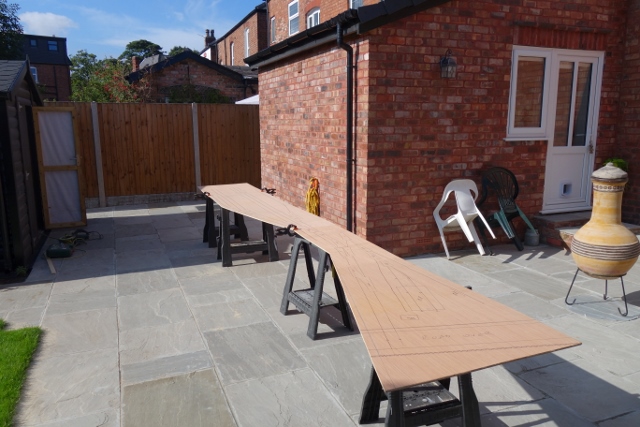
The boards for Trinity Square have been cut from the remaining two pieces of 8ft x 4ft plywood. This view, from the approach end, shows the shape of the site. Cyril Freezer's original plan was 6ft 8 inches long - mine is 19 feet.

Now that I do not have to move 8x4 sheets of timber about, the baseboard frame across the door can be fitted and the platform tracks mocked up for a visual check. The radius through the platforms is 216 inches, tightening to 48 and 36 inches once beyond them.
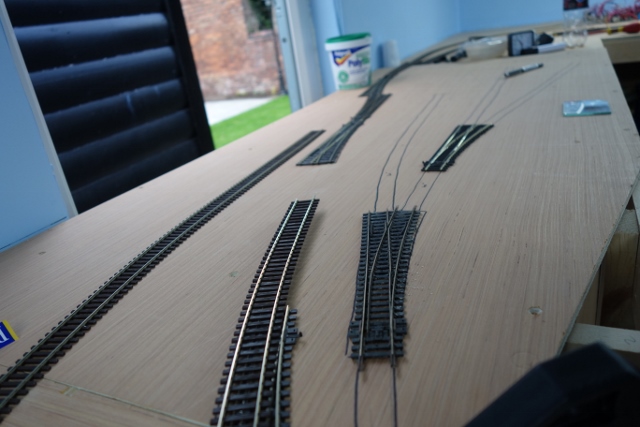
The PW sidings mocked up on the board over the door. The siting of these sidings is the main reason I chose not to have a lift-up section.
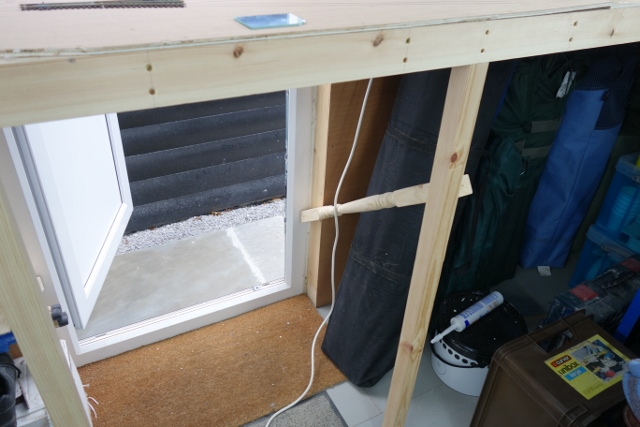
Instead, I went for a duck-under with a pair of bannisters left over from the house renovation as rails to aid progress. I used exactly the same structure on the old Yarslow layout (although the baseboard was 6 inches lower) and it worked pefectly well. Note the stone path outside the door - ideal to facilitate shed access during poor weather.
A week off now as our guests descend. Then its back to track-laying and soldering to finish Yarslow. At that point, I expect to be running trains right around the main lines.
:Happy :Happy
Putting my feet up for a week……………
Shed dweller, Softie Southerner and Meglomaniac
1 guest and 0 members have just viewed this.