Chairs, Frogs and Sleepers.............
Posted

Full Member
Totally agree!Nice work with those kits.
Cheers,
Claus
www.flickr.com/photos/ellef/
Claus
www.flickr.com/photos/ellef/

Posted

Full Member
Twobolt John
Posted
Full Member
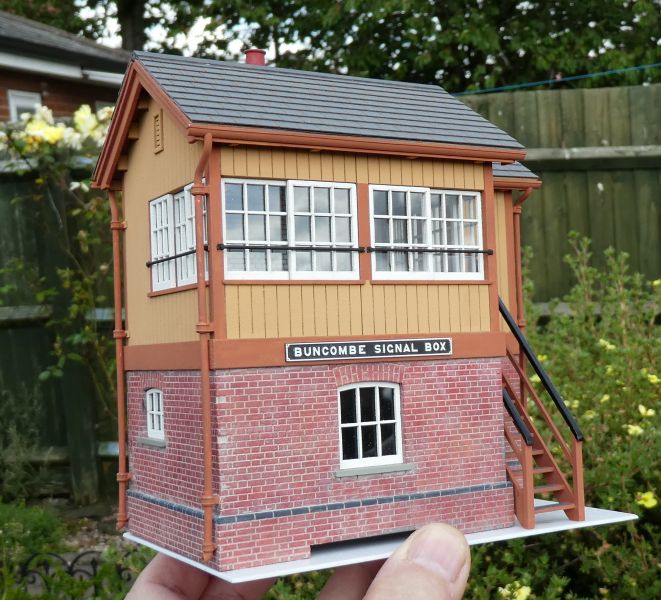
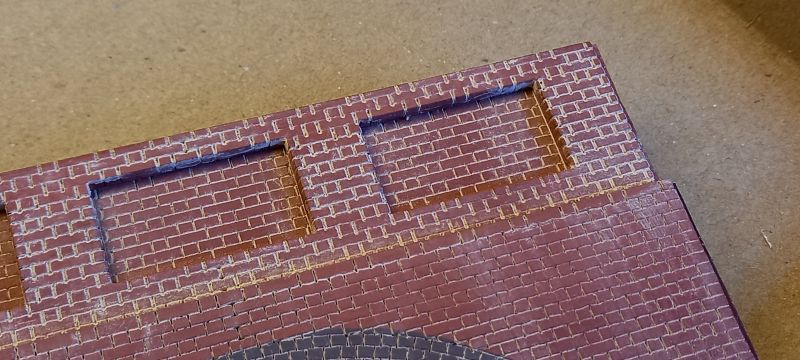
Another Railmodels kit. It was built at Buncombe in 1899 and was damaged by a Zeppelin Airship attack during the First World War. It needed a new roof and chimney stack , but by 1929 leaks from the chimney stack were solved by rendering . There is machine gun damage still apparent on the signal box brickwork.
Actually, a Railmodel weak point is the brickwork geometry on most of their brick chimney stacks and it bothered me too much to be ignored. Rendering is the solution.
Twobolt John
Posted
Full Member
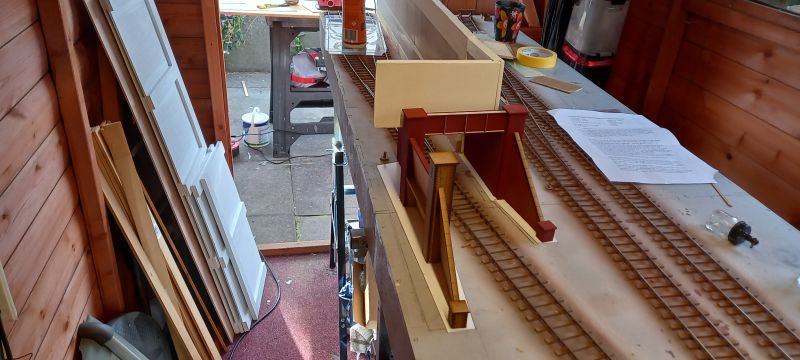
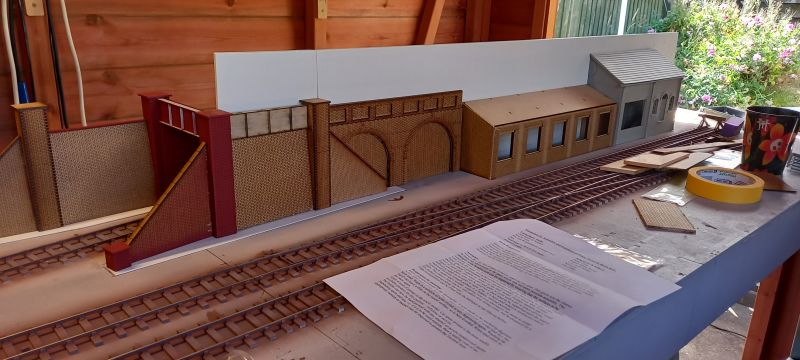
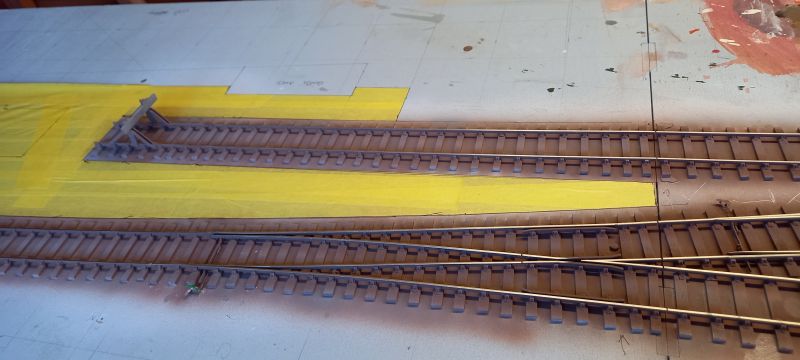
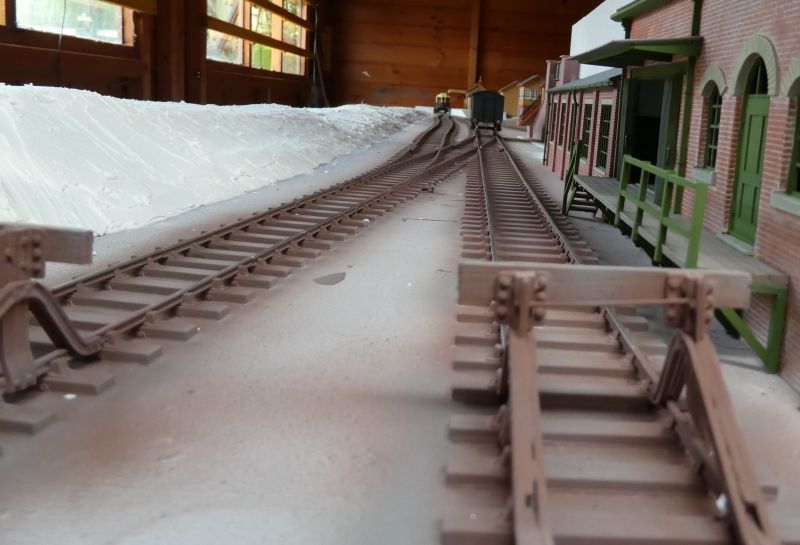
Buncombe Bridge has been fettled with two laser cut bridge kits to give access to the `hidden` fiddle yard.
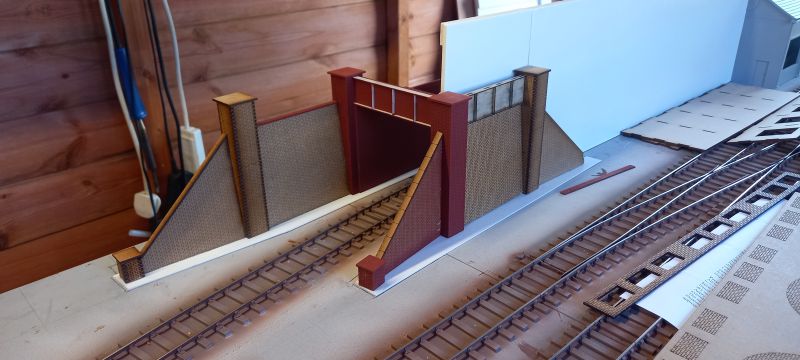
Senility crept in as I forgot that the plan was to make it as two separate sections straddling two base boards.
So I have had to redesign it as a removeable unit incorporating the white `curtain` that will surround the back and sides of the layout.
Using a few other O Gauge suppliers I`ve made a `backscene` diorama for the siding to supply stores and equipment to Buwwetts Cartridge Factory. you will ,of course, remember Elmer Fudd running out of Buwwets for his rifle !!!
Twobolt John
Posted

Full Member
I like the model Kits you've chosen and the finishing presents them superbly.
Colin
Posted
Full Member
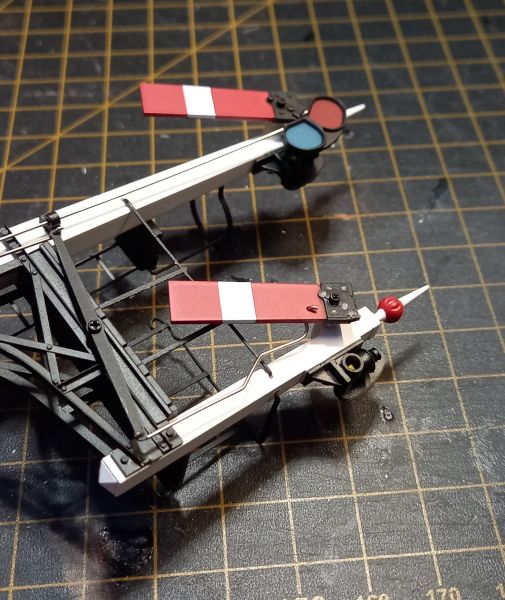
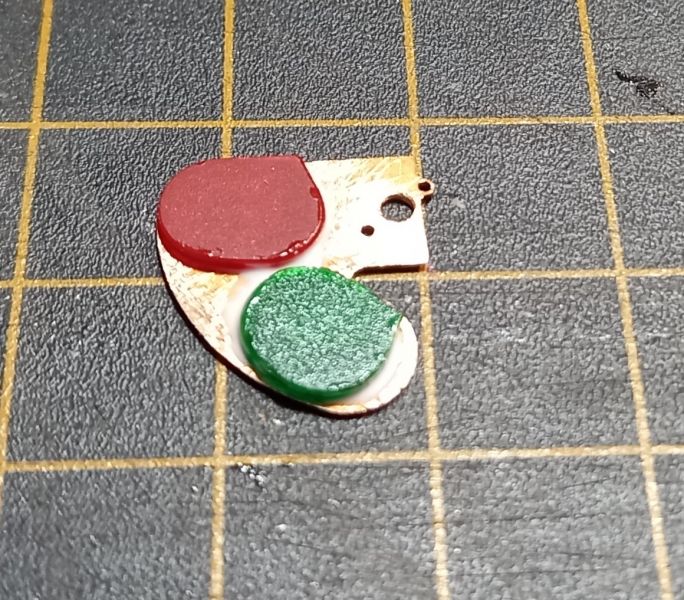
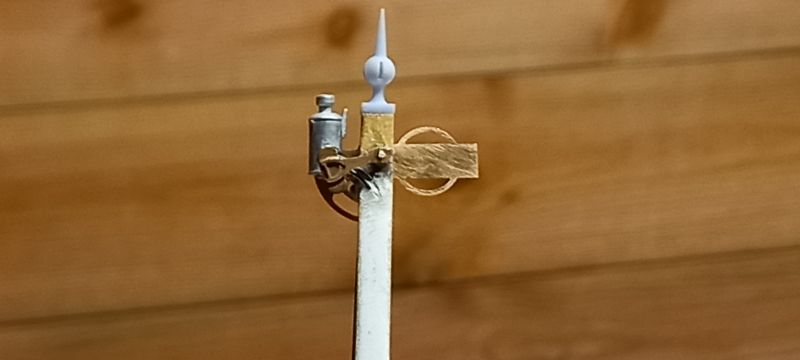
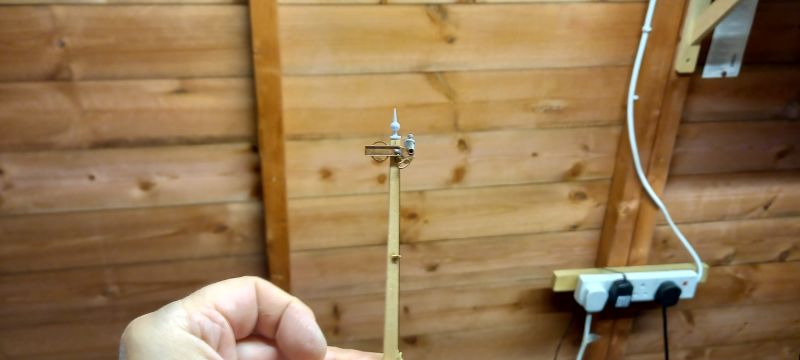
This is Dapol`s motorised bracket signal which I needed to modify to incorporate a Shunting signal.
I used a set of ancient Colin Waite signal arms which fit perfectly with a bit of modelling.
I`ve kept Dapol`s signal arm intact but carefully cut off the spectacle plate which is the wrong style for a shunting signal. I also shortened the arm to a scale 3` length. Rivet detail was removed except for the `axle bolt` which would have ruined the signal operation.
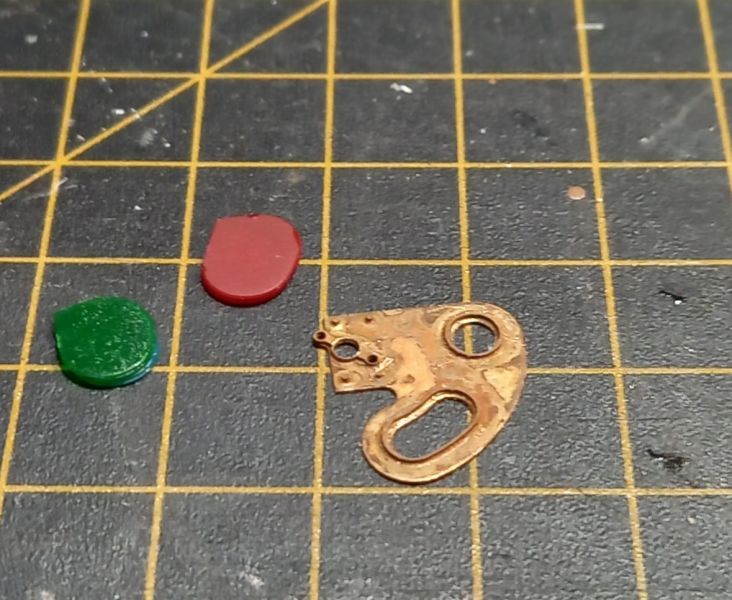
Dapol`s coloured lenses are easily rescued and were fixed with Canopy Glue behind the new correct style brass spectacle plate.
Things will look much better with a coat of paint.
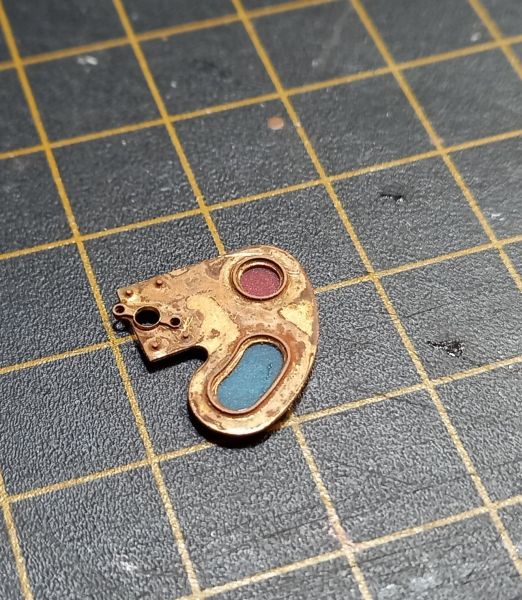
So, I`m just waiting for a set of Shunting Arm `S` signage to attach to the arm and it`s done.

 Last edit: by Twobolt
Twobolt John
Posted

Full Member
Shed dweller, Softie Southerner and Meglomaniac
Posted
Full Member
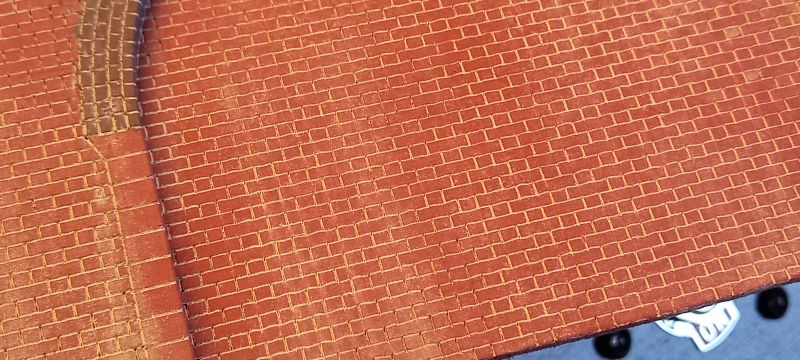
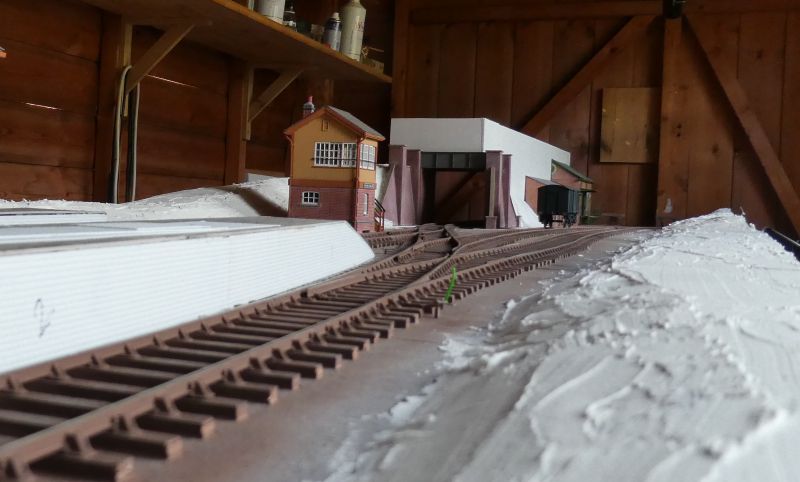
Painting of the bridge has taken ages due to the lower level of quality of the laser cut brickwork not being deep enough to take the type of acrylic mortar I like to use.
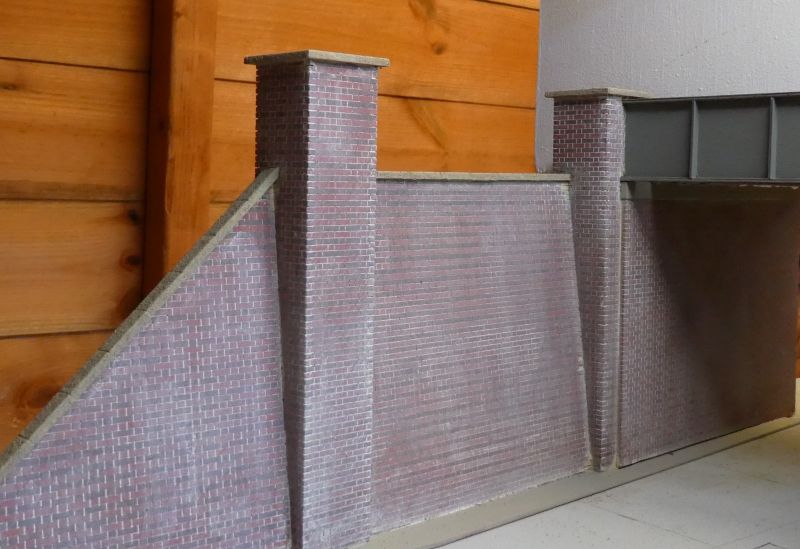
I used Halfords plastic primer first, then hand painted enamel brickwork colours with an acrylic tester pot of a suitable mortar colour.
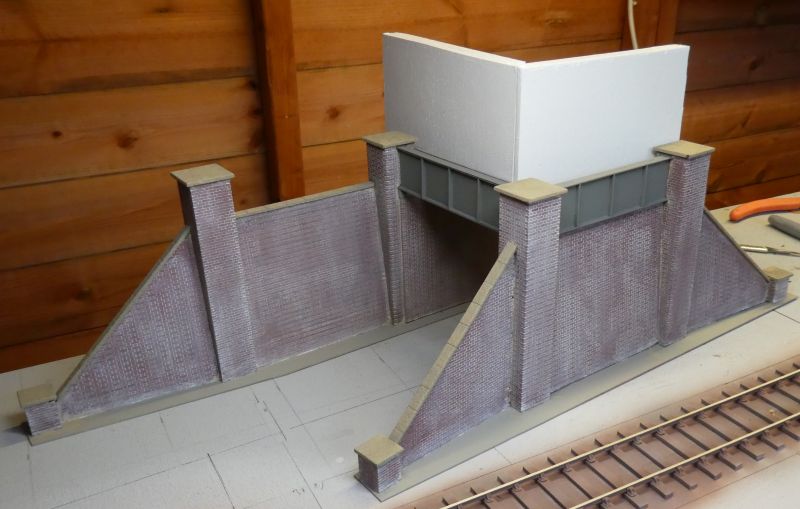
Anyhow the removeable bridge unit is done. I`ll consider using some weathering powders when the lighting unit is up.
Twobolt John
Posted
Full Member
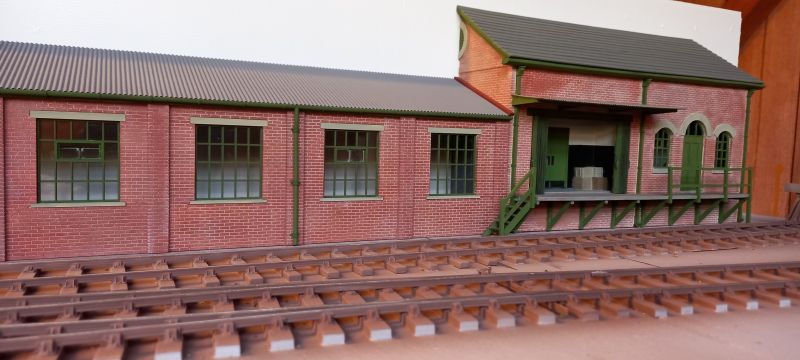
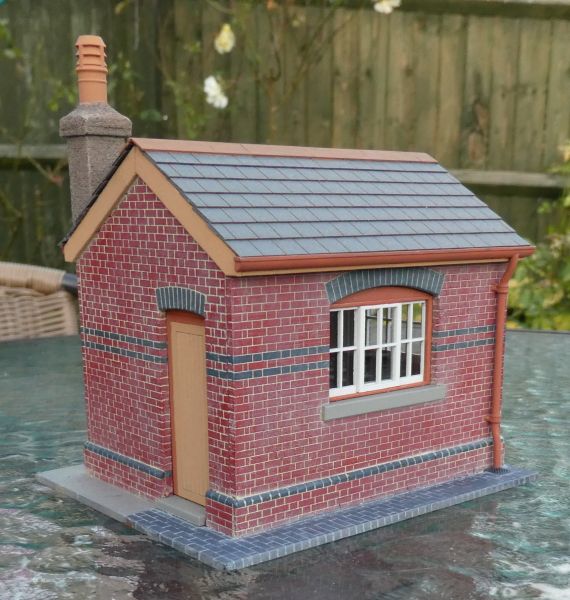
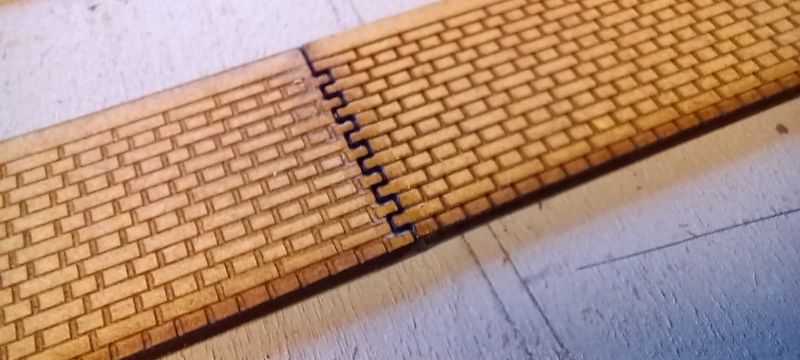
Things have been a bit slow making the factory scene. It`s been a marrying up of a laser cut kit from Railway Laser lines kit to a Skytrex Models resin product. Although the brickwork pattern has been the same the quality of the resin kit took ages to paint as the brickwork was`nt very deeply moulded. I`m happy with the result though and will finish things when the lighting unit has been fitted (it a`int built yet).
I`ve had nixed feelings about the quality of some laser cut brickwork products and have scrapped some.
I`m sure you`ve all heard of English Bond brickwork pattern and Flemish Bond…let me introduce you to the lasser known Merchant Navy Bond……
…and the Double Vision Bond….
Last edit: by Twobolt
Twobolt John
Posted

Full Member
I`m sure you`ve all heard of English Bond brickwork pattern and Flemish Bond…let me introduce you to the lasser known Merchant Navy Bond……
…and the Double Vision Bond2

'Petermac
Posted

Full Member
Bill
:cool:
At 6'4'', Bill is a tall chap, then again, when horizontal he is rather long and people often used to trip over him! . . . and so a nickname was born :)
Posted
Full Member
I`m just sipping my Brooke Bond…………………. :cool wink
Twobolt John
Posted
Full Member
Sorry, but I couldn't resist, being of a certain age you know. Tea and tap water are my main drinks these days, although now, sat on the terrace at 2330 with the two outdoor cats and 30 deg and enjoying a cold demi sec rose wine made a couple of kilometres away and will turn in shortly.
Modelling is on hold until the cooler autumn, so I'm carrying out some restoration to an old Citroen and keeping the gardens more or less in order.
Keep well,
Bill
At 6'4'', Bill is a tall chap, then again, when horizontal he is rather long and people often used to trip over him! . . . and so a nickname was born :)
Posted
Full Member
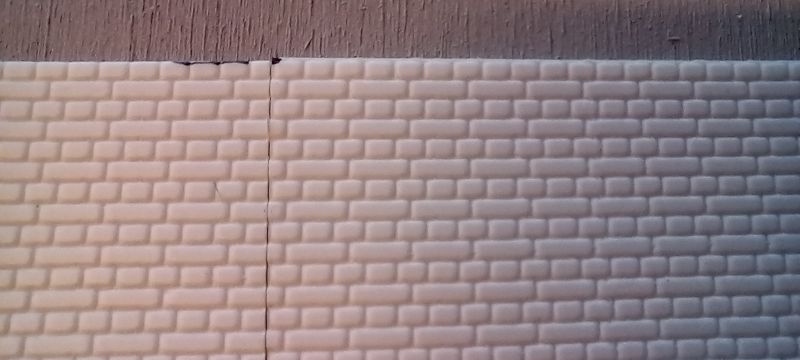
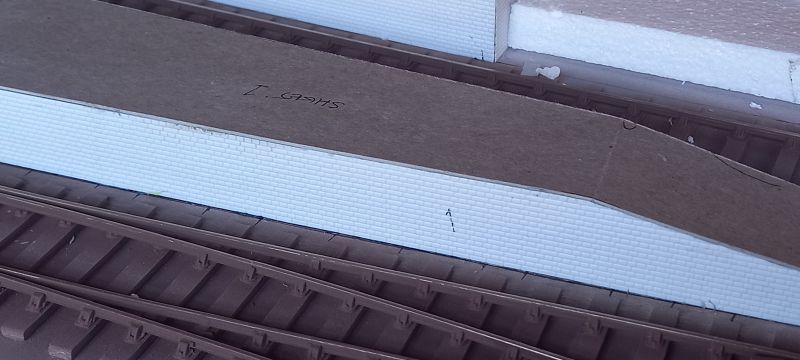
………not happy with this platform kit , so using my final sheet of 7mm scale Finecast plastic brickwork I refaced it all.
For platform construction I have used various sheets of card coated on both sides with Shellac to reduce the effects of dampness in winter.
I also used a Coach and Pencil to mark out the platform shape using masking tape as a stencil transfer onto card.
It worked for me……………
Last edit: by Twobolt
Twobolt John
Posted
Full Member
I found some very tiny micro 12v LED`s to light them up with from Ebay UK
Using 15` wooden posts, first up is to be an ancient siding to main track signal.
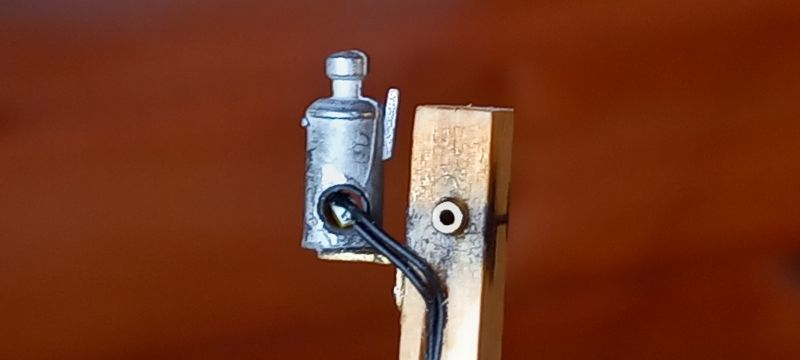
Usual method of burying the LED wires in the post and finishing off with a filler. I also used some shrink tubing to line the metal signal lamp to prevent any shorting of the LED soldered connections.
Next up is a advanced starter and shunt signal using the same method.
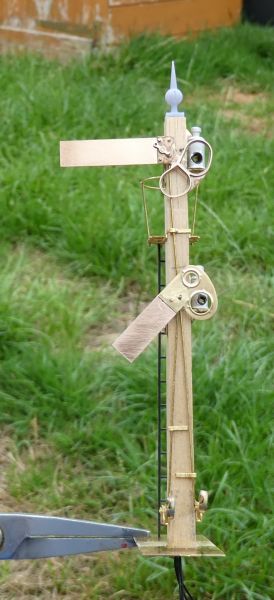
How will I operate them you ask !!!
Watch this space……
Last edit: by Twobolt
Twobolt John
Posted
Full Member
Cheers Pete.
Posted
Full Member
Whilst writing, the signal box looks great, I particularly like the chipped corner bricks - a nice touch. :thumbs
Your shot of the "cheap" laser cut brickwork takes me back to my experiences with Linka castings. Try as one might, hiding the many joins between panels was nigh on impossible …………..
'Petermac
Posted
Full Member
BTW, John. I didn't mean your signal box looked like a Heath Robinson effort. I didn't realise how it came across until I read it. :oops:
Last edit: by peterm
Cheers Pete.
Posted
Full Member
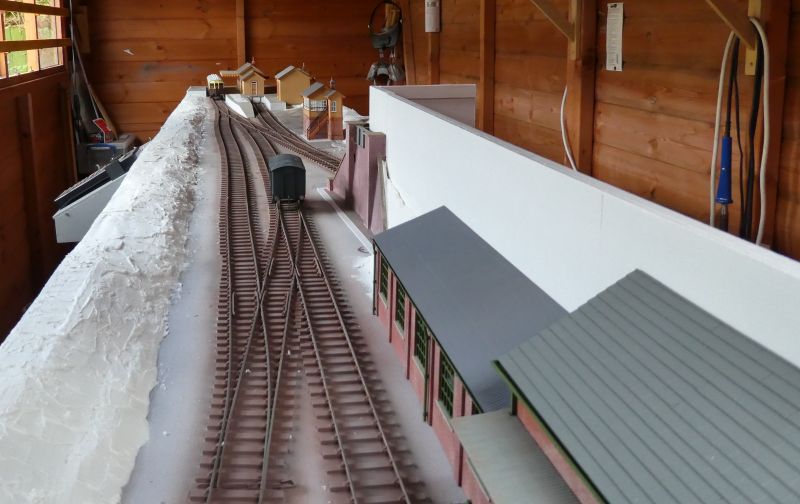
The aim for this year was to complete 75% of a new layout.
Today I covered the landscape polystyrene with Screwfix Lightweight Filler and feel I have reached my above aim.
This update will end Chairs,Frogs and Sleepers thread until I return with a more completed and detailed Buncome Layout.
Meanwhile my other layout Sarsden will be returned to the shed and set up to incorporate Buncome sitting on top.
So I will have two layouts to work on….is this a first for an old 70 year old codger ???
:cheers :thud :thud :thud :cheers
Last edit: by Twobolt
Twobolt John
Posted
Full Member
1 guest and 0 members have just viewed this.