Fowler 7F "Austin Seven"
Posted
#218384
(In Topic #11906)

Full Member
Restoration
I acquired my model of this loco second hand. I was told that it had been professionally built so took the plunge.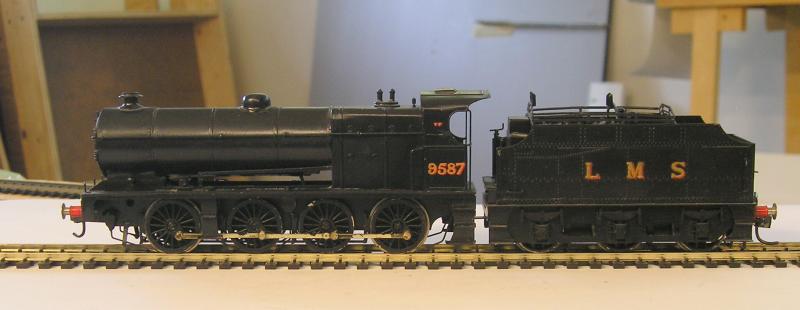
Not too bad, I installed a decoder and even had it running.
There things rested for a couple of years until I took it out resolved to do some minor titivation.
My first task was to review the tender chassis - -the body seems fine to me at this point.
TBH, it could have stayed as is, but, being me, I wasn't satisfied. For a start I didn't like the one dimensional brakes. I also really wanted to compensate it - as much to get my eye back in as anything.
I sourced new brakes from a Mainly Trains etch. The chassis was completely stripped and High Level hornguides installed. The builder had used "U" shaped frame spacers which wouldn't stay square so I replaced these with "L" spacers.
Long story short, here's the new tender chassis:
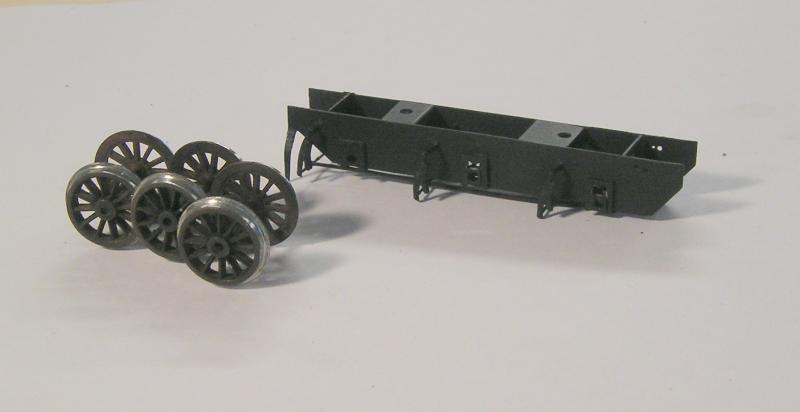
I plan to weather the chassis and wheels separately.
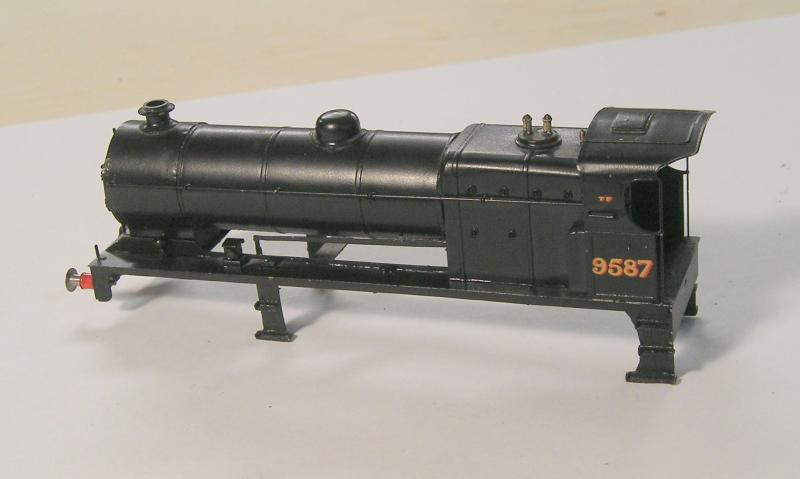
I turned next to the loco chassis, visible in this shot:
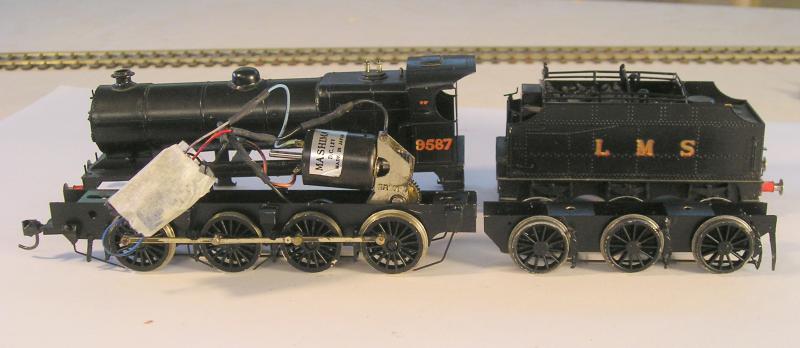
As I compared this chassis to photos, I kept finding things missing or wrong. Guard irons too far back, anemic brakes again, undersized sandbox at the front and a piece of kit above the front sandbox that I can't identify also missing. The glaring issue is that the two inner wheelsets are flangeless - quite wrong but probably done for practical reasons.
So, wheels out and brake gear off. All but the rearmost sandboxes were removed as well.
Again, Mainly Trains to the rescue with their loco brake fret. Well mostly, since only three pairs are provided. Happily my Aladdin's cave of bits turned up a pair of brakes.
I also found replacement flanged wheels - same size as Jinty.
A note about wheels. I found that 7 of 8 wheels had deeper flanges than the 8th. This is because, I suppose, they are Romfords. My odd wheel is Markits. I've run into this before and found that, for C&L track, there is a likelihood of Romford flanges hitting chairs - bumpity bump. My solution is to mount each wheel on its axle, stick it into the Dremel chuck and run the flange against a file. You need to check frequently with your digital caliper that you're taking the right amount off (~0.75mm dia). It's then a matter of reshaping the flange with fine files to get the bevels just so.
Here's the loco chassis after rebuilding:
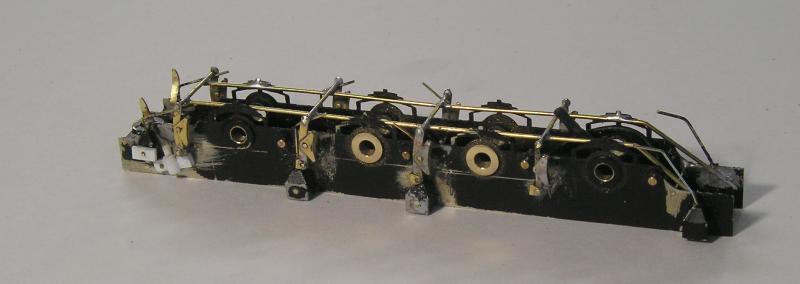
It's ready for paint - I think, unless I find more things to do.
The body is next. Again I notice that there are things missing - like ejectors (or is that injectors?) and various other bits of kit.
I also want to do a better job on the cab:
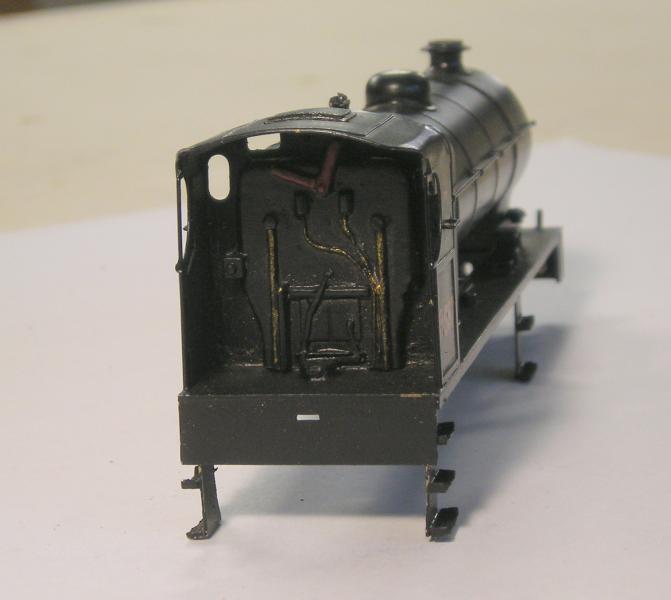
The cab is very open and I think it should look as good as Bachmann are doing.
Now, of course, it all depends on how pedantic you want to be, but I always say that if you buy a second hand kit built loco be prepared to rebuild it.
John
John

Posted

Inactive Member
I did read somewhere (don't ask me :oops:), that some 1 : 1 locos had flange-less inner drivers.
Max
Port Elderley
Port Elderley
Posted
Full Member
You're right, the 2-10-0 had flangeless center wheels - others too perhaps. I did check a plethora of photos to make sure the 7F had all flanged wheels.
John
John
Posted
Full Member
First, I wanted to see if I could upgrade the backhead detail to something approaching Bachmann's latest - a look at your own models of things like the 3F will tell you that that is a pipe dream. I did get the backhead out, but after painting the inside of cab white (prior to cream), the masking tape pulled off some of paint and the transfers. I decided to strip the body completely - it is now pristine brass.
Today, while having a rummage, I found an ancient body for the Mainline 2P - something I have been meaning to fix up for more than 20 years but never got round to. I noticed that, while the backhead detail is nothing like Bachmann, it isn't bad. I will cut up the body and rob the backhead.
Another issue with this model is that the builder hadn't bothered with wheel balance weights - a very distinctive feature. I had some weights left over from a Jinty upgrade etch (from Brassmasters) and fitted those. The wheels were primed and painted black.
I then did a trial fit of the wheels to the chassis and found to my disgust that one of the insulated wheels was shorting. After some thought, I realised that I had installed a balance weight bridging the insulating layer. I removed the etched weight made a plastic one - short fixed. Back to paint.
Today, I wanted to repeat the trial fit and this time all is good on the electrical front - insulated on the pickup side, short to frame on the other side.
Right, a straightforward install of the coupling rods I thought. Not so fast - first I noticed that the pivot joint was only represented in one place, should be in two places. I also noticed that the builder had broken a big end and the others were quite thin. Happily I have the rods from the Flatiron so I pressganged these into service adding a pivot and refurbishing the rods as needed - this took all afternoon.
My last job was to remove the crankpins because, having been used previously, they were really too short. As usual, sods' law came into play and I stripped one. My efforts to drill the pin out resulted in a scrapped wheel. I installed a fresh balance weight in a spare wheel and that is in paint.
Phew! What a saga.
John:pedal
John
Posted

Full Member
Nice work. Professional builds are sometimes dreadful - just because somebody builds these for a living doesn't mean they're any good at it (as I have found out with many Japanese and Korean brass models).
Alan Gibson Workshop does a Midland/LMS backhead, as well as a LMS Stanier and LMS 7F backhead. I've used some of the GWR ones, lots of detail and sharp white metal casting. Adds a bit of weight as well. Might need a bit of fettling to accommodate the gearbox. £2.08. Postage is reasonable, and Colin will send a picture of the kit instructions if you ask him.
I'm off to Warley in November, let me know if you want any small bits from AGW, as the full range is not at the show and needs to be pre-ordered for pick-up. Same for C+L.
Nigel
©Nigel C. Phillips
Posted
Full Member
As for professional builds, the chap who built this loco did a very good job on the bodies and got the chassis square. My suspicion is that his brief was to build the kit from the bits in the box. BTW its Falcon Brass. Anyone who's built any kits will know that there are frequently parts in the kit that don't pass muster - brakes for example. I always like to have details of that sort lying around for cases like this. There are numerous details missing that are evident from photos, the kit designer(s) may have expected the builder to source or build these.
I'm sure we'll talk again before Nov.
John
John
Posted
Full Member
Small bits (as in a bag thereof to slip between the stuff from Sainsbury's that no doubt will have to be got). It's the mass of the items, not the number.
I see the new owners of Falcon Brassworks are still only offering wagons - no locomotives. I suspect the model you have could predate Philips Rudd and is essentially a Jidenco model, which were pretty basic and left a lot to be added by the builder. Straight chassis and a decent motor/gearbox is a good basis for detailing.
Nigel
©Nigel C. Phillips
Posted
Full Member
I have heard that Falcon kits are something of a bear to make. There is certainly a lot of scope for the builder to detail.
John
John
Posted
Full Member
I also went to Mainly Trains - the listings are a shadow of their former selves but I did order a load of useful bits for loco brake gear detailing. I also found a cab detailing fret that includes reversing lever and those tiny valve knobs on backheads. There's a heck of a lot of useful stuff under the mainly Trains brand. Because this site has joined the 21st century, my order is being processed as we speak.:)
So, we'll sit tight for few days and see what's what when the bits arrive.
John
John
Posted
Full Member
Colin usually answers emails within 2-3 days. It's pretty much a one-man business (as it was when Alan was running it), getting him on the 'phone can also be dodgy unless he's out of the workshop.
Nigel
©Nigel C. Phillips
Posted
Full Member
John
John
Posted

Full Member
Posted
Full Member
John
John
Posted
Full Member
Posted
Full Member
John
John
Posted
Full Member
John
John
1 guest and 0 members have just viewed this.