Painting Dapol 00 scale figures - Part 1
Posted
#6210
(In Topic #721)

Full Member
For the purpose of this thread I will use Dapol figures. There are surprisingly few good 00 figures available in plastic, particulalrly in unpainted hard plastic. The HO scene is well catered for, although most, not all, come ready painted. Although old the Dapol range (ex Airfix) are well moulded, highly deatiled and easy to paint. Sadly the poses are a bit limited, with only 2 sets available.
I will look at several distinct painting styles and will produce a step by step account of how I deal with each style. This thread may go on a while as I snatch opportunities between other activities! As a start point, regardless of style it is important to prepare the figure. First the figure must be washed in warm water, with a little detergent added (washing up liquid will do). This will remove any grease and this is vital if acrylics are used. Secondly any mould marks or flash should be cut away before painting commences.
Before starting to paint the figure it is worth having a think about what it is doing, what era is represented and where it will be located in its final setting. This will determine, pose, dress, colour scheme etc.
I will be using acrylic paints, which is a new venture for me, having painted mainly using modelling enamels. So the subject matter:
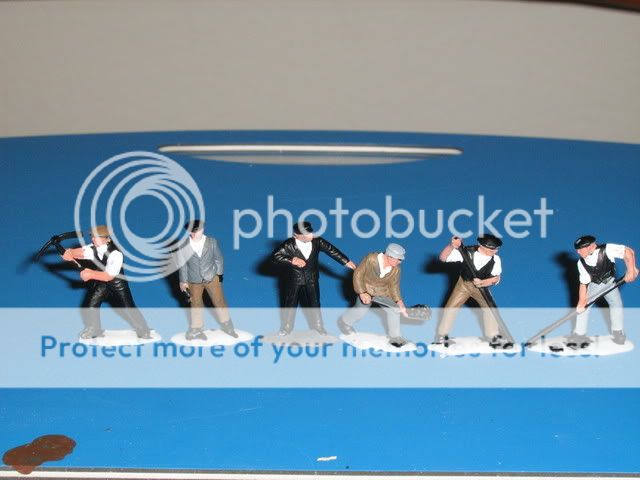
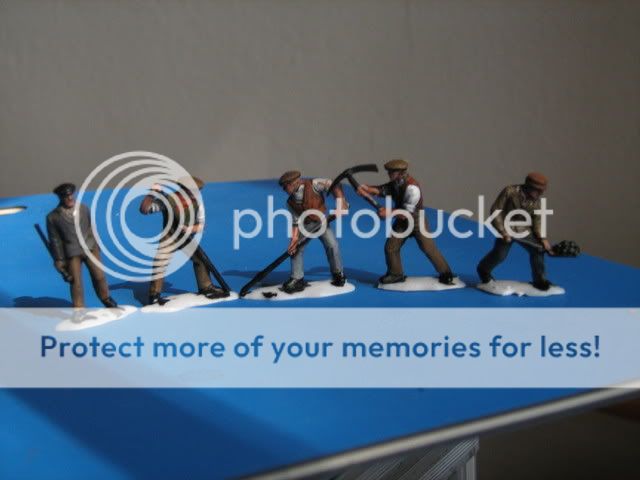
The first batch will be a group that has been painted in overall black. Blocks of colours are then applied, followed by shading and highlights to build depth. Here you see some colours having been applied to the flat black:
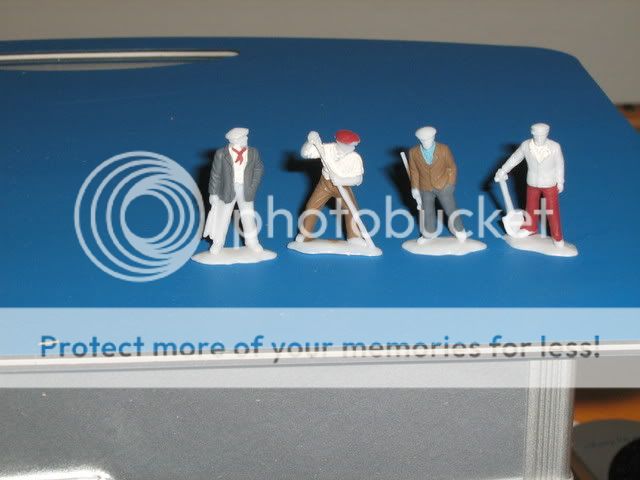
The second batch will be painted directly onto the light grey plastic, in a similar way and I suspect the emphasis will be towards shading as the colours will start much brighter on the lighter background:
Next I have some nearly completed figures painted in enamels. The aim here will be to improve them using shading and highlights:

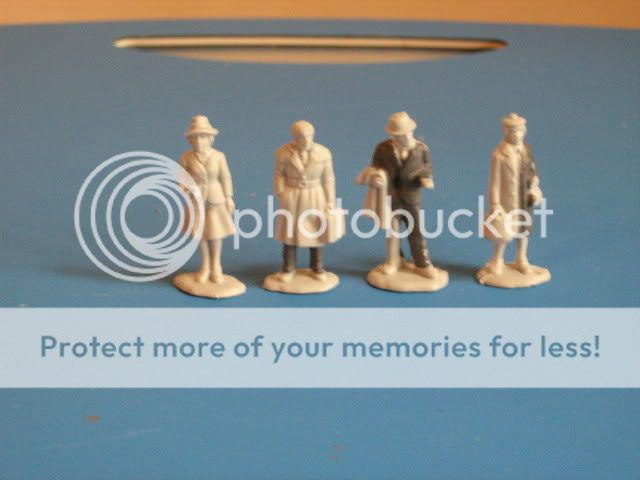
Finally this group has been converted by swapping heads to create some different figures. I am not sure how these will be painted, possibly dry brush on black. The original male poses can be see in earlier pictures and the two females have simply swapped heads and one has lost her umbrella.
All being well this should prove to be an interesting project
Bob(K)

Posted

Full Member
Wayne
Posted

Legacy Member
Posted
Guest user
I was only thinking few days ago many modellers spend ages on the scenery of the layout and working on their rolling stock to make it look more real. But i have noticed not many modellers actually put passengers in their coaches which if you think about it would be the norm on a real railway coaches would not go round empty otherwise the railway would be out of business very quickly.
I wonder if anybody does half torsos that you could use for that or perhaps you just have to chop their legs off.
cheers Brian
Posted

Full Member
Paining for me, has always been where I really ruin a perfectly good model (which I've normally assembled very badly in the first place so nothing new there !!)
I can see something brewing for the "projects" thread - we all need peolpe on our layout and this may be something we can do over a health giving tot of whisky in the evening !!!!
Petermac
'Petermac
Posted
Guest user
I've also got some diecast figures and other items that I bought from Dart Castings at a show last year.
They suggested a spray with Halfords grey undercoat and then painting with enamels, but I don't see why acrylics can't be used after undercoating.
Posted
Full Member
Robert said
First question Bob is what glue did you use on the swapped heads?
Bob
I use straight forward plastic cement. I prefer the liquid variety produced by Revell. This is only for hard plastic figures such as Dapol. The glue literally melts and then welds the plastic together.
Soft plastic needs a glue like UHU/Bostick and often requires a metal peg to keep the head in place. ( I use an ordinary household pin, forced in with pliers a few mm and then cut it off, leaving 2-3mm protuding. The soft plastic head is then forced on to the peg and held with glue)
Bob(K)
Posted
Full Member
Wayne
Posted
Full Member
Gwent Rail said
This is one for me to follow :!: I've also got some diecast figures and other items that I bought from Dart Castings at a show last year.
They suggested a spray with Halfords grey undercoat and then painting with enamels, but I don't see why acrylics can't be used after undercoating.
Jeff
From my experience once you have got an undercoat on you can use either enamel or acrylic paint - provided it is grease free. Grey spray would be fine, as long as it is not overdone. I have used spray grey, black , white and even rust (for animals), depending upon on what the figure is. On balance grey or black would be best.
Bob(K)
Posted

Full Member
Phill
Posted
Full Member
henryparrot said
a quick question there seems to be a lot of diecast figures available is painting them the same as you do the plastic ones or is it vastly differant?
I wonder if anybody does half torsos that you could use for that or perhaps you just have to chop their legs off.
cheers Brian
Brian
The methods used here are equally applicable to metal figures. Once you have an undercoat on they can be treated the same as plastic, but they are more pricey. White metal is easy to carve and so conversions too are an option.
Regarding sitting figures - coaches rarely have enough room for sitting passengers and so surgery of the legs will be required, even for moulded seated figures. Quite often much of the back will have to go too so the figure fits the seat - but it can be done.
Bob(K)
Posted
Full Member
Phill
Posted
Guest user
say if you want an arm pointing at something :roll:
Posted
Full Member
Matt said
can you move a figure using heat?
say if you want an arm pointing at something :roll:
Matt
With soft plastic you can soften the part in very hot water, bend it to shape and then plunge it into cold and it will stay in the bent shape. As far as I am aware this will not work with hard plastic.
Applying heat directly to hard or soft plastic is tricky and the plastic will most likely ball up or melt. You will certainly lose detail on the figure. It is possible to use a pin or needle embedded in a cork, which is then heated as a cutting tool or for engraving figures eg carving a belt or buttons etc. The effect can be changed with different temperatures. Typically a candle is used as a heat source.
With hard plastic it is best to cut off the limb, shape the end to be attached and glue in place. You might need a small spacer or wedge to fit the gap. Another solution is to swap a limb from another figure.
I can see a seperate thread on figure conversion might be needed at a later date, as this too can be a subject in its own right :!:
Bob(K)
Posted
Legacy Member
Posted
Inactive Member
Very importatnt for me because when I have looked at figures they seem either to be continental or dressed a la modern times and not much use when modelling BR in the 50's.

Les
Devon Junction
Kernow Junction
Kernow Junction
Posted
Guest user
Did you major in understatements? Fascinating thread, Bob. Looking forward to more.
Mike
Posted

Full Member
You are right enough about the HO world being well served with pre-painted figures. The problem is that the relative cost is quite prohibitive. Some sets work out at two dollars per figure which is too steep. There are "job lots" of unpainted figures out there, and I will probably go down that road. Reading posts such as yours boosts my confidence when it comes to painting the figures myself :!: :D

Posted
Full Member

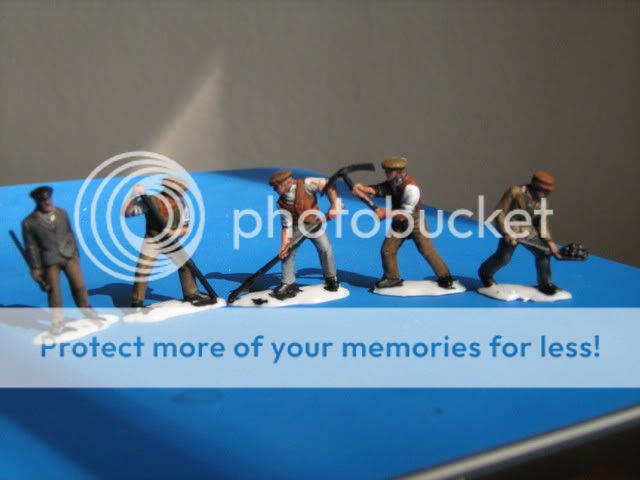
I decided that the easiest way to create depth and shadow would be to use a dark wash. So I mixed a dark brown with some black and applied this all over the figures. The colour runs into the folds and depressions, creating shadow. Of course the figures now look pretty horrible:
Once dry I then went back to my original block colours and, with a fairly dry brush started to highlight the raised areas. Where I really wanted to emphasise items, such as collars, tops of folds etc, I added some white. This builds more depth into the figure:
I did the same for the areas of flesh, playing around with the tones by adding small amounts of white and brown:
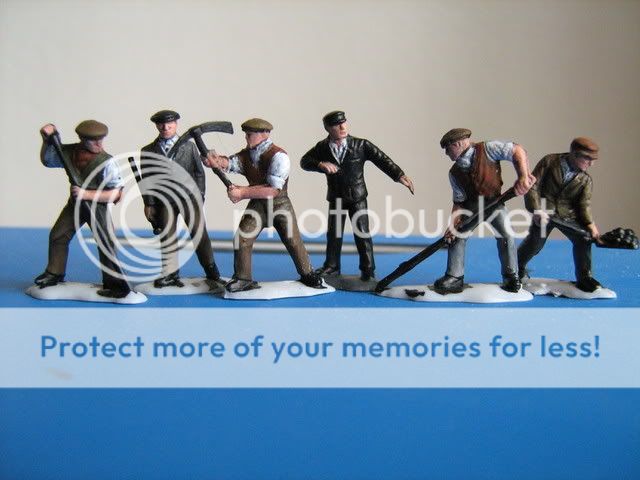
Finally, for this stage I painted in the hair, the tools and further highlights. Sorry about this photograph - it was starting to get dark!

So at the end of the process the figures are starting to take shape and already are beginning to look the part. In all I spent about 3 hours on and off to do this. Most of the time was taken waiting for the paint to dry.
Bob(K)
Posted
Guest user
This is a very valuable thread in so many ways, not the least of which is how it shows the amount of work needed to bring the figures up to scratch. Your determination to get it right has lifted them to another level.
Mike
1 guest and 0 members have just viewed this.