Improving the Hornby Signal Box
Posted

Full Member
You say you made them out of Plasticard? Can you elaborate on that a little? Just how did you bend them and what thickness did you use? What you have done is EXACTLY what I am trying to do. I Like it!
Wayne :D :D

Posted

Full Member
For the ridge tiles I used some thin, plain white plastic card (about 0.5 mm thick). I cut a strip of card about 1 cm wide to just over the length of the roof (about 12cm). Next I drew a line along the centre, producing 2 0.5cm strips. Then I scored along this line. this will be my bend line. I made my tiles 0.5 cm in width and cut these out, ending up with a load of pieces 1cm x 0.5 cm, with a scored line running across them. I applied some glue to the roof, placed the score line facing up on the apex and bent the tile in half, giving the effect of a tile on each side and avoiding a gap on the apex. I hope that makes sense.
Clearly the measurements and tile size will vary. I did some trials with paper first and came up with the above measurements.
Bob(K)
Posted
Full Member
 Luckily I have a widget on my computer that does it for me. 8)
 Really all I needed was the procedure and you did just that, thanks.
Wayne
Posted
Full Member
I have used one of the permanent way gang from the Dapol set. I cut off the tool the figure is using and he will be installed in the box in the act of pulling one of the levers.
Brian is painted in acrylics and this is the first time I have tried this. I painted him overall black to start with and then applied block colours on his flesh jacket and trousers, with a dab of white for his shirt;
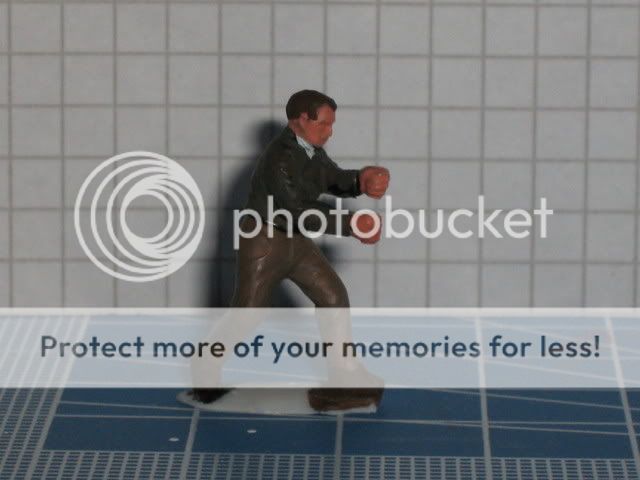
Next I added some shading adding darker and lighter shades of the base colour, including the face and hands:
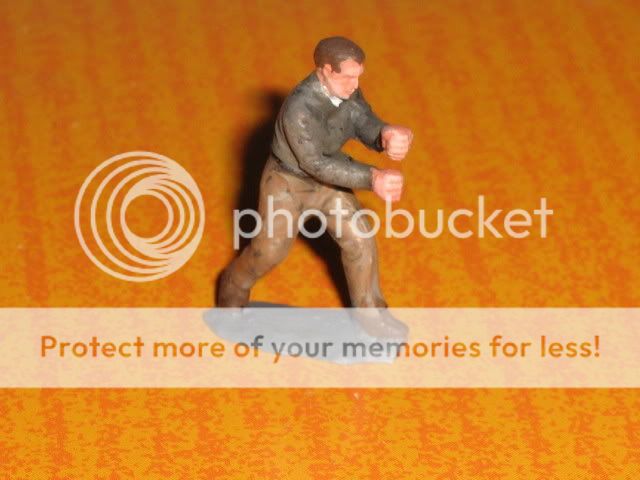
Then to tone the whole figure down a gave him a quick wash of brown. This settles into the folds in skin and clothing to give depth and shadow:
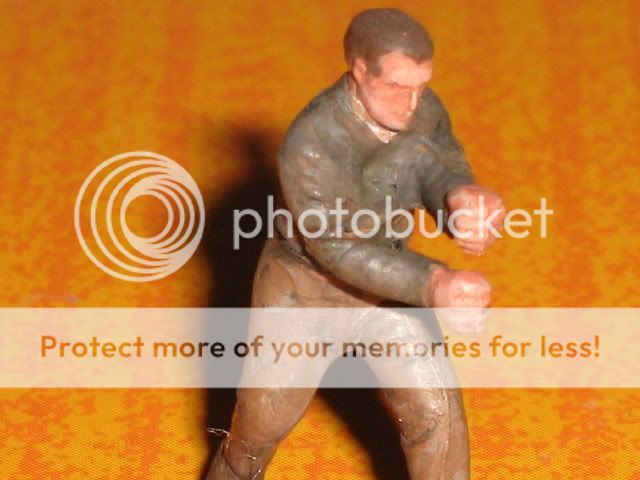
I will cut off the base when I fix him into the signal box.
I will do a second figure to stand outside on the steps, once these are installed.
Bob(K)
Posted

Legacy Member
Posted
Full Member
When I have worked out how to use these acrylics properly I will be glad to. :) I have a pile of Dapol figures which I brought with me and I will play around them with after I have completed the signal box and see what the results are like. I will then do a piece, looking at some different techniques.
Bob(K)
Posted
Legacy Member
Posted
Full Member
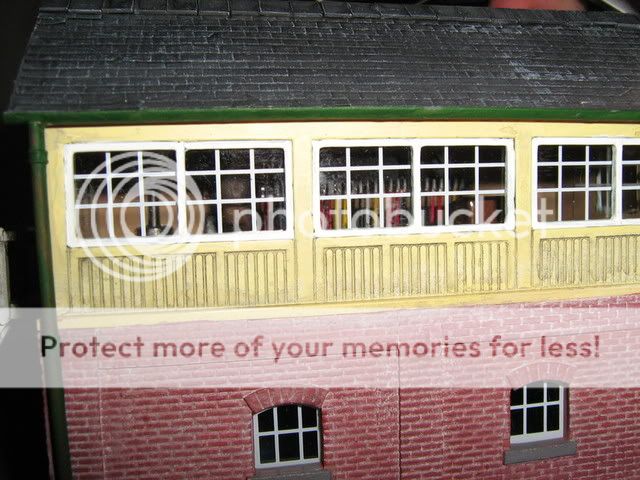
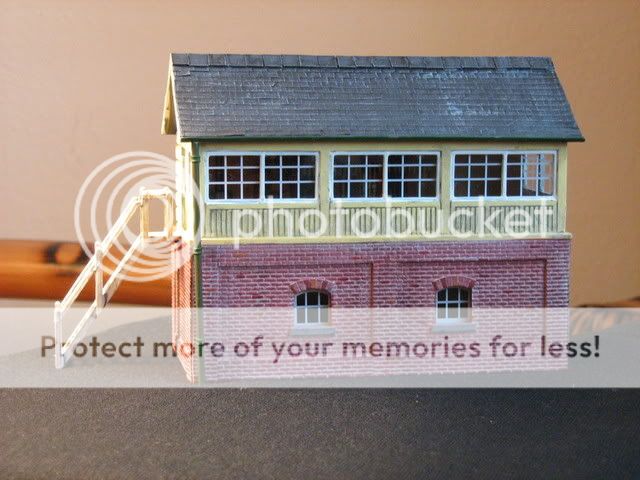
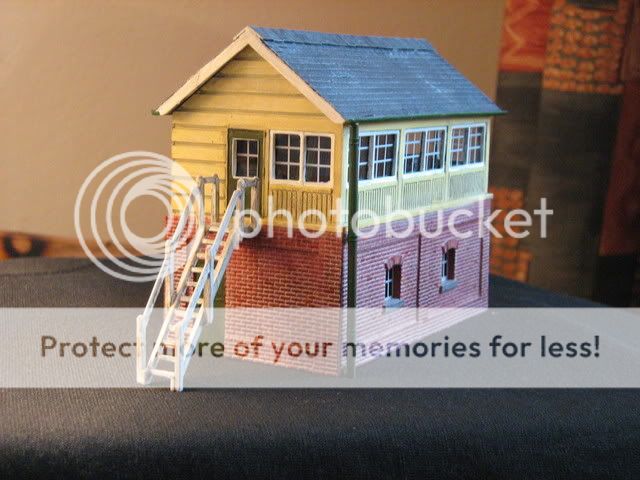
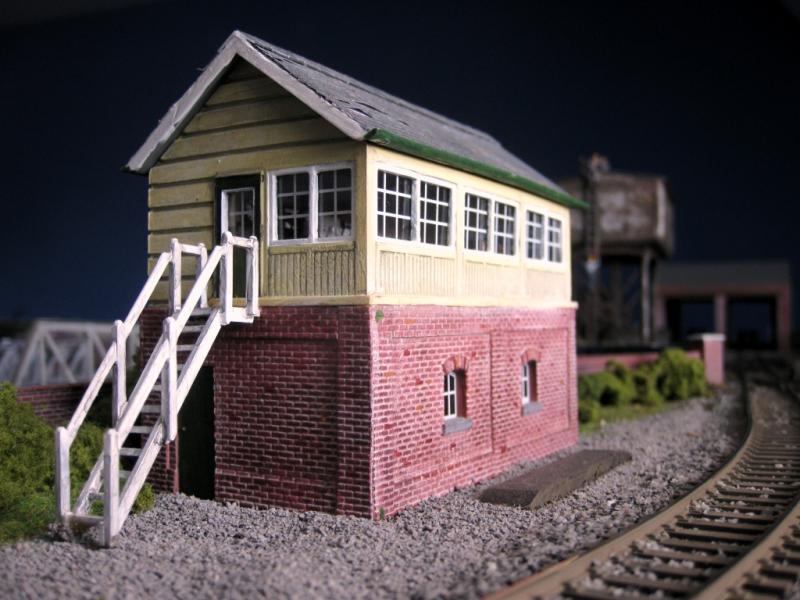
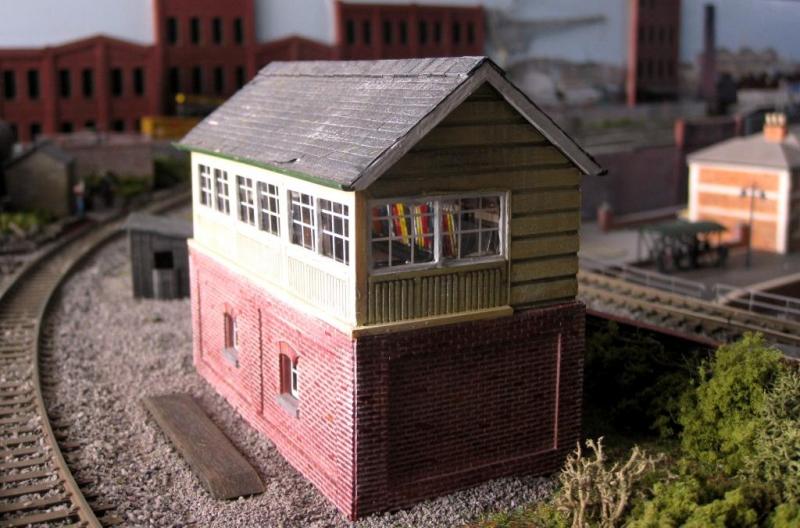
Here are some pictures of the finished item:
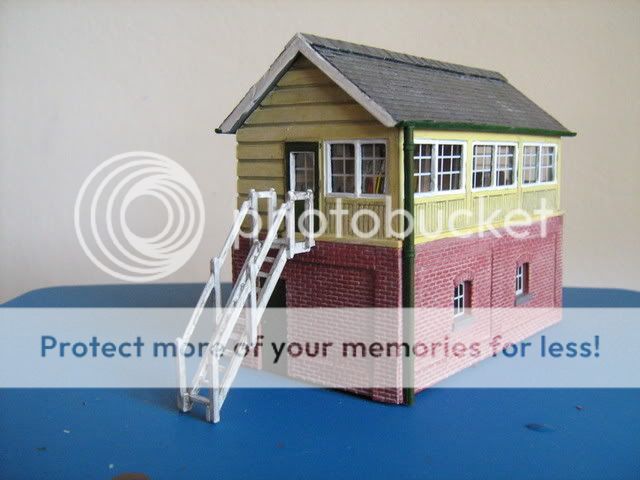
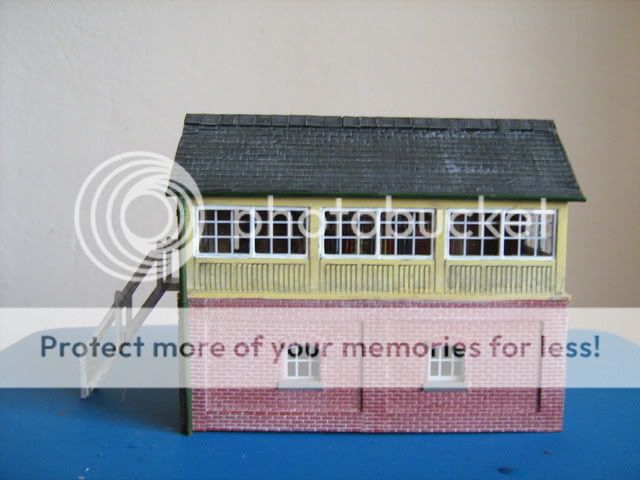
Although I did some work on the interior, it is hard to see the detail, but I know it is there! You can just about make out the man pulling the levers on the left and some of the detail of the operating equipment:
Bob(K)
Posted
Guest user
Mike
Posted
Full Member
Wayne
Posted

Full Member
Phill
Posted

Full Member
Fantastic tiles, great windows and upper half.
If I could suggest anything to give it that little tweak to it, I reckon, IMHO, that the brickwork is too uniform and "clean". Might just be the photo.
Maybe a few random slightly different coloured bricks :? and a bit of dirt :shock:
Your railway of course. Just a thought.
Posted
Full Member
Yes, on balance I think you are right. I might have a go at improving the brickwork over the coming days. It takes someone else to spot these things, as you you get used to the look of a thing.
Thanks, it's good to get constructive comments.
Bob(K)
Posted
Full Member
Marty said
Bob K
Fantastic tiles, great windows and upper half.
If I could suggest anything to give it that little tweak to it, I reckon, IMHO, that the brickwork is too uniform and "clean". Might just be the photo.
Maybe a few random slightly different coloured bricks :? and a bit of dirt :shock:
Your railway of course. Just a thought.
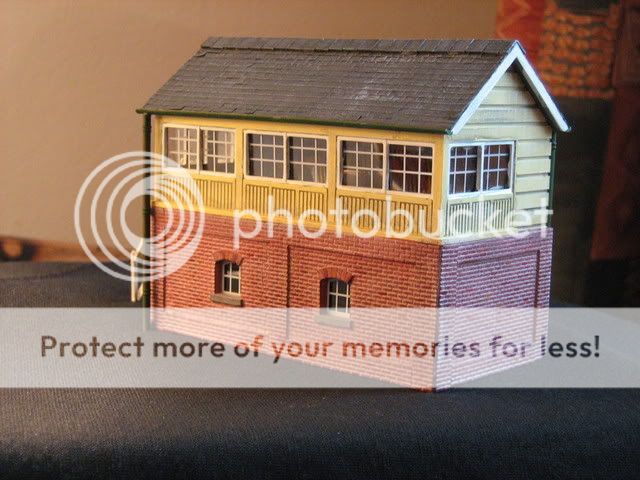
Marty suggested some more weathering on the brickwork - well I had to agree that a little more work was required, so I have had a go and here are the results:
Bob(K)
Posted
Full Member
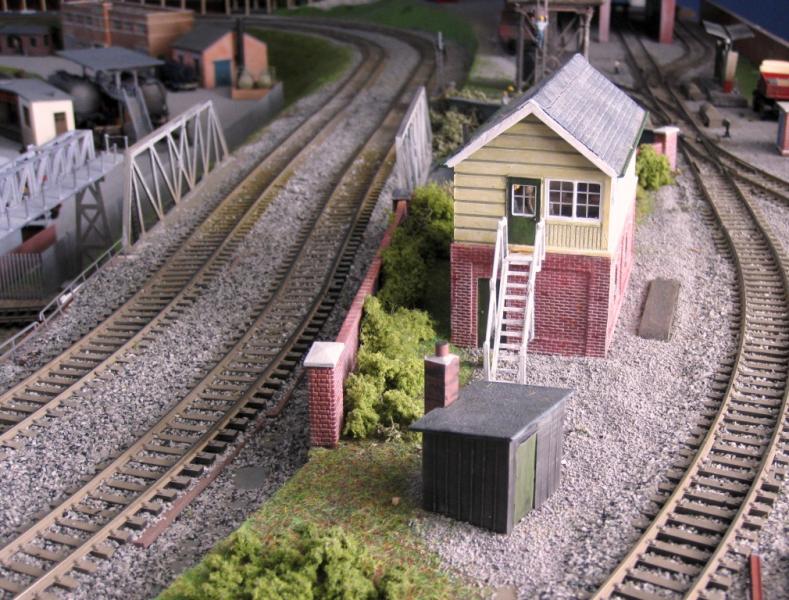
Project finished!
Bob
Posted

Full Member
 thumbs
Because this opened up at page 1, I re-read the thread and I'm amazed that you managed to take everything you needed to Liberia with you - talk about "advance planning" !!! :shock::shock::shock:
Whenever I plan to do something, there are always as many "extras" I need as those I thought I'd got covered. It's a PITA from France, it must be nigh on impossible from the far flung places you take your "holidays" in ……….:cheers (unless the UN has a weekly "Shetland Bus" service to a UK model shop :roll:)
'Petermac
1 guest and 0 members have just viewed this.