Wayne's South Shore Baseboards
Posted
Guest user
Great to see so much progress Wayne. Might be time to switch to the layout thread, because you'll be running trains in no time.
Speaking of trains, do you have any in stock? I'd like to know what you plan to run on there.
Mike
Posted
Guest user
i do however use tracksetta for the actual laying of the track.
:thumbs;-):lol::lol::lol::lol::cool:
Posted

Full Member
Well, now how do I explain that? In the real world of train tracks they never make a full radius (180 degrees), because if you did then there is a lot of force on the train at the tangent points going into and out of that radius. So they use a formula that "pushes out" the two parallel tracks wider than the diameter of the semi circle (180 degree radius). Then you go back into the curve from the tangent point X dimension (X is different for every scale) and away from the tangent point the same X dimension, and a new arc is struck using those two points. This then eases the transition going into and out of a full 180 degree radius.
Saying this in a slightly different way:
Using a 24" radius, draw a 180 degree semi circle. That then creates two parallel tracks 48" apart. Now widen those tracks by 1/2" on each side to 49" apart. (The 1/2" dimension is on a chart that shows the offset for each scale and radius. 1/2" is for HO Scale and a 24" radius) On the chart is also the offset dimension from the tangent points of the arc to the tracks. For HO Scale it is 9". So you measure from the tangent point 9" back up the arc, and make a "mark", then measure going down the straight track 9" and make a "mark".
At this point you take a flexible straight edge (batten) and lay it over the straight track going through your "mark" and bend it through the next "mark" on the true radius, continue bending it following the true radius for a few inches more to help align the batten in a flowing arc. Now strike a new arc between the two "Marks". The resulting shape is called a Cubic Spiral.
Now I sure hope that is understandable Tim, because I'm not sure I can explain it any better than that.
I will say this, once it was drawn on the layout it really looks good. Very smooth looking going into and out of a full radius.
Mike:
I have zero trains, no cars, no engines, no nothing. Talk about starting from scratch! Thats me!
I want to do Diesels only, no steam. Probably in the 80's to current. I will be starting out slowly buying all of this. However I must get started pretty soon, because I will need to test the track as I go along.
Wayne

Posted
Guest user
 I think I'll take your word for it

I have a couple of tight turns on my layout but the 6 axle locos negotiate them without any trouble, although I mostly have 4 axle locos. So many good models to choose from. I'm looking forward to seeing what you come up with.
Mike
Posted

Full Member
A lot less scientific than the cubic spiral, but a similar concept I think, the base radius was plotted out and then I just bent the initial 3mm spline until it looked right.
Nice work there Wayne.
 Last edit: by Marty
Posted
Guest user
except from the NMRA website under Recommended practices:-
Most railroads must curve, but experience teaches that curves should be kept as large in radius as the track plan and space available will permit. Adding easements to these large curves will insure the finest performance and appearance obtainable.
Posted

Full Member
 oops:
oops:Like Owen - I use a piece of string - I think it's called "cubic string " :roll::roll::lol::lol::lol:
Seriously, this side of the pond, we refer to that as "transition curves" but I do it by "eye". I'm sure the "cubic spiral" is the correct technical way of doing this - afterall, in real life, you can't stand at one end of the country and line up the curve into Edinburgh Waverley by "eye" !!!
Your layout is going to look great - and fairly quickly too by the look of things !!
'Petermac
Posted
Guest user
Or by eye !
Your stock still has to go around any bend that you put into your layout, hence why it might be a good idea to have some when you start laying the track, as sometimes one piece of stock will not go around a tight bend but another will. See if you can hire a couple of loco's and stock from your local shop, just for this job. After all he will be selling a lot to you in the future.
Posted
Full Member
See if you can hire a couple of loco's and stock from your local shop, just for this job. After all he will be selling a lot to you in the future.
And you can bet he knows it!
You are right Alan, I know I need some stock, and will be getting some VERY soon. I have been dragging my feet due to this DCC Controller decision. It is looking like it's going to be the NCE PowerCab, it is the only one in DCC that my train store stocks. He can order anything but only stocks the NCE equipment. His "Big Sell" to me is that he has never had to return one to be worked on, and when he does call them he actually gets people to answer the phone. :shock:
What a day and age we live in!
Wayne
Posted
Full Member
The layout is coming along fine right now. I am going to play golf again, so not much will happen on it today.
Come on Friday! :doublethumb
Wayne
Posted

Full Member

Posted
Full Member
'Petermac
Posted
Full Member
Wayne - go easy on those curves !!! I would guess that 17" is about the limit - but then who am I ?:roll::roll:
Believe me I will Petermac. I have not yet committed to the 17" radius, so I will try and stretch it out as much as I can. My problem is it is going around a mountain, so I have to be careful to get it right.
In fact I'm just about ready to go and tackle it right now.
Wayne
PS: Came if first place today in golf (Scramble)! :Happy:Happy:Happy
Posted
Guest user
PS: Came if first place today in golf (Scramble)! :Happy:Happy:Happy
See all this positive thinking is starting to reach the rest of your life

Posted
Full Member
Ran into a huge problem today, the adhesive (Liquid Nails) that was recommended to bond the foam, Did Not Work! It worked just fine bonding the foam to the wood top of the baseboards, but not to the foam to foam bond. It all came loose today, so I went to the craft store and found some adhesive that will bond foam to foam. It is made by Aleene's and is called Foamtastic. I ran a test and it stuck the pieces together very well.
Here is what I woke up to this morning. You can see that the Liquid Nails actually ate away at the foam. Those channels where the adhesive was laid are about a 1/4" deep in each piece. As the adhesive ate into the foam, it pulled the adhesive apart to the point where it wasn't even touching itself from the top sheet to the bottom sheet. It also put a bad curl into the smaller pieces of foam. That's how I noticed I had a problem. I began to pull slightly at each piece of foam and with very little resistance each one let loose.
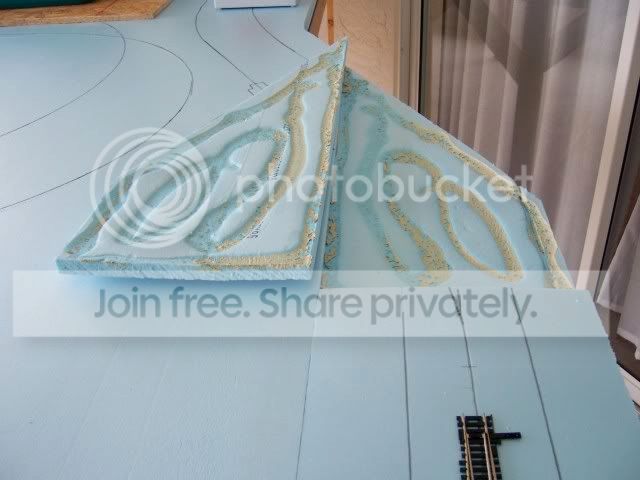
Here is a close up of the two pieces. The adhesive was completely dried on both pieces of foam.

OK, enough of the crying, This is what it looks like now. I think I put everything that had any weight to it in the house on top of the foam to hold it in place for the recommended drying time of 24 hours. At one point SWMBO said "If I wanted to unhook the drain line I could use the kitchen sink too" :hmm , but I think she was kidding!
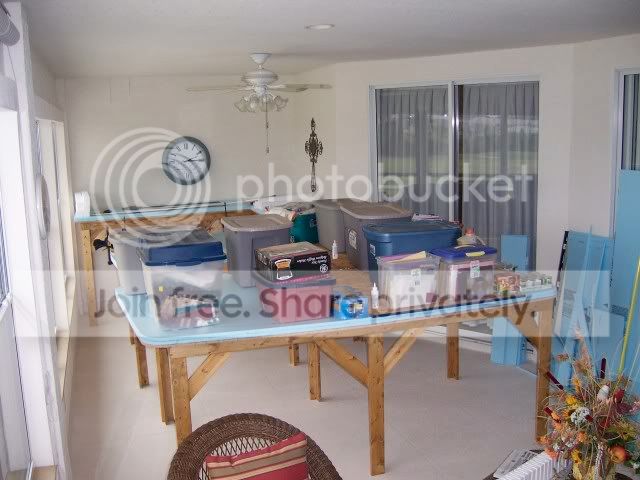
Still need to do the upper table (in the back), but I really didn't want to unhook the kitchen sink, so it can wait till another day when the lower tables have dried.
Oh, by the way, my inclines arrived yesterday, thought I would be putting them down today. :twisted:
At least I caught it before the track was laid down, that would have caused a nuclear explosion heard round the globe.
Wayne
Posted
Full Member
On previous layouts I have used nothing more sophisticated than undiluted PVA or Aleene's Tacky Glue to glue foam to foam. It takes forever to set in an airless bond, but eventually does the job.
I'm curious why LN dissolved the foam like that as it isn't solvent based. Hmmm:hmm
Posted
Guest user
I too have used liquid nails to hold down my foam, but my foam is just the cheap white stuff.
Speaking of things eating foam, call me crazy but I used mineral turps on my New England layout to dissolve the foam where I made the drain. I just kept well clear while it did its stuff, so I avoided any fumes. It worked a treat.
Mike
Posted
Guest user
Now look on the bright side, you've just invented "Wayne's patented river bed construction method". Happy modelling !! :cool wink:cool wink:thumbs:thumbs
Posted
Full Member
Now look on the bright side, you've just invented "Wayne's patented river bed construction method
That's why I like this forum, everyone looks on the positive side of things!
Lesson learned, so now everyone else knows not to try and bond two pieces of foam together with "Liquid Nails - Projects".
Wayne
Posted
Full Member
Glad you are able to save the top sheets of foam Wayne, not a total disaster.
Onwards and upwards.
1 guest and 0 members have just viewed this.