RR&Co - Max's shunting puzzle.
Posted
#96711
(In Topic #5118)

Inactive Member
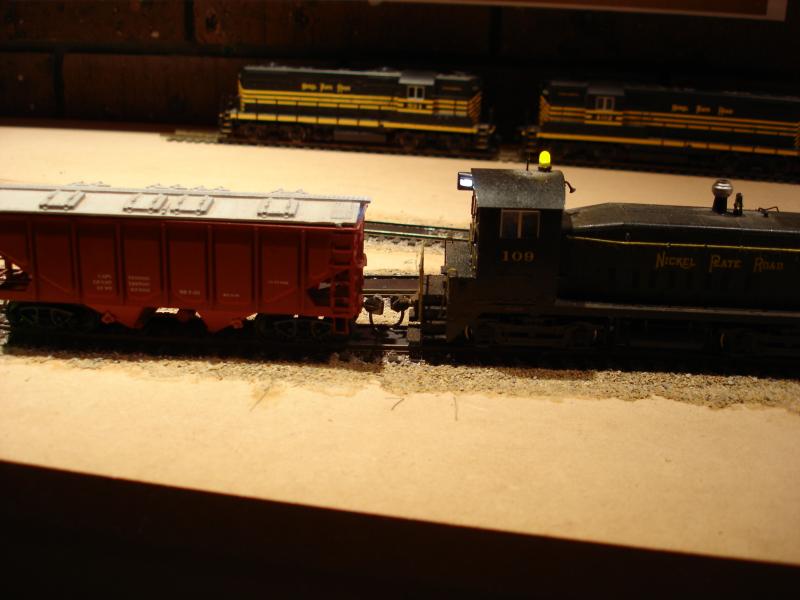
I'll put the captions under each photo.
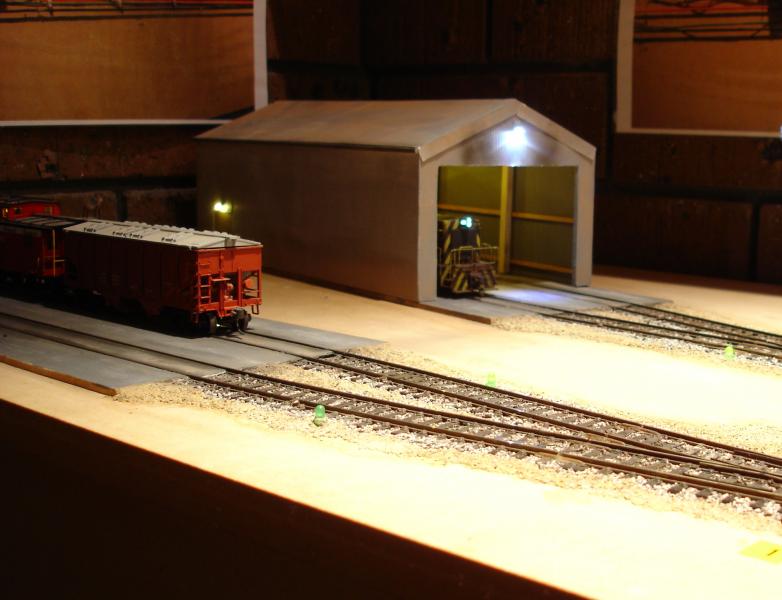
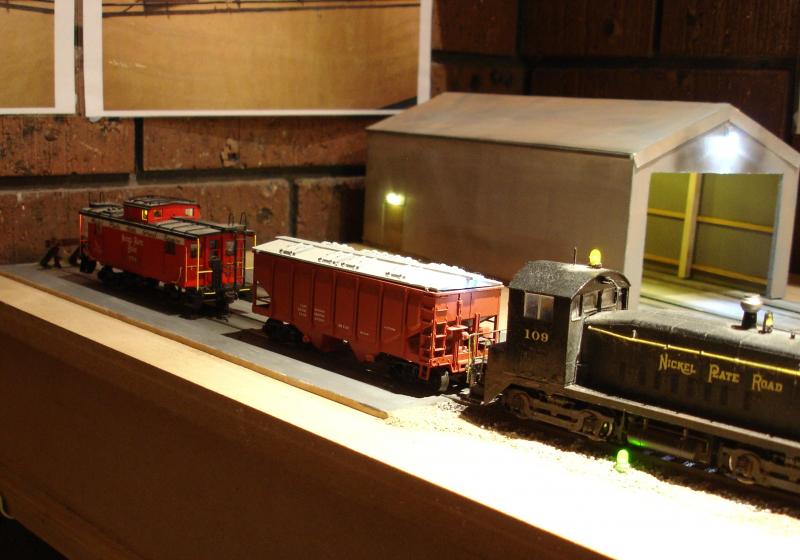
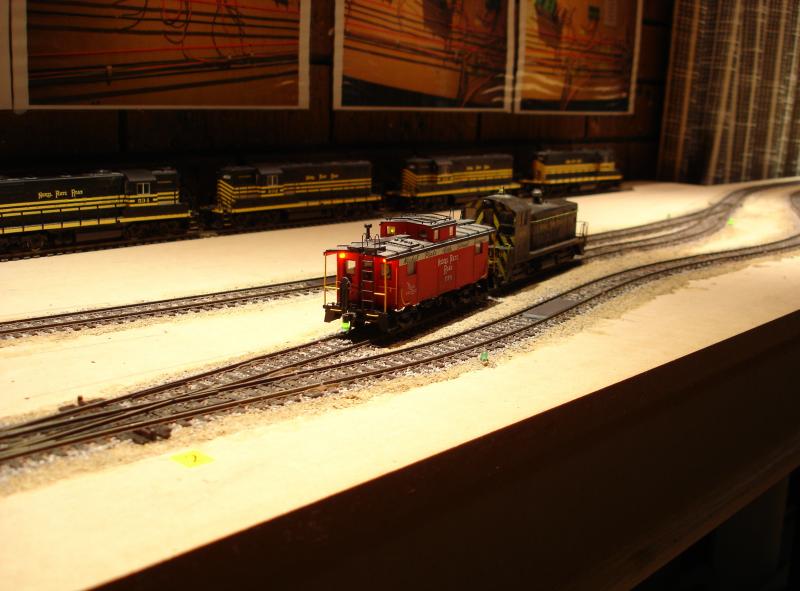
The sequence begins with the loco in the shed.
It goes out past the turnout, which changes for the other track.

. . . and couples on to two wagons. They need to be reversed in order to go out as part of a train.
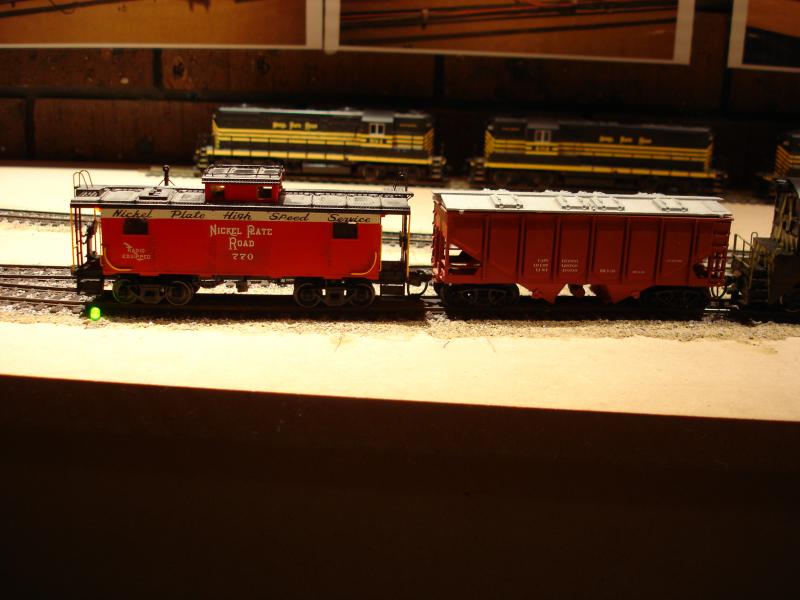
They are pulled out past the double slip and shuffled over the magnet to uncouple the caboose.
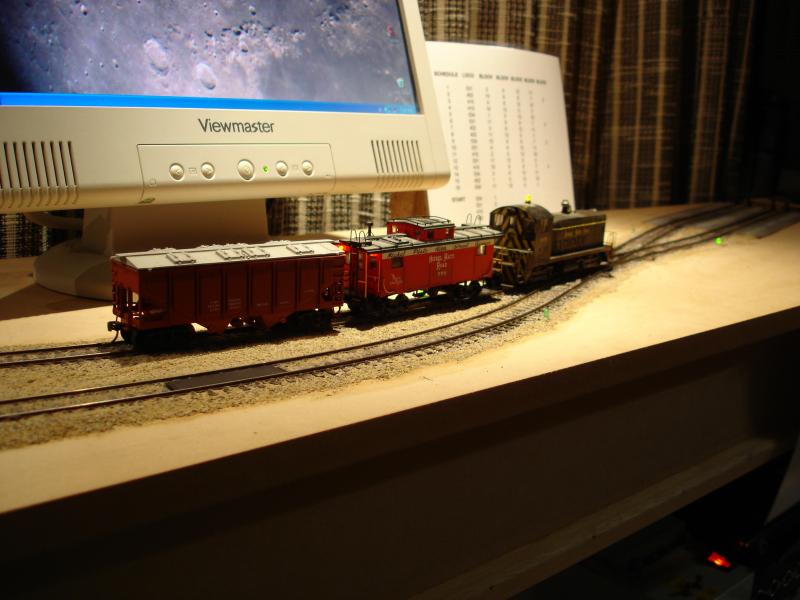
The two are pushed back into the spur, decoupling the caboose.
Back out to the magnet and uncouple the hopper car.
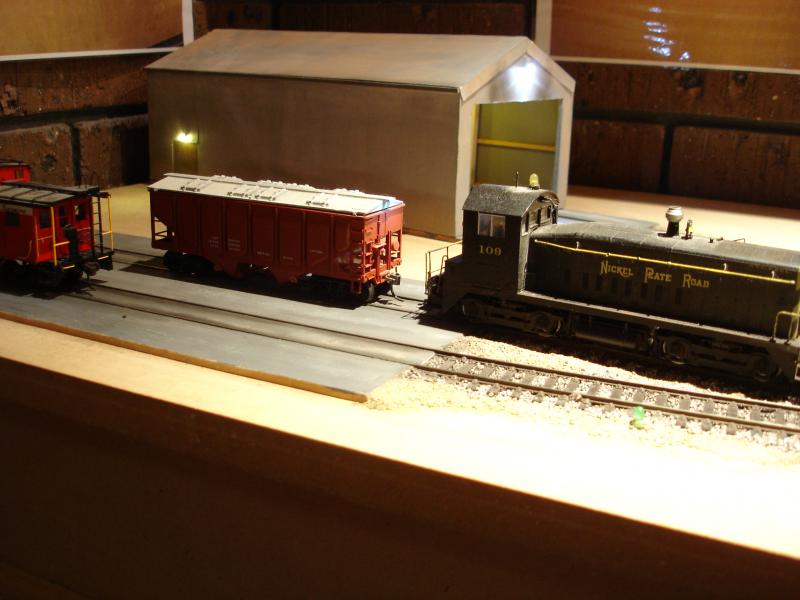
. . . and push it back into the other spur.
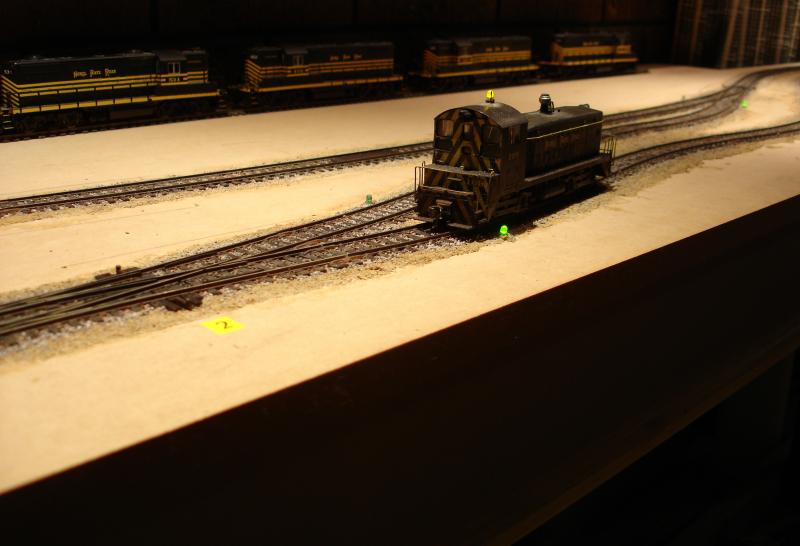
Back out through the double slip.
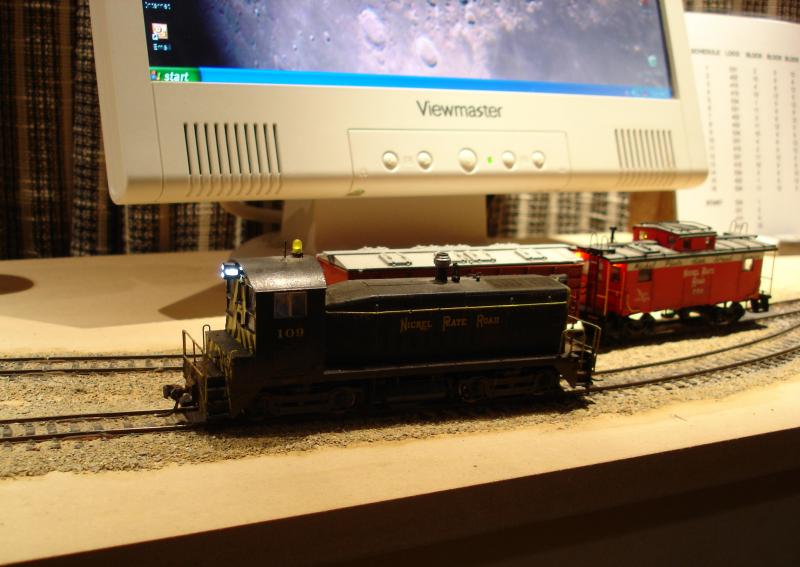
Drive into the spur and hook up to the caboose.
Tow the caboose out past the double slip.

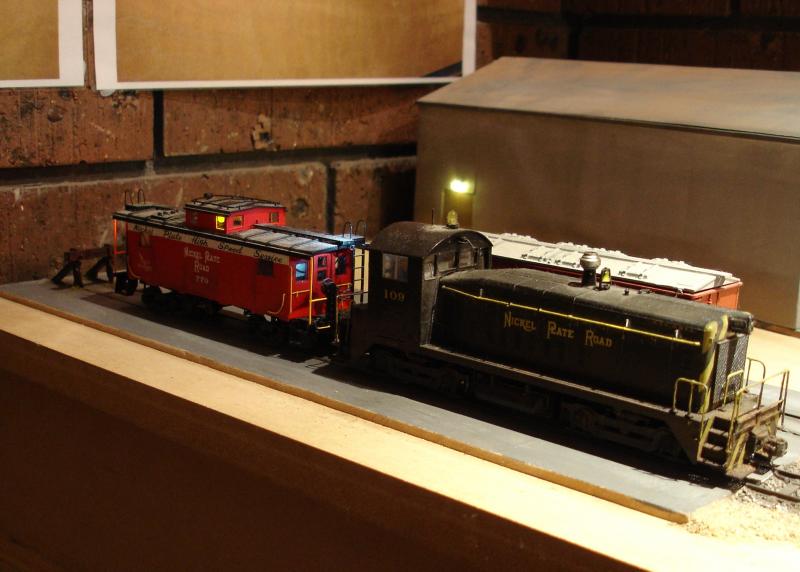
Drive back in and couple to the two cars.
Tow the two cars to the terminal at the other end of the layout. Stop over the magnet and uncouple.
Drive forward, stop and then run around the cars. Two Schedules?
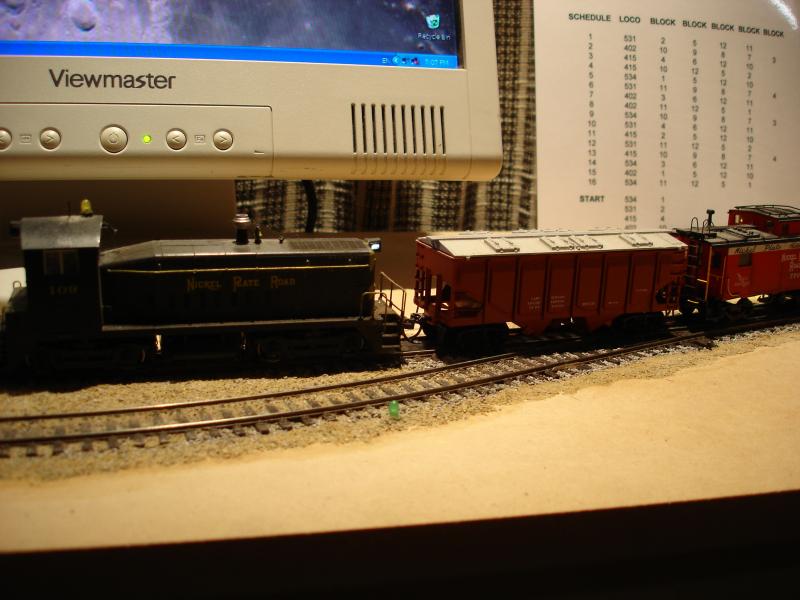
Push the cars forward over the magnet, shuffle to uncouple and then push the cars into the spur.
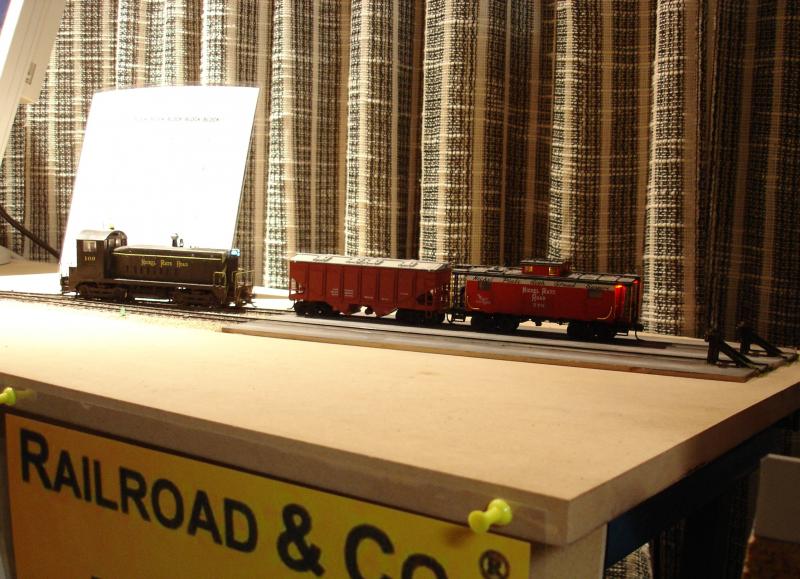
Then the loco can run back to the shed to wait for the second half of the sequence to begin - which will take the two cars back to where they started; with the caboose in close to the buffer and the loco back in the shed again.
I make it 15 schedules for the first half.
The shuffles all have the loco in different positions relative to the magnet (and in relation to the ends of the blocks), and the cars require the loco to stop pushing them in several positions relative to the block ends.
It should be a snap. :shock:
My first impression is that I should begin by writing one schedule at a time. I don't think I can do a compound schedule (where for example, the loco goes out and back in one schedule). It might be possible. I'll give it a go but I'm not confident.
I think I'll need to understand the B & S markers better before I'll make progress. Wish me luck. :pedal
Max
Port Elderley
Port Elderley

Posted
Guest user
well more power to your elbow..
:pathead:pathead
 :cool:
Posted
Guest user
Is the tram track no more?
As you seem to be calling what was the tram track a shunting puzzle now or is it dual purpose?
Brian
Posted
Legacy Member
Max - I have to admit being slightly worried by the pictures on your layout room wall. Most blokes would have trains or fast cars or maybe even Justine on their wall but you seem to have pictures of layout wiring .
Whats that all about ??????????
 :pedal:pedal
Richard. A sorely missed member who lost a brave battle in 2012.
Posted
Guest user
Thats what happens when you become a Railroad & co Nerd.
You have been warned
Brian
Posted

Full Member
Brian :Red Card:Red Card that was uncalled for, i have a smashing collection of track diagrams thank you, the one over the fireplace in the living room is a master piece! and i much prefer sad b****** thank you.Richard
Thats what happens when you become a Railroad & co Nerd.
You have been warned
Brian
Regards
Pete.
ECOS2 with RR&Co Traincontroller and a load of other electronics so i can sit back and watch the trains go by.
Pete.
ECOS2 with RR&Co Traincontroller and a load of other electronics so i can sit back and watch the trains go by.
Posted
Inactive Member
Richard, the photos are a series of shots so I can follow the wiring as it's nearly impossible to see it with the board down. Miraculously, I only had one pair reversed when I started running, and the photos helped to find it easily. Now I've found that visitors like to look at them so they can see the "innards," so I left them there.
I must admit I have been referred to as a "sad b*******d" in the past, Pete - among other things.
 Last edit: by MaxSouthOz
Max
Port Elderley
Port Elderley
Posted
Inactive Member
I can see when it's still wet as the block shows red. :shock:
Later today I hope to start making the schedules. I have to put B&S markers in all over the place, but they have to be restricted to use during the schedules and not stop other passing trains. I'm guessing that using the Conditions tab in the Schedule Properties, I will be able to insert the markers for exclusive use of that schedule.
Does that sound right?
Max
Port Elderley
Port Elderley
Posted
Full Member
During "dry runs," I discovered that my magnets were too low. With Code 75 track you have to cut out the ties, but you still have to pack under the magnet a bit to have just a poofteenth above the railheads. Anyway, now I'm waiting for the PVA to dry.
I can see when it's still wet as the block shows red. :shock:
Later today I hope to start making the schedules. I have to put B&S markers in all over the place, but they have to be restricted to use during the schedules and not stop other passing trains. I'm guessing that using the Conditions tab in the Schedule Properties, I will be able to insert the markers for exclusive use of that schedule.
Does that sound right?
Not quite right max, basically you assign schedules to markers rather than assign markers to schedules.
Double left click on each marker in block editor and you will see a tab call Schedules this where you assign schedules which those markers will work on, other schedules should just sail over them. Just one more point if no schedules are assigned to a marker all schedules that go into that black will obey the marker by dafault.
Double click marker in Block Edit
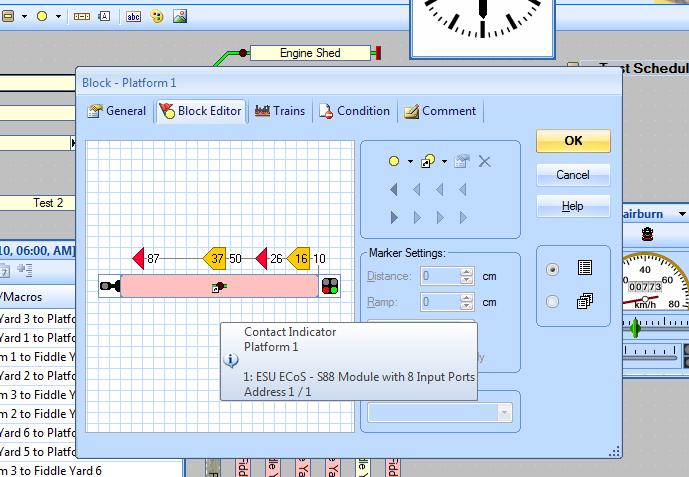
Assign schedules to the Marker. Remember to assign sched to both stop and its paired brake markers, yes its twice the work.

Regards
Pete.
ECOS2 with RR&Co Traincontroller and a load of other electronics so i can sit back and watch the trains go by.
Pete.
ECOS2 with RR&Co Traincontroller and a load of other electronics so i can sit back and watch the trains go by.
Posted
Inactive Member
Max
Port Elderley
Port Elderley
Posted

Full Member
Assign schedules to the Marker. Remember to assign sched to both stop and its paired brake markers, yes its twice the work.
Great photo shots and explanation Pete
I hadnt realised you had to specify schedules to brake markers I assumed they were controlled by the schedule listed in the linked stop marker……………I will have to try it when I get home.:oops::oops::oops:
In an earlier post you suggested that you dont need brake markers for every shunting stop marker because of the slow shunting speeds. That is a very valid point………….I dont use them in every case and where I do I have a much shorter ramp……say 3" instead of my standard 12"
Max
Here are a couple of tips
To avoid confusion with the brake markers give them meaningful names rather than the TC default……like "2 car uncouple" or "Standard Buffer Stop" and so on…………….use the comment tab to amplify these…..when you put the mouse pointer on the stop marker the comments immediately get displayed
You are right about the number of schedules needed to complete your puzzle…….15 sounds about right…………..I have 18 for a fairly similar routine
I test each schedule individually until it is perfect 95% of the time and only then do I move on to the next one. I name them with a prefix that ensures they are displayed in sequence in the schedule window…………for example I have a routine where the branch loco exits the shed and eventually enters the bay and couples up with the autotrain…………..all schedules associated with the Cynwyd branch are prefixed C. All component schedules involving the autotrain have AT added thus the first few schedules read
CAT 1 Shed to Loop
CAT 2 Loop to Branch Entry
CAT 3 Branch Entry to Bay
As above I add lots of comments to explain the purpose and any macros or successor schedules that will be used……because you can access this all with a mouse point rather than drilling down to the properties
Once all the schedules have been individually tested I then, and only then, link them together in what I call a routine……I use a combination of successor schedules plus any that have to be included as as an operation and then I bundle them altogether in a sequence…………….and it is this sequence which goes into the time table as a single line entry
I give all Schedules or Sequences which will appear in a time table different names to what I call component schedules so they will appear in a different place in the schedule list thus
Cynwyd-Dyserth Autotrain Start The sequence above 4 schedules in total
Cynwyd-Dyserth Autotrain Single schedule
Cynwyd Dyserth Autotrain End The reverse end of day sequence when the loco parks the autotrain overnight in the bay and returns to the Engine shed 6 schedules in total
With these 3 I can use the timetable to programmes the autotrain to start in the morning……shuttle back and forth during the day and return to shed in the evening………….I am going to add other variations but this hopefully explains the principle
I have learned through bitter experience…….test one schedule at a time…..name each one logically (its very easy to rename) and add lots of comments
Kind Regards
Posted
Inactive Member
I agree with testing thoroughly before moving on. I'm up to the exciting part now. :Happy
Max
Port Elderley
Port Elderley
Posted
Full Member
Whiskers? give us a clue?All good stuff, John. Thank you. I've hit a bit of hurdle with the Kadees. I'm off to the shop today to replace them (now I've raised the magnets), with whiskers. Sol's advice - and it makes sense.
I agree with testing thoroughly before moving on. I'm up to the exciting part now. :Happy
Regards
Pete.
ECOS2 with RR&Co Traincontroller and a load of other electronics so i can sit back and watch the trains go by.
Pete.
ECOS2 with RR&Co Traincontroller and a load of other electronics so i can sit back and watch the trains go by.
Posted
Guest user
Posted
Full Member
Regards
Pete.
ECOS2 with RR&Co Traincontroller and a load of other electronics so i can sit back and watch the trains go by.
Pete.
ECOS2 with RR&Co Traincontroller and a load of other electronics so i can sit back and watch the trains go by.
Posted
Guest user
When Bachmann H0 rolling stock first started to use McHenry/Ez-Mate knuckle couplings, they slopped a bit in the "standard" box so they thinned the box down a bit & to fit Kadee #5, the bronze spring got squashed a bit & the shank did not freely move so some modellers cut some edge off the bronze spring to be able to fit it all into the box.
Kadee in their wisdom ,decided to create new couplings that overcome that problem but still fitted in the standard box without problems so out came their version of whisker couplings.
New click boxes #242 & #252 & as well to add to existing #232 & #233 boxes.
Posted
Guest user
 lol::cool:
Posted
Inactive Member
Max
Port Elderley
Port Elderley
Posted
Inactive Member
Max
Port Elderley
Port Elderley
Posted
Inactive Member

I couldn't figure out why it wouldn't go into Block 6 - and then it dawned on me! Block 6 is red, why? The caboose has LEDs! TC can see another train ahead and won't let the loco proceed . . .
Gather 'round Gurus. This is a tricky one. :thud
Max
Port Elderley
Port Elderley
1 guest and 0 members have just viewed this.