making Rock Faces the RJR way
Posted
#12554
(In Topic #1130)
Guest user
In answer to the question how I do the rocks. :-
It becomes obvious how the shapes appear when you see how they are done !!
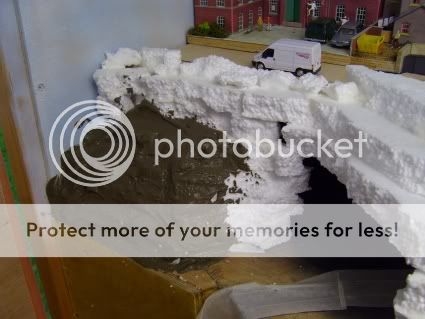
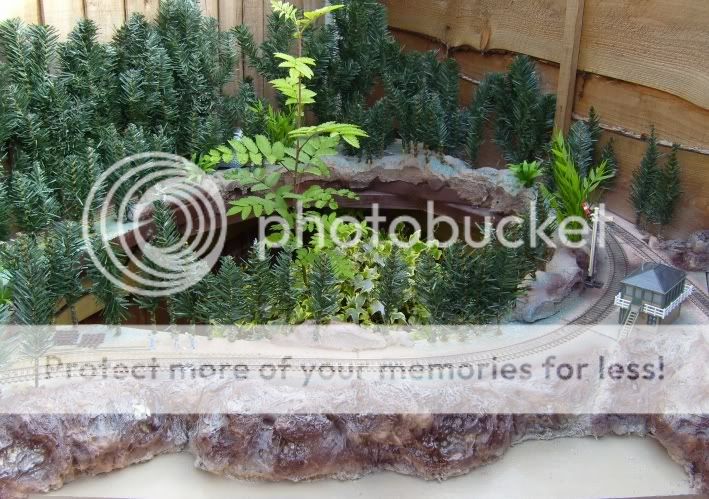
I mentioned I insulated the shed with 1" styrene, well while I was cleaning up the offcuts the pile started to look like a rock face !!!
So I took the idea further, stack of polystyrene strips stuck together with the polystyrene cement. Then the problem of a surface finish came up. The styrene ball effect did nothing for me. The answer came in the form of a bucket that I had mixed ceramic tile adhesive in ( the powdered form) It had a look of rock. So I mixed some up an painted it on with a sttiff brush.
When dried it look a bit flat and boring, this is improved by the use of a product available from B&Q in spray can. It is a decrative finisih made by Plasticote called flecspray and is available in several colours. I had previously used it on my outdoor layout as ballast. The colour I used for the rock is Gothic Grey and gives the speckled finish..
Finally it still looks a bit uniform so my favourite colour Matt Black is sprayed on from another aerosol in a fine patchy finish.
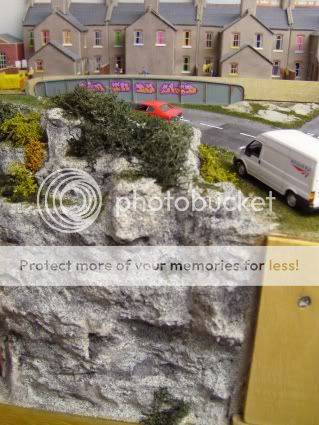
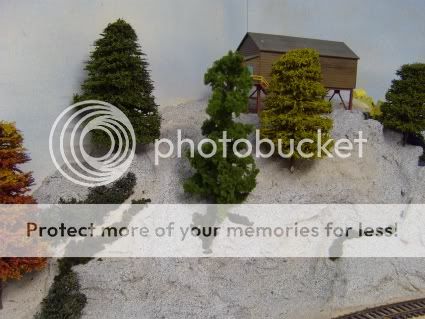
Last job add grass scatter to taste.
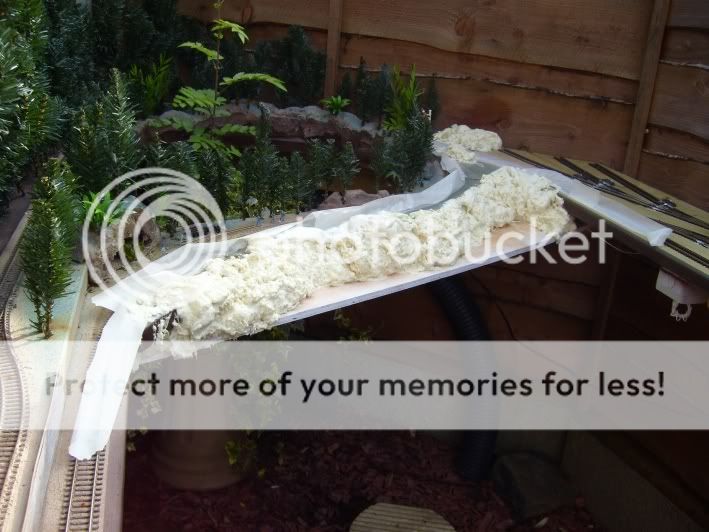
This larger area that forms the tunnel at the back of the shed was done in the same way but a piece of ply was built into the pile of polystyrene to add strength.
The grass is dropped from above if it finds an area flat enough to settle on fine if not you get expossed rock
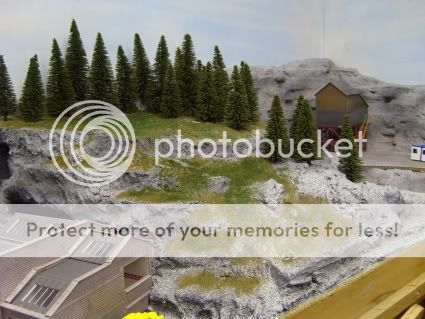
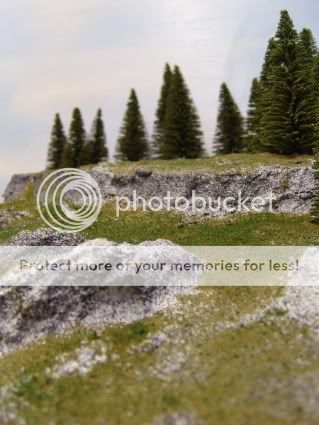
I use 2 colours of grass just to give a patchy non uniform appearance.
I hope this helps and answers the question.
Posted
Inactive Member
Les
Devon Junction
Kernow Junction
Kernow Junction

Posted
Full Member
Brian(G)
Posted

Full Member

Petermac
'Petermac
Posted
Guest user
If you want an even quicker way of making hills …..
When I had the outdoor layout I needed waterproof scenery, in to the back of the van and out came some expanding foam in a can !!! Such as "No more big Gaps"
Squirt it where you want it
Let it set expand and set (about an hour) Then hack at it with a bread knife, to loose the round baloon shapes. Finally spray with car spray aerosols in a couple of colors, this is chocolate brown and black.
John
RJR
Posted
Guest user
I know that MikeC has used this type of foam, so it's nice to see a few shots of it in use.
Posted
Full Member


craigmunday.smugmug.net
Posted
Guest user
cheers Brian
Posted
Guest user
Posted
Guest user

Posted
Guest user
Posted
Guest user
1 guest and 0 members have just viewed this.