Jeff's (SRman) work bench and projects
Posted

Full Member
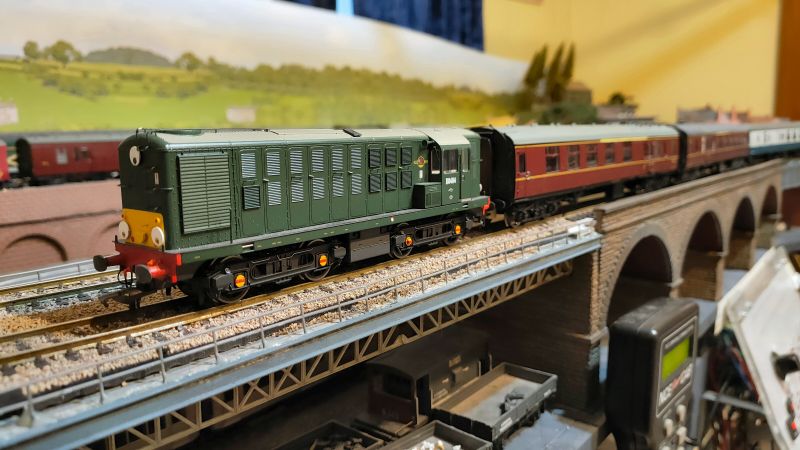
Wow! The first video was a trip down memory lane for me. Those Red Metropolitan line sets of that era were my "bread and Butter" when staying with Gran (Pinner or Harrow) or visiting my Uncle (Northwood Hills). Memories of the "express" runs up destination Amersham, whizzing past slower Bakerloo line (all stops) en route to Harrow-on-the-Hill.
Not quite up there with GWR but runs a very close second. Well done, great stuff indeed.
:doublethumb :doublethumb :doublethumb

Posted

Full Member
I think the appearance is much improved already. Note that the ground floor is still on the layout.
Yesterday evening was spent fitting some Keen Systems replacement coupling parts to four Bachmann mark 1 coaches. the process was very straightforward. Keen intend them to be used with their own rigid imitation buckeye couplings, but I put NEM fishtail couplings in, replacing the cranked tension locks or close-couplings with straight tension locks or Kadee #18s, depending on the coach. I haven't painted them yet.
Posed here with the Heljan class 16, also with straight couplings fitted (why do Heljan fit cranked couplings when they aren't needed at all?). They all coupled up perfectly.
Jeff Lynn,
Amateur layabout, Professional Lurker, Thread hijacker extraordinaire
Amateur layabout, Professional Lurker, Thread hijacker extraordinaire
Posted
Full Member
The straight parts of the cab front handrail at one end on my DRS 66/9 had bent and broken off the centre post. The plastic was supposed to be straight but had set into a curve, and attempts to straighten it before regluing failed, so I had to come up with another solution. The near-vertical side parts of the handrails were intact, so I cut the "straight" parts off just to the side of the support post at the top. The centre support had broken off flush with the cab front. I decided that I would replace the entire centre section with brass wire, but had to find a way to mount it.
The answer was to drill new holes (#76 drill bit) for the ends immediately beside the original posts, plus a larger hole for the centre support. I cut a section of plastic rod to fit the centre then trimmed it once it was glued in, and bent the ends of the brass wire to 90 degrees, after checking that the straight section exactly fitted the gap. The ends were trimmed and filed slightly flat to butt up against the existing posts.
I haven't painted it yet, but I hope the photo shows more clearly what I have done. I'll add a tiny amount of filler to disguise where the brass bends in, then paint it white to match the original.
Jeff Lynn,
Amateur layabout, Professional Lurker, Thread hijacker extraordinaire
Amateur layabout, Professional Lurker, Thread hijacker extraordinaire
Posted
Full Member
P.s. I know the headlights are wrong for this type. I bought the model very cheaply as a hybrid with the later body on the earlier chassis. Part of the work I did earlier was to swap the fuel tank for the correct, shorter type. The WiPAC headlights aren't working at present, to when I go to fix them, it will be a good opportunity to modify the lights.
Jeff Lynn,
Amateur layabout, Professional Lurker, Thread hijacker extraordinaire
Amateur layabout, Professional Lurker, Thread hijacker extraordinaire
Posted
Full Member
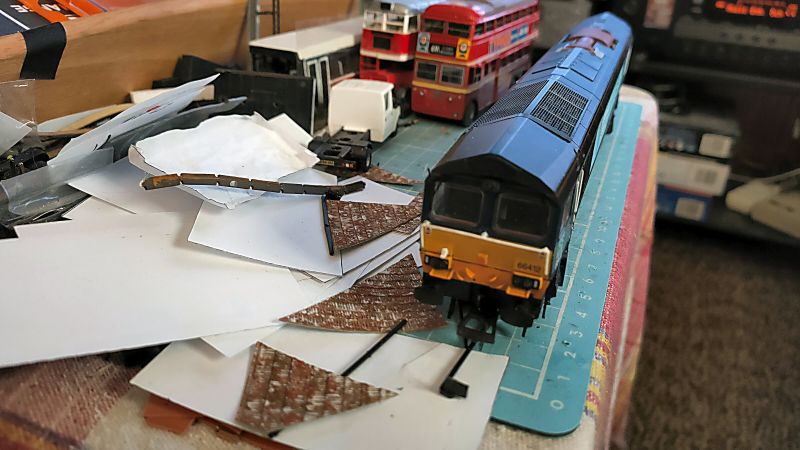
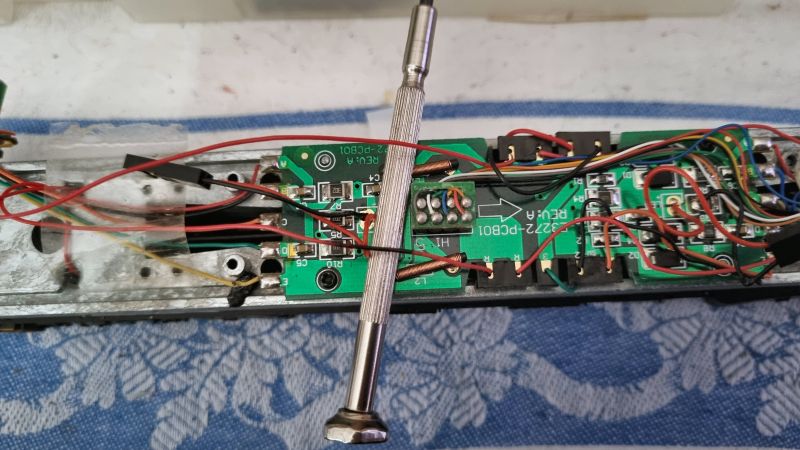
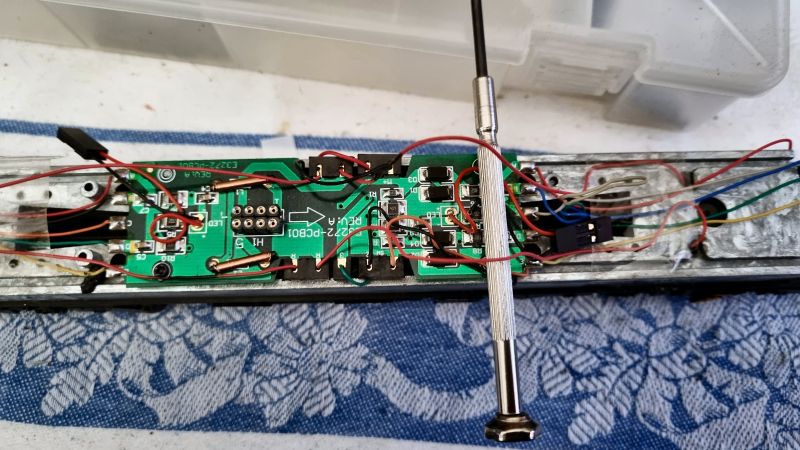
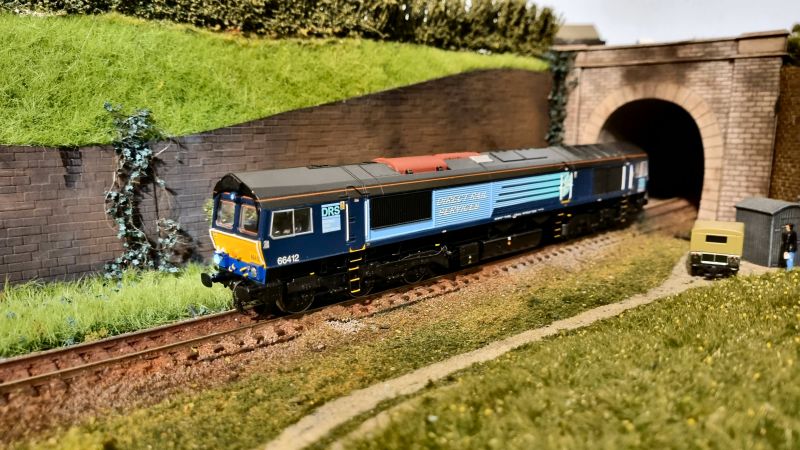
I bought some spare parts from Bachmann with a view to eventually fixing this locomotive up to make it more accurate, and finally bit the bullet a few weeks ago. As an interim measure, I had changed the fuel tank assembly a while back, but this time I went for a full chassis changeover. It involved disconnecting wires and removing the bogies and fuel tanks (again), plus the cab interior mouldings before putting everything back onto the new chassis. I took a couple of photos of the wiring before disconnecting anything, and carefully stored the various screws so I could remember which order they came out and where they went on reassembly. There were only a couple of minor glitches: one where I was threading the fuel tank switch wires back through the metal chassis block, when one of the wires dropped off so had to be resoldered, and the second hitch was when a wire dropped off one of the lighting boards inside the body as I tried to replace it on the chassis. Both wires were re-soldered and checked OK. I tidied up the wires and put some new tape over them to keep them in place neatly … I think I did a better job than the factory!

Before putting the last body screws back in, I checked the chassis was running properly on DC (I swapped the decoder out with a blanking plug temporarily). It ran very sweetly, but the lights worked in reverse, so I have swapped something somewhere. Adding 1 to the CV29 value in the decoder did nothing - it went in reverse but the lights also were reversed, so I pulled the retainer off the brush wire terminals and swapped those over. To standardise with the other class 66 locos, I adjusted the CV 29 value again, so the radiator end is actually the reverse direction (it's American!), but all is now working as it should.
The photos of the circuit board show it as it was before I started work. The third one shows it with the wrong colour buffer beam area which had to be repainted with a red centre and yellow the light cluster boxes (4th photo).
 Last edit: by SRman
Jeff Lynn,
Amateur layabout, Professional Lurker, Thread hijacker extraordinaire
Amateur layabout, Professional Lurker, Thread hijacker extraordinaire
Posted
Full Member
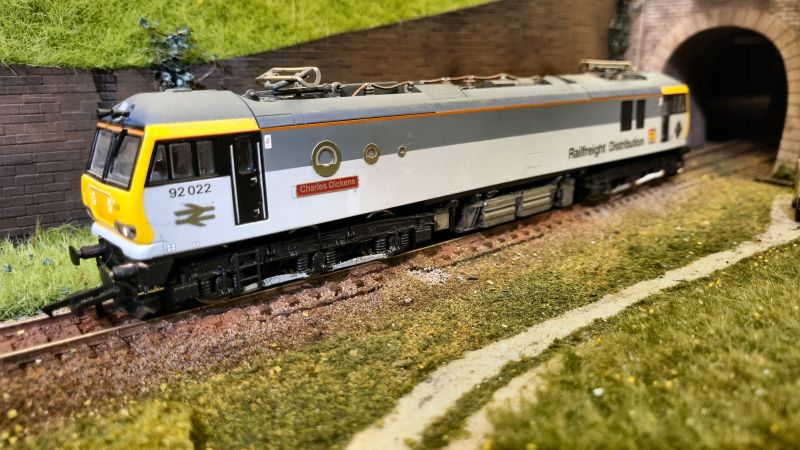
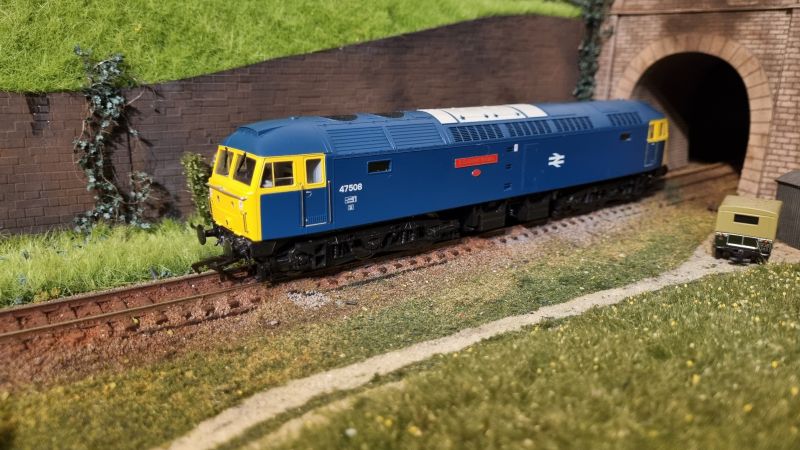
This is what lead to other issues. In pulling some of these items out of the storage drawers, I found bits falling off or loose, so put them aside for repairs. Of these, some were very minor, but the two that needed a little more work were my Hornby class 92 with a Hornby class 60 chassis installed; this required both deflectors re-glued, and also one of the coupling pockets. The body is not sitting quite correctly on this loco, so I'll have to have a further look at it later (1st photo).
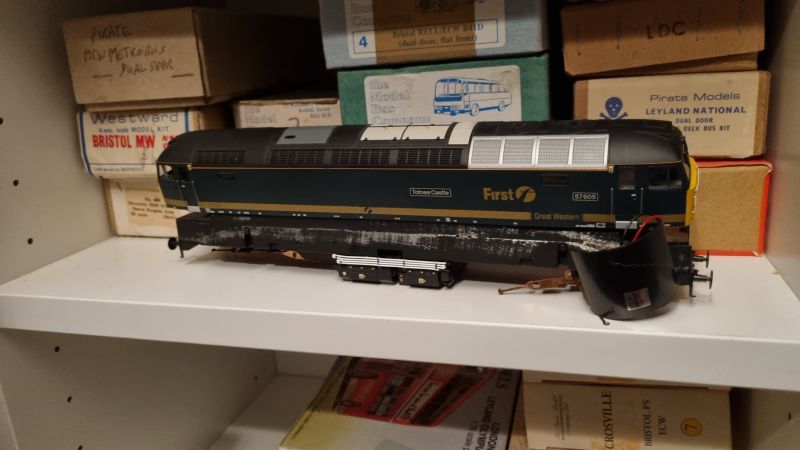
The other problem locomotive was a Heljan BR blue class 47, which had a loose bogie. On investigation, the top clip had come loose. On further investigation, I found that it was actually about to snap along one side, and the one at the other end was ready to do the same and let go. I may plunder a Heljan class 57 that almost never gets run for the necessary bogie parts, or even take the whole bogies and substitute the side frames from the 47. I do have some Heljan spares around, but I'm don't have those top clips. They should be available from Gaugemaster (but were out of stock when I checked), but the postage for just those alone will be a killer unless I find some other "essential" items I need from them - Gwiwer has offered to act as an intermediary for me to get them when they become available. In the meantime, the 47 parts were put in a take away container to keep them all together.
One good thing out of all this is that I now have a heap of more up to date photos of my stock.
Continuing the story, the Heljan class 47 is active again, at the expense of a sacrificial class 57 (the Bachmann model has a much better finish, so this one is more "expendable").
47 508, 'S. S. Great Britain' was the locomotive involved with cracked bogie mounting clips. 57 605 'Totnes Castle' was the donor of the replacement clips … or actually, the entire inner bogie components. Because of the somewhat modular construction of the Heljan mechanisms, I was able to swap the innards while retaining the 47 bits.
The method involved firstly removing the sideframes from the bogies, which are on spigots and simply clip off outwards. The reason for this is to release the wiper pickups, which in turn negate any need to unplug or de-solder any wires. The next step was removing those top clips to release the 57 bogies (the 47's had already just fallen out!). That then allows the bogies to be removed completely, hopefully with the cardan shafts still attached. It's no biggie if they aren't.
The base plates of the bogies also unclip, with a little persuasion with a flat-bladed screwdriver on their side clips. This allows the wheels to be dropped out, with two reasons for this in my case. One was to ease replacing the pickup strips later, but the other was to allow me to put the newer plated wheelsets back into the 47 (the 57 had original brass wheels). After swapping the wheels, I clipped the bases back on to help keep the two halves of the bogie towers together.
Reassembly was the reverse of all this, with particular attention being paid to getting the cardan shafts engaged at both ends. To ease this operation slightly, I levered the PCB out from its rubber retaining strips. That let me see what I was doing to manoeuvre the shafts into their slots. Once those were engaged, I could clip the tops back in, locating them on the yokes that stop the bogies sliding back and forth. It's a little like a Chinese puzzle where everything locates everything else. The pickup strips can then be threaded back through and can be reseated on their spigots on the sides of the bogies. Removing the base plates can make this easier, but it can be done without doing that, it just means more bending and tweaking of the pickups afterwards.
The final step is to push-fit the side frames again. The class 47 and 57 frames are not quite the same, in that the 57 has sandboxes but the 47 doesn't. Either set of frames will fit, though.
After all this, I tested the 47 quickly on the programming track, with a short-circuit being reported. Turned out I had assembled it with the pickups at one end on the wrong sides. That was quickly fixed and the 47 glided silently around the layout on test.
Photos 2 and 3 show the forlorn remains of the 57, together with the broken top clips. It can be restored to running condition once the spares become available.
Last edit: by SRman
Jeff Lynn,
Amateur layabout, Professional Lurker, Thread hijacker extraordinaire
Amateur layabout, Professional Lurker, Thread hijacker extraordinaire
Posted

Full Member
Posted
Full Member
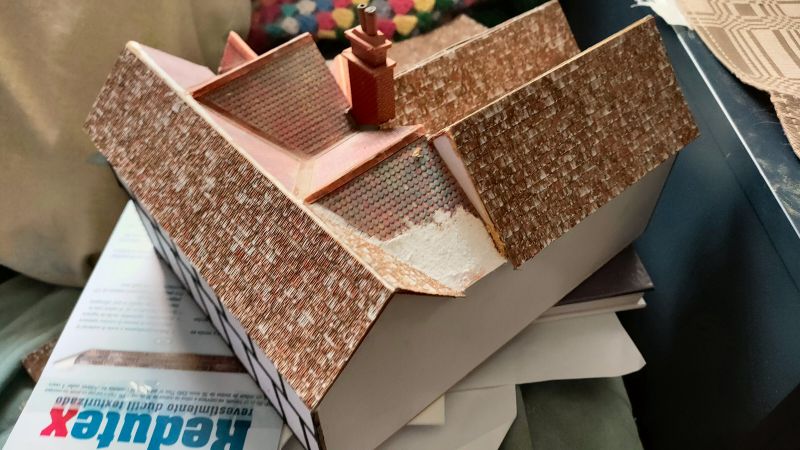
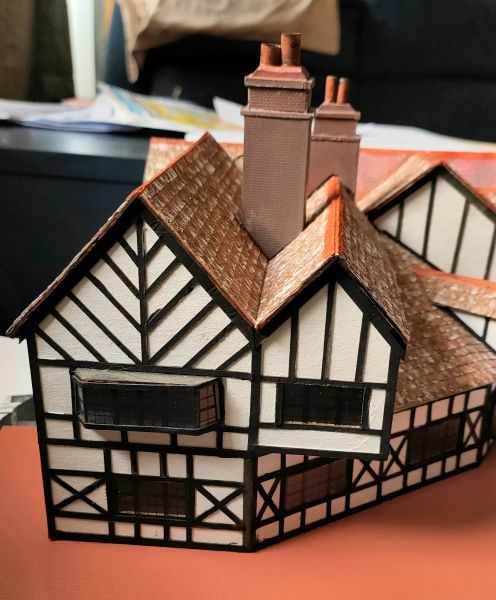
The most recent item is resurrecting the old Albion Garage from my old Middlehurst and High Cross layout. The first photo shows it in place there, the next shows part of the hill where it will be located (with unpainted green foam showing) and the following ones show it as it was being repaired after storage for around 13 years, and in a trial position on the piece of scenery that will go back onto Newton Broadway behind the engine shed area, signal box and level crossing. It is still a work in progress. The Doctor Who, K9 and two Dalek figures in the second photo were courtesy of a good friend who is into 3D printing - he just presented them to me one day, knowing I am a long-term fan (since 1963, in fact!).
The good thing about not having fixed the scenic section down means I can work on it off the layout. Once it is ready to put on more permanently, I'll deal with it in the layout topic, and blend it in properly.


Last edit: by SRman
Jeff Lynn,
Amateur layabout, Professional Lurker, Thread hijacker extraordinaire
Amateur layabout, Professional Lurker, Thread hijacker extraordinaire
Posted

Full Member
I am very pleased you are back. Keep the photos coming!
Cheers,
Claus
Cheers,
Claus
www.flickr.com/photos/ellef/
Claus
www.flickr.com/photos/ellef/
Posted

Site staff
Ed
Full Member
Accurascale has featured very prominently in new arrivals since December 2022. I have now acquired no less than four of their lovely class 92 electric locomotives, two with factory-fitted sound, one with sound added afterwards, and one non-sound. In fact, the first to arrive was Europorte 92 043 Debussy in TT grey, had sound originally, but I swapped the decoder into GBRf 92 032 IMechE Railway Division which didn't originally have sound fitted, adding an Accurathrash speaker in the process (I left the original speaker in 92 043 for future use). The other two were GBRf 92 020 and DB Schenker 92 009 Marco Polo. Accurscale were very obliging in sending me the ESU file with their settings for the non-sound LokPilot decoder I fitted into 92 043. This means that the functions not related to sound all match the ones with sound (e.g. F20 turns off the tail lights for when a train is being hauled). I have also fitted drivers and sun blinds into three of them (so
far).
I had some fun reprogramming all of them to reverse the effect of F8: by default, F8 had to be on to keep both pantographs down to represent third rail running, so I altered that using my LokProgrammer software so that if F8 is off, it acts as DC third rail mode, and pressing F8 activates the pantograph at one end for overhead line operation.
Also in that time period, two sets of three CDA china clay hoppers arrived in EWS livery variations.
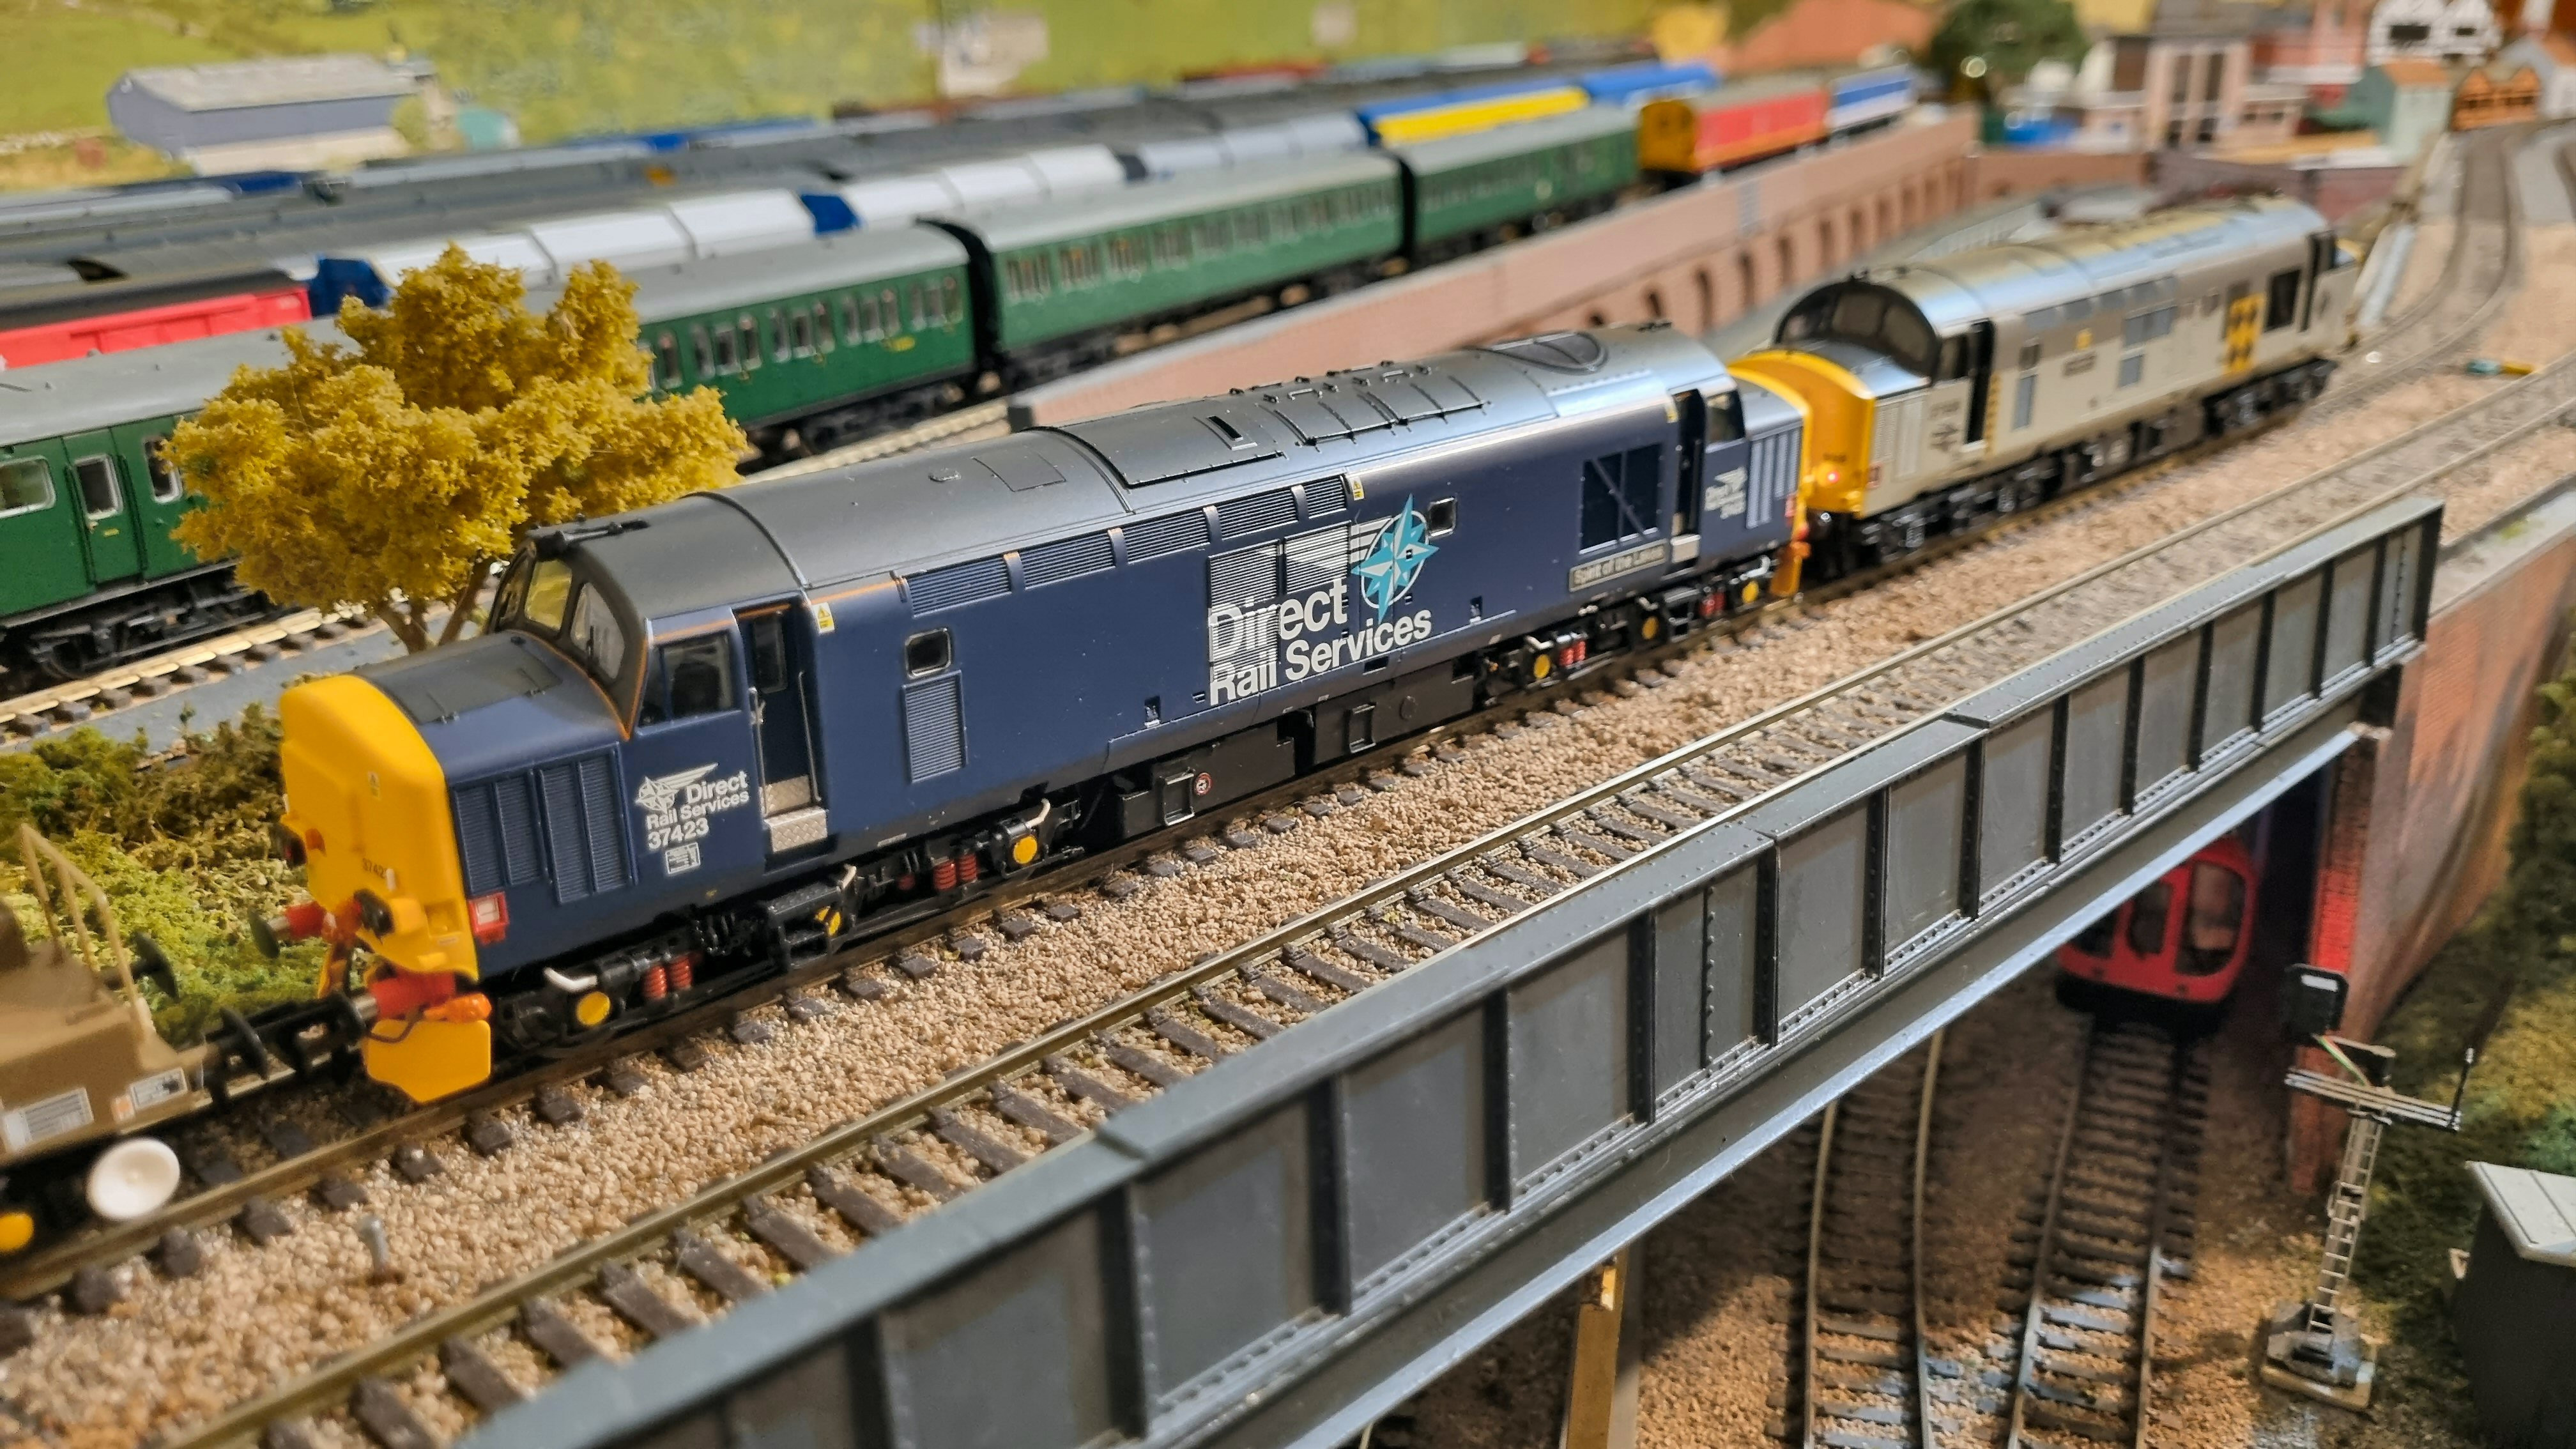
Then, the first of my class 37s arrived, DRS 37 423 Spirit of the Lakes with sound fitted, which was really a last minute decision to buy - one I don't regret at all. Two further 37s are still to come: Railfreight Distribution 37 026 Shapfell is on its way right now, and DRS 37 609 is on order expected fairly soon (That is just arriving at Accurascale at present). I will be retro-fitting sound to both of the later deliveries - I was too late to order them with sound from the factory. I have remapped several functions to bring them into line with the 92s and 59, all of which have F20 to disable the tail lights - why the 37 had that on F17 I don't know!
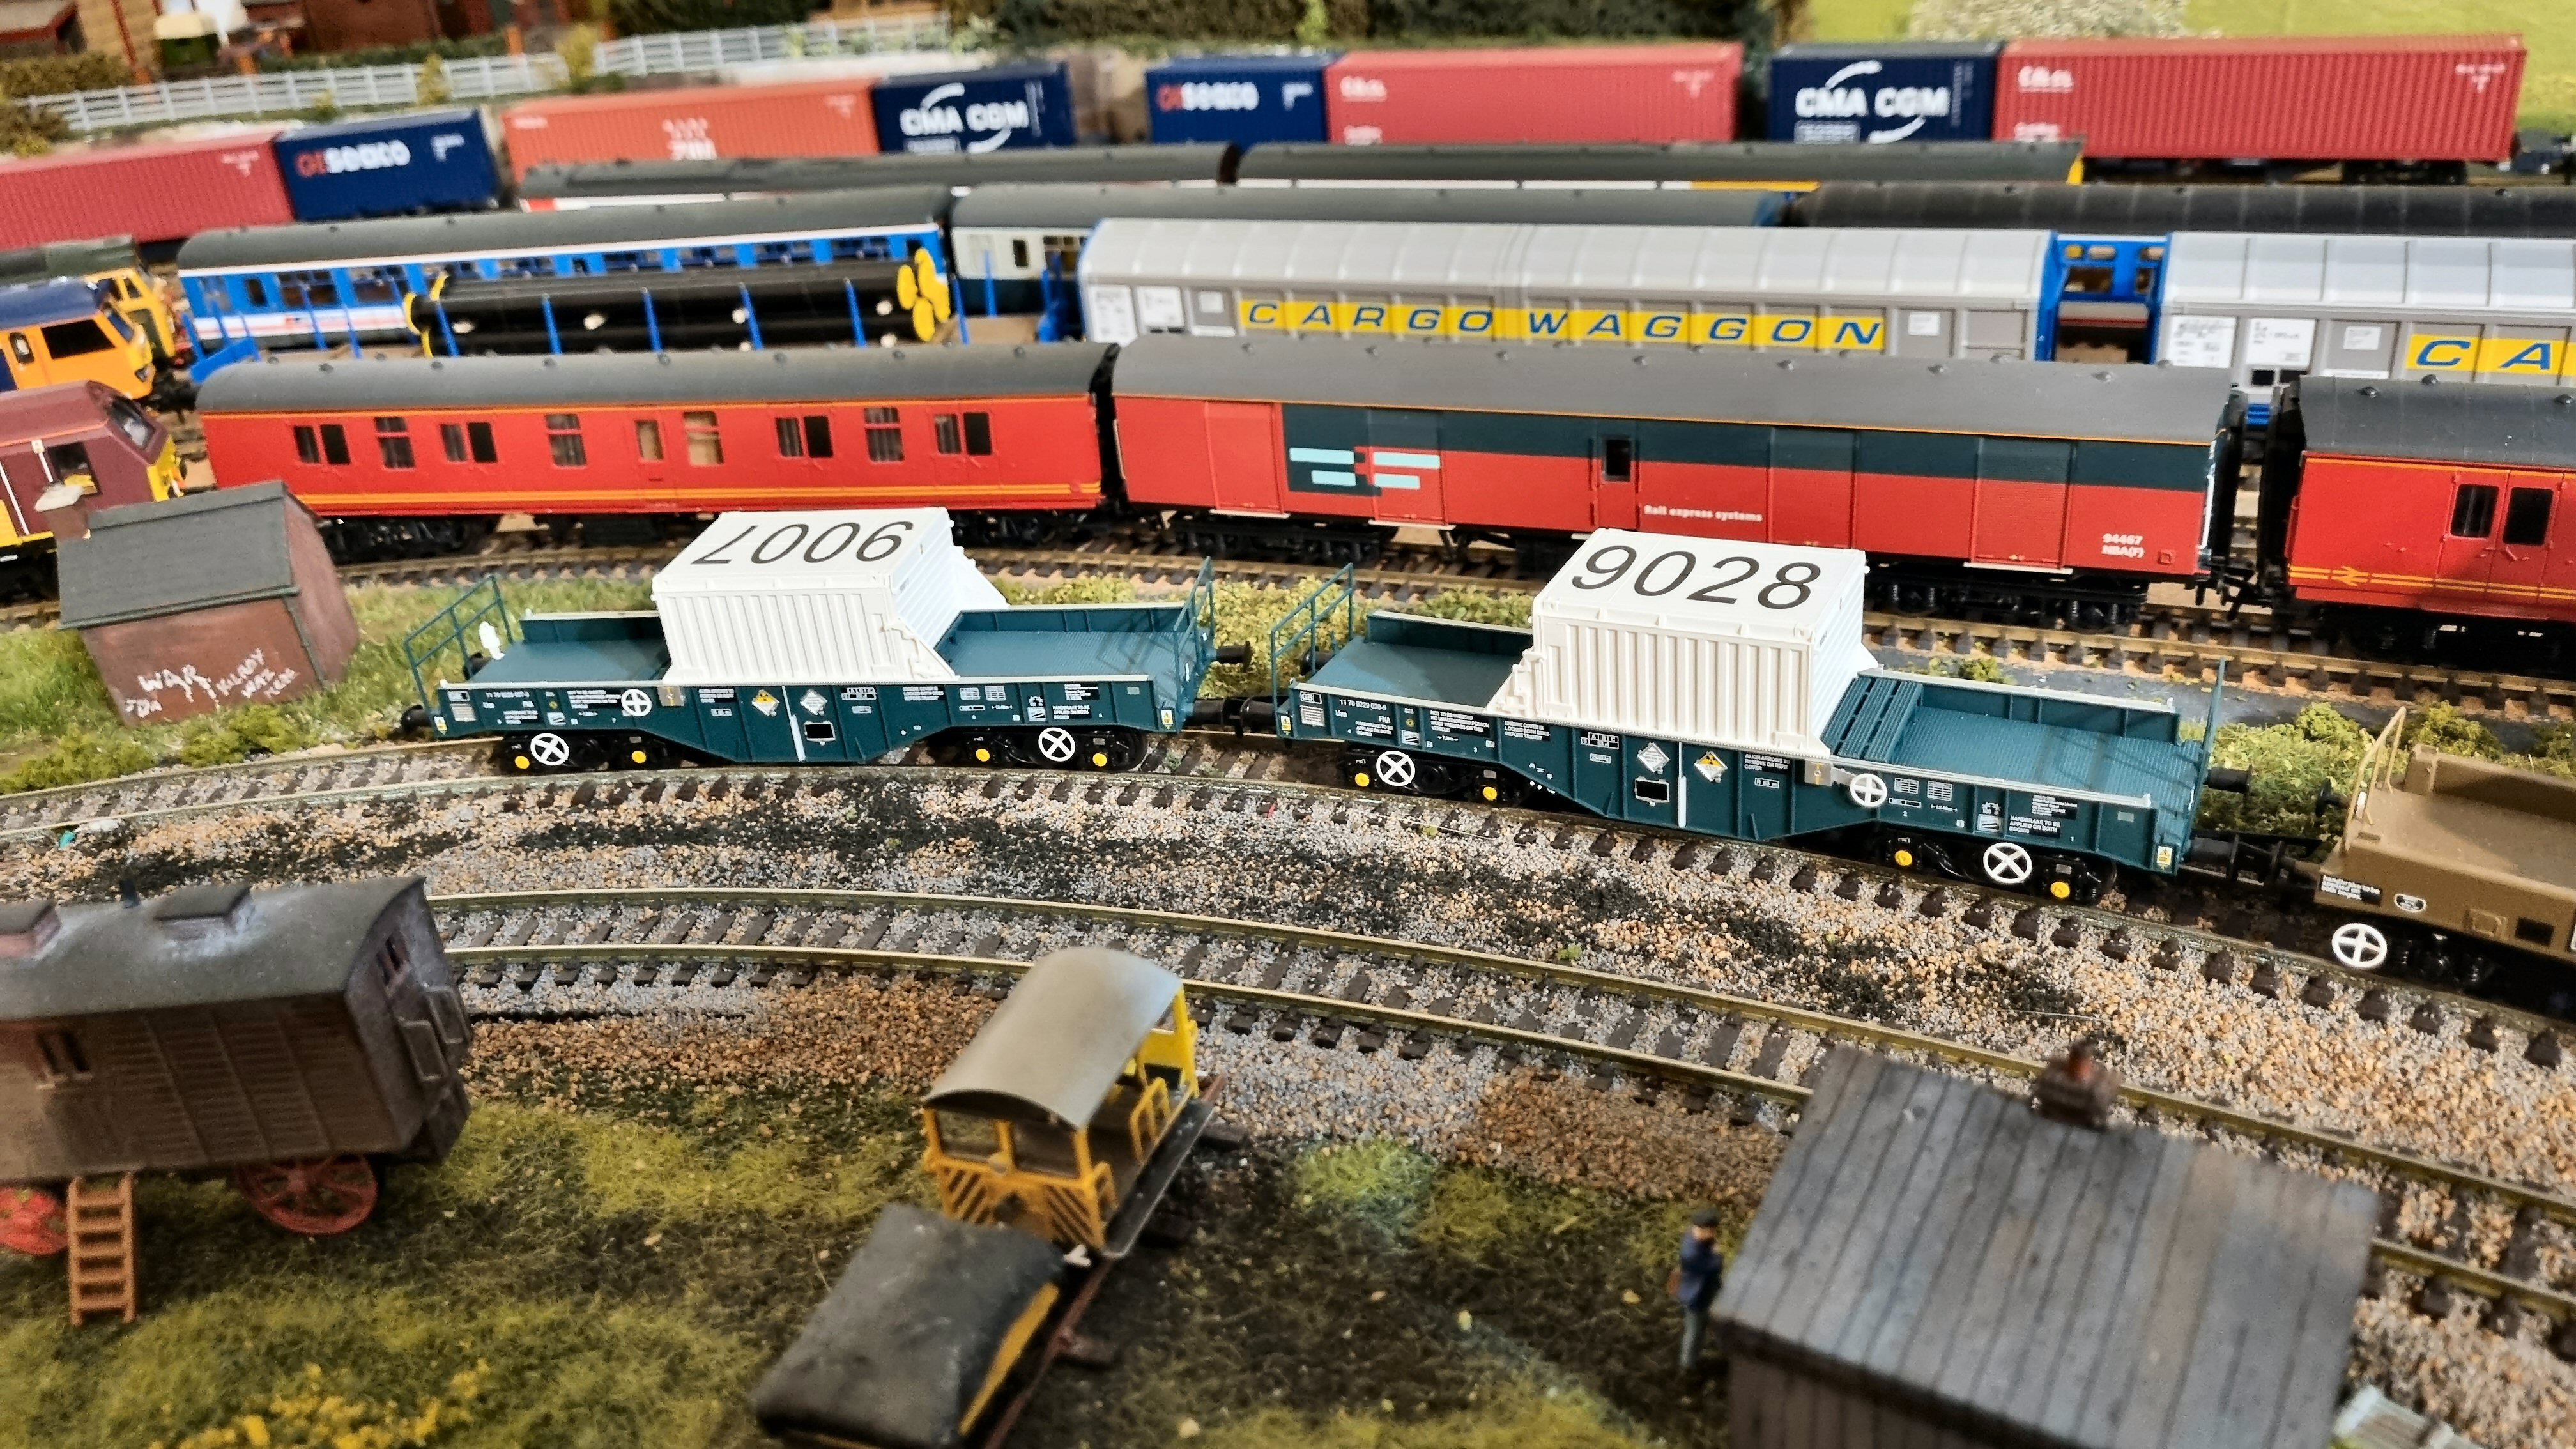
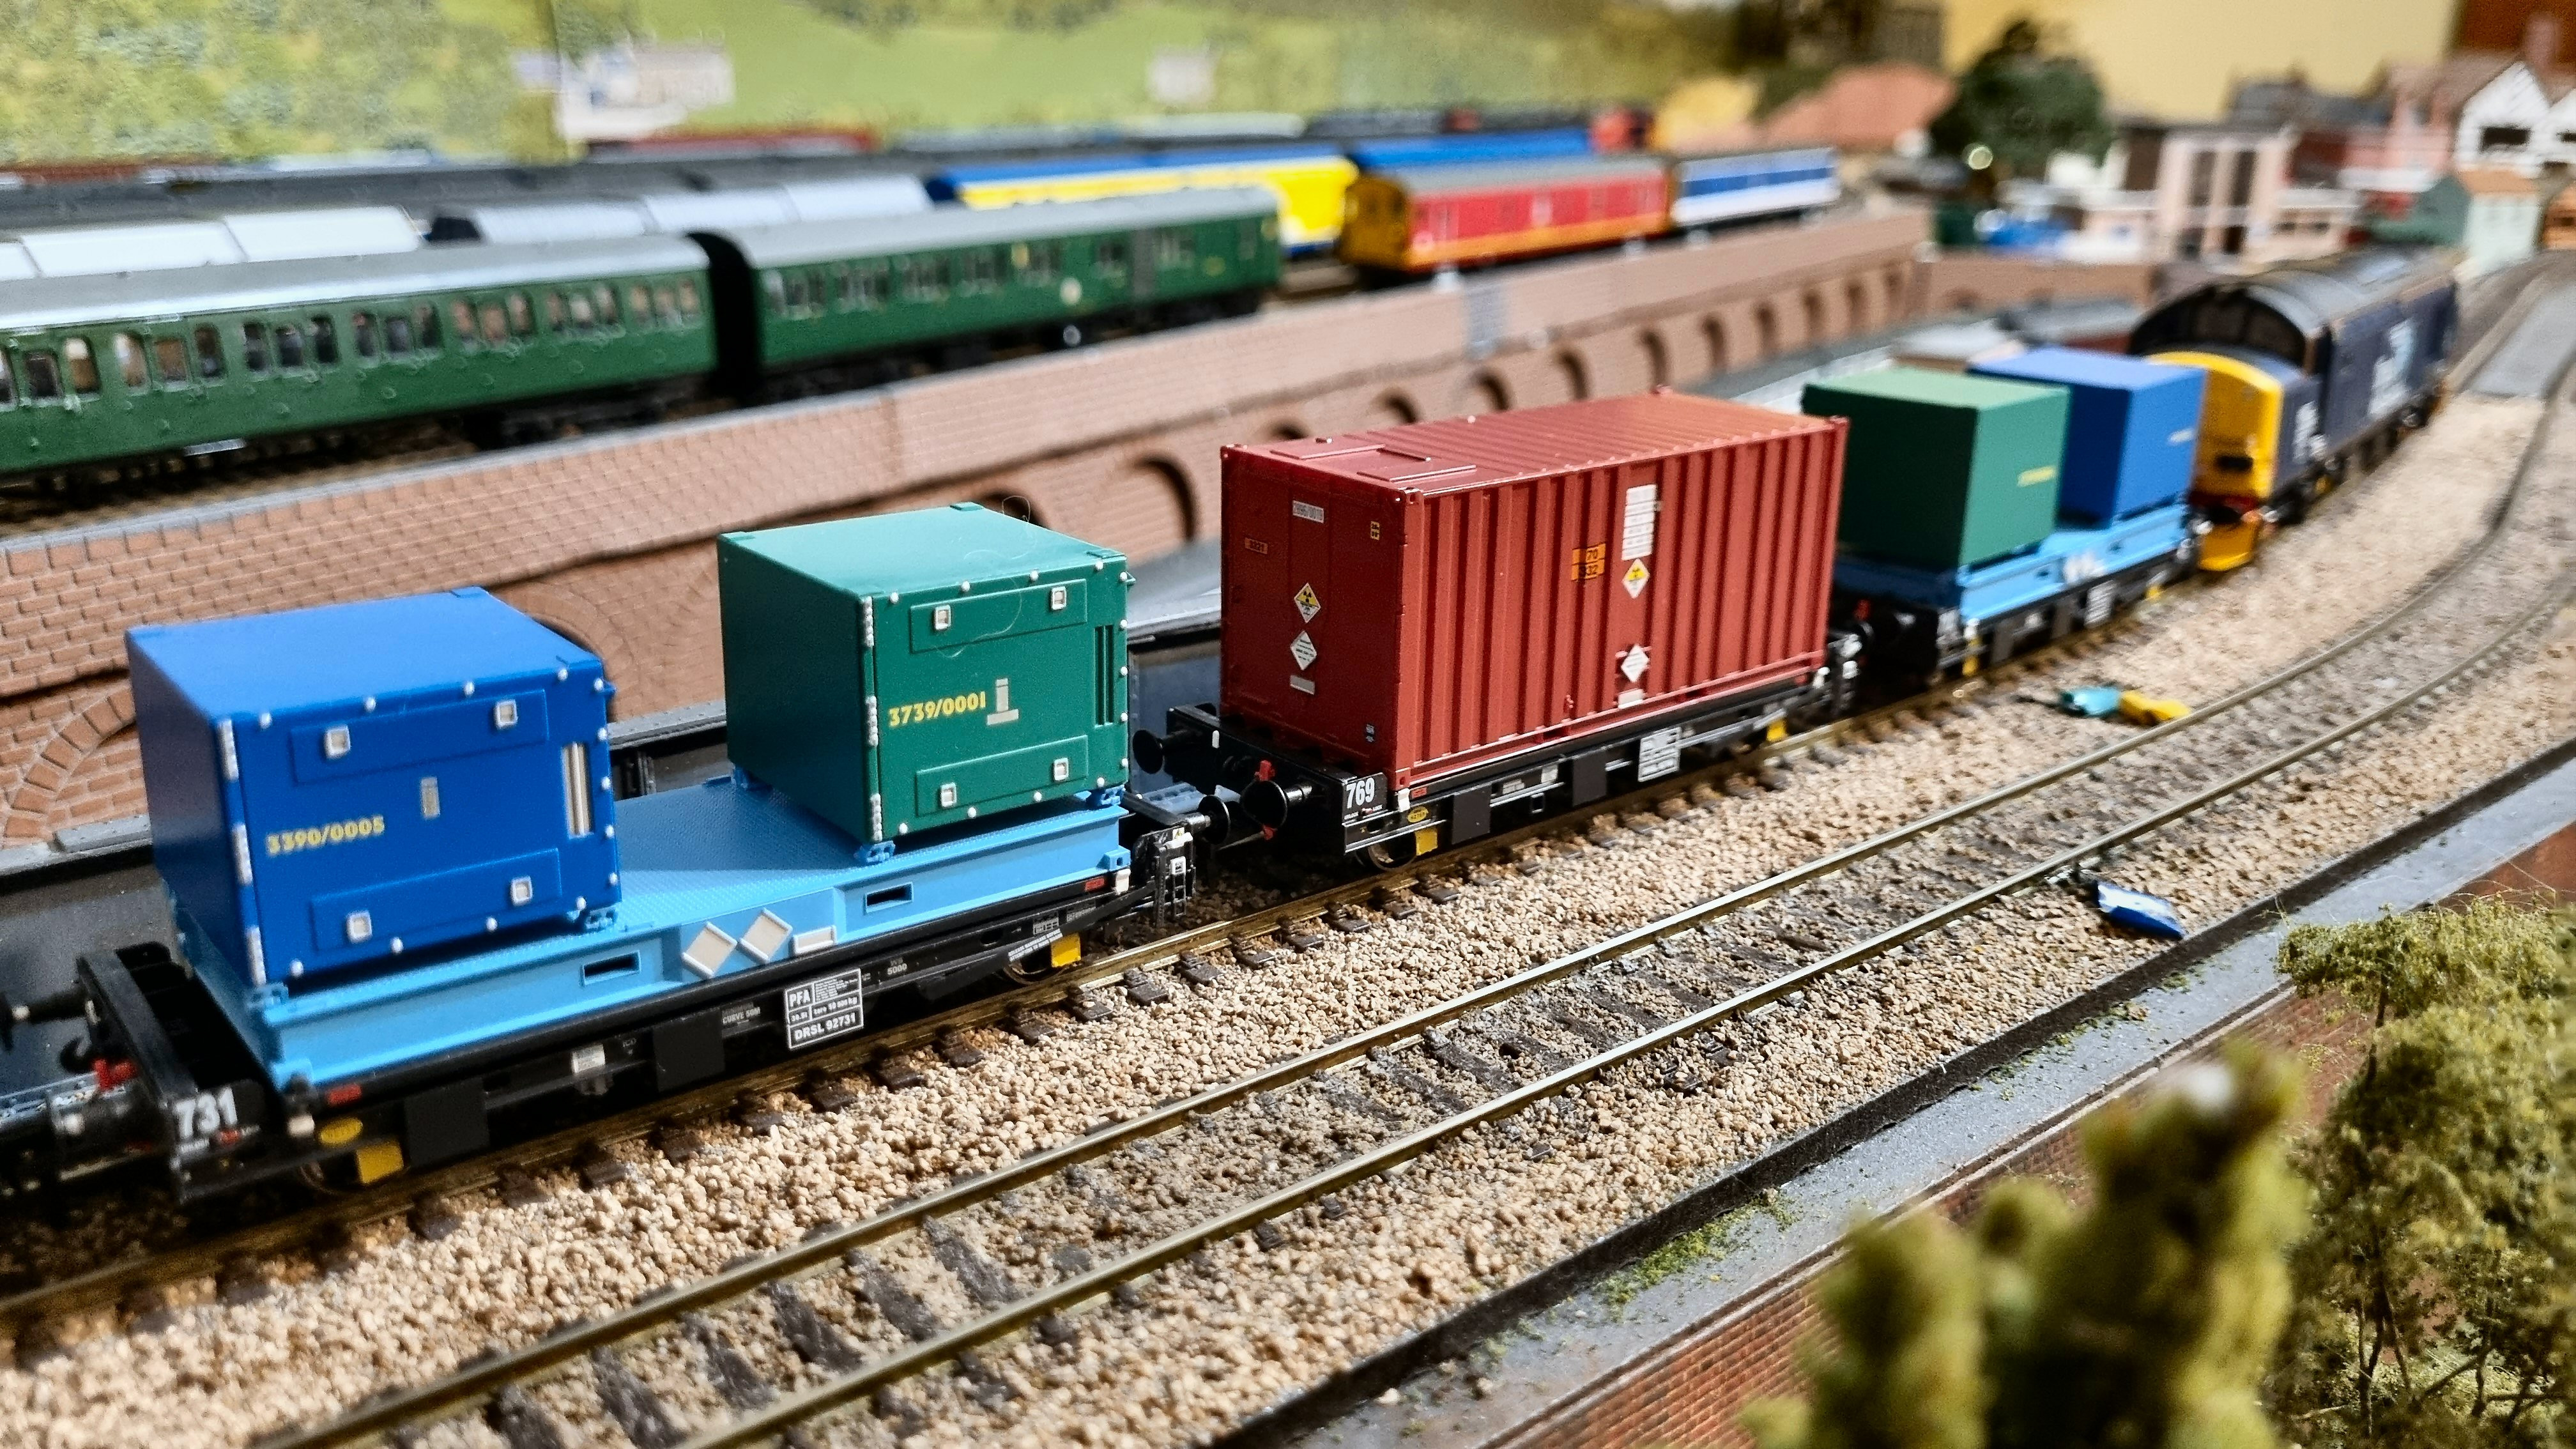
For the DRS 37s, I had a couple of Bachmann FNA-C nuclear flask wagons, and decided to supplement them with a pair of the Accurascale FNA-D wagons, and a set of three Nupak PFA wagons.
Moving away from Accurascale, I also received a Dapol class 59 (at a reduced price), 59 206 John F Yeoman in DB Schenker red, and bought a set of six of Dapol's Yeoman hoppers from (would you believe?) Modellbahn Union in Germany, at 20 Euros each (bargains). I purchesed a LokSound decoder locally and ordered the sound project from legomanbiffo to put on that for the 59.
I have bought several LokSound decoders recently to upgrade not only the class 59, but several older models as I seem to run rather a lot of sound models in preference to any others. Main sources for local LokSounds and LokPilots have been Buckambool Models and Euro Hobby Trains, both in New South Wales and both with very fair prices. I have bought quite a few sound projects off legomanbiffo (class 207 DEMU for one), but also tried a couple from Coastal DCC, one in a Heljan NBL class 16 diesel-electric, the other in another NBL diesel, the Dapol class 22 diesel-hydraulic.
Still on sound, I tried two other LokSounds with ESU's own free sounds: the class 31 hi-fi one into Hornby green D5627 (which should technically be a class 30 with Mirrlees sounds - legomanbiffo has just released a version of this so he may well be getting another email from me soon!); and the Bulleid Merchant Navy sounds into a Bachmann SECR C class 0-6-0, 592 . The latter is only a 2-cylinder steam loco where the MN is 3-cylinder, so this has been my first attempt at editing sound files. I eliminated the turbine generator and air pump sounds, and altered the chuffs to match a 2-cylinder better, with four chiffs per wheel revolution, and I swapped out the whistle, using a German E94 whistle as being very close in pitch to the preserved C (592) on the Bluebell Railway. It's not perfect, but it is also not bad at all for my first effort, and a freebie at that. I posted a very short video on YouTube to show the sounds off. Likewise for the Bachmann London Transport ex-GWR 57XX Pannier tank which has a Zimo sound decoder from Buckambool Models with YouChoos sound installed, and I managed to shoehorn a speaker into the locomotive boiler as well by hard-wiring the decoder in.
The pictures and video links following are roughly in the order I have referred to things above. Any that don't fit this post will go into following posts.


Jeff Lynn,
Amateur layabout, Professional Lurker, Thread hijacker extraordinaire
Amateur layabout, Professional Lurker, Thread hijacker extraordinaire
Posted
Full Member
(Dapol class 59/2)
Jeff Lynn,
Amateur layabout, Professional Lurker, Thread hijacker extraordinaire
Amateur layabout, Professional Lurker, Thread hijacker extraordinaire
Full Member
One involved fitting an Accurascale Deltic sound decoder (ESU LokSound again) into the older Bachmann/NRM Deltic prototype. There wasn't room for an Accurathrash speaker, but I put a Zimo double Dumbo speaker in instead.
Another was to update a Second-hand Dapol GBRf class 73, which started as 73 206 Lisa from the earliest batch of 73s Dapol produced with faulty lighting. I modified the pcb as per an earlier one I did, so that the cab lights could be operated independently, added Coastal DCC sound (LokSound again), and renamed and renumbered it to 73 212 Fiona (after a wonderful friend), using numbers and 3D nameplate transfers from Railtec.
A new arrival which has only had a non-sound decoder fitted was the Rails/Dapol SECR D1 in BR lined black livery. The photo shows it on a test train with two more Accurascale arrivals, the Siphon Gs in liveries for two different eras, plus two of the Rapido SECR 6-wheel brake vans (the old Lima Seacow/Sealion is acting as a barrier wagon to minimise the coupling throw on the brake vans.


Last edit: by SRman
Jeff Lynn,
Amateur layabout, Professional Lurker, Thread hijacker extraordinaire
Amateur layabout, Professional Lurker, Thread hijacker extraordinaire
Posted
Full Member

Jeff Lynn,
Amateur layabout, Professional Lurker, Thread hijacker extraordinaire
Amateur layabout, Professional Lurker, Thread hijacker extraordinaire
Posted
Full Member
Last edit: by SRman
Jeff Lynn,
Amateur layabout, Professional Lurker, Thread hijacker extraordinaire
Amateur layabout, Professional Lurker, Thread hijacker extraordinaire
Posted
Full Member
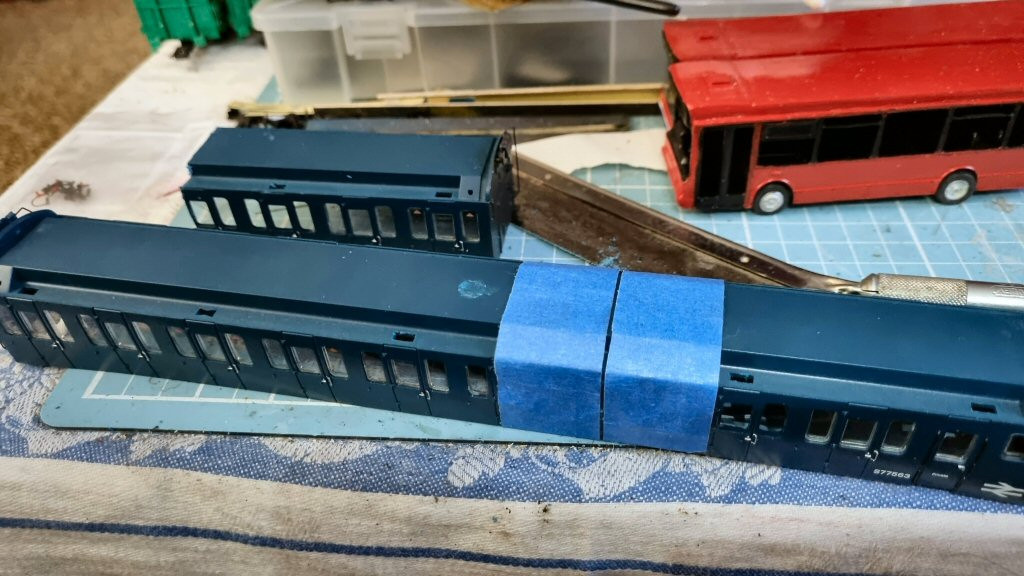
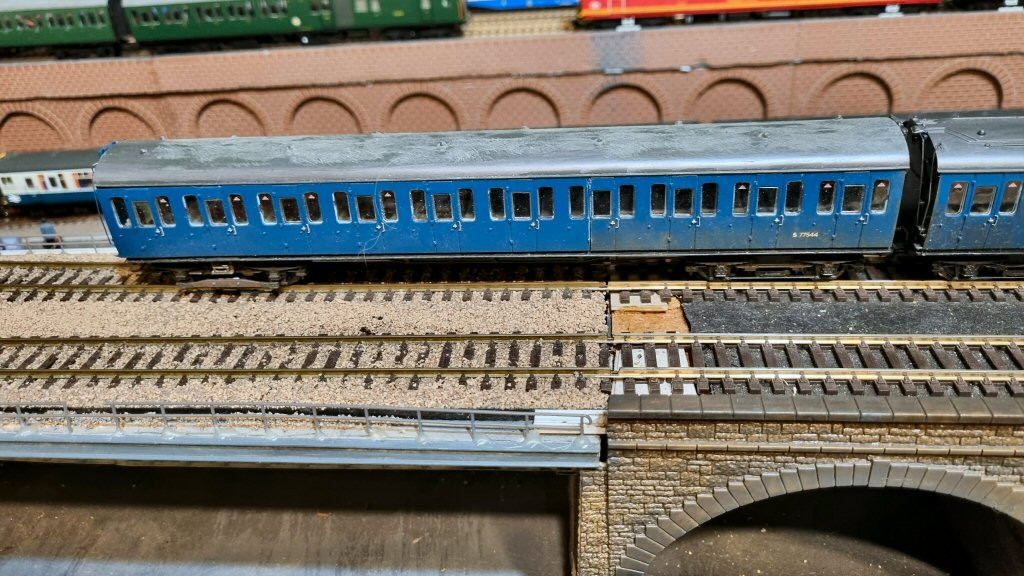
This has been on the workbench for a while. I started converting two Bachmann 2 EPB (class 416/2) units too one 4 EPB (class 415/2). This involved using two spare EPB body shells (spare from the original numbering error Bachmann made with the first BR blue release - they sent replacement body shells complete with the lighting PCB, glazing and all fittings in place). The bodies join very neatly when cut through the door gaps with a razor saw - only a few door hinge mouldings get lost in the process. At present, the wiring and motor arrangements remain as two 2 EPBs semi-permanently joined together in a DCC consist. I have fitted a kinematic coupling arrangement on one of the new centre coaches, which meant losing the leading end of the PCB in the underframe to make enough room for the coupling bits, so that will need a bit of rewiring to get the interior lights working again. The second, more recent conversion has kept its PCB for the present, and still has the now incorrect bogie with its shoe gear and rigid coupling, but also still has its working interior lights.
There is a little more work to do, but for now it looks like a 4 EPB, although I have used Kadee couplings for the join between the two centre cars, so the gap is a little larger than standard. I will be investigating removing one motor bogie and through wiring the carriages at a later stage.
Edit: I have to wait until later to post the images as the site is saying I am exceeding my daily upload limit.
Jeff Lynn,
Amateur layabout, Professional Lurker, Thread hijacker extraordinaire
Amateur layabout, Professional Lurker, Thread hijacker extraordinaire
Posted
Site staff
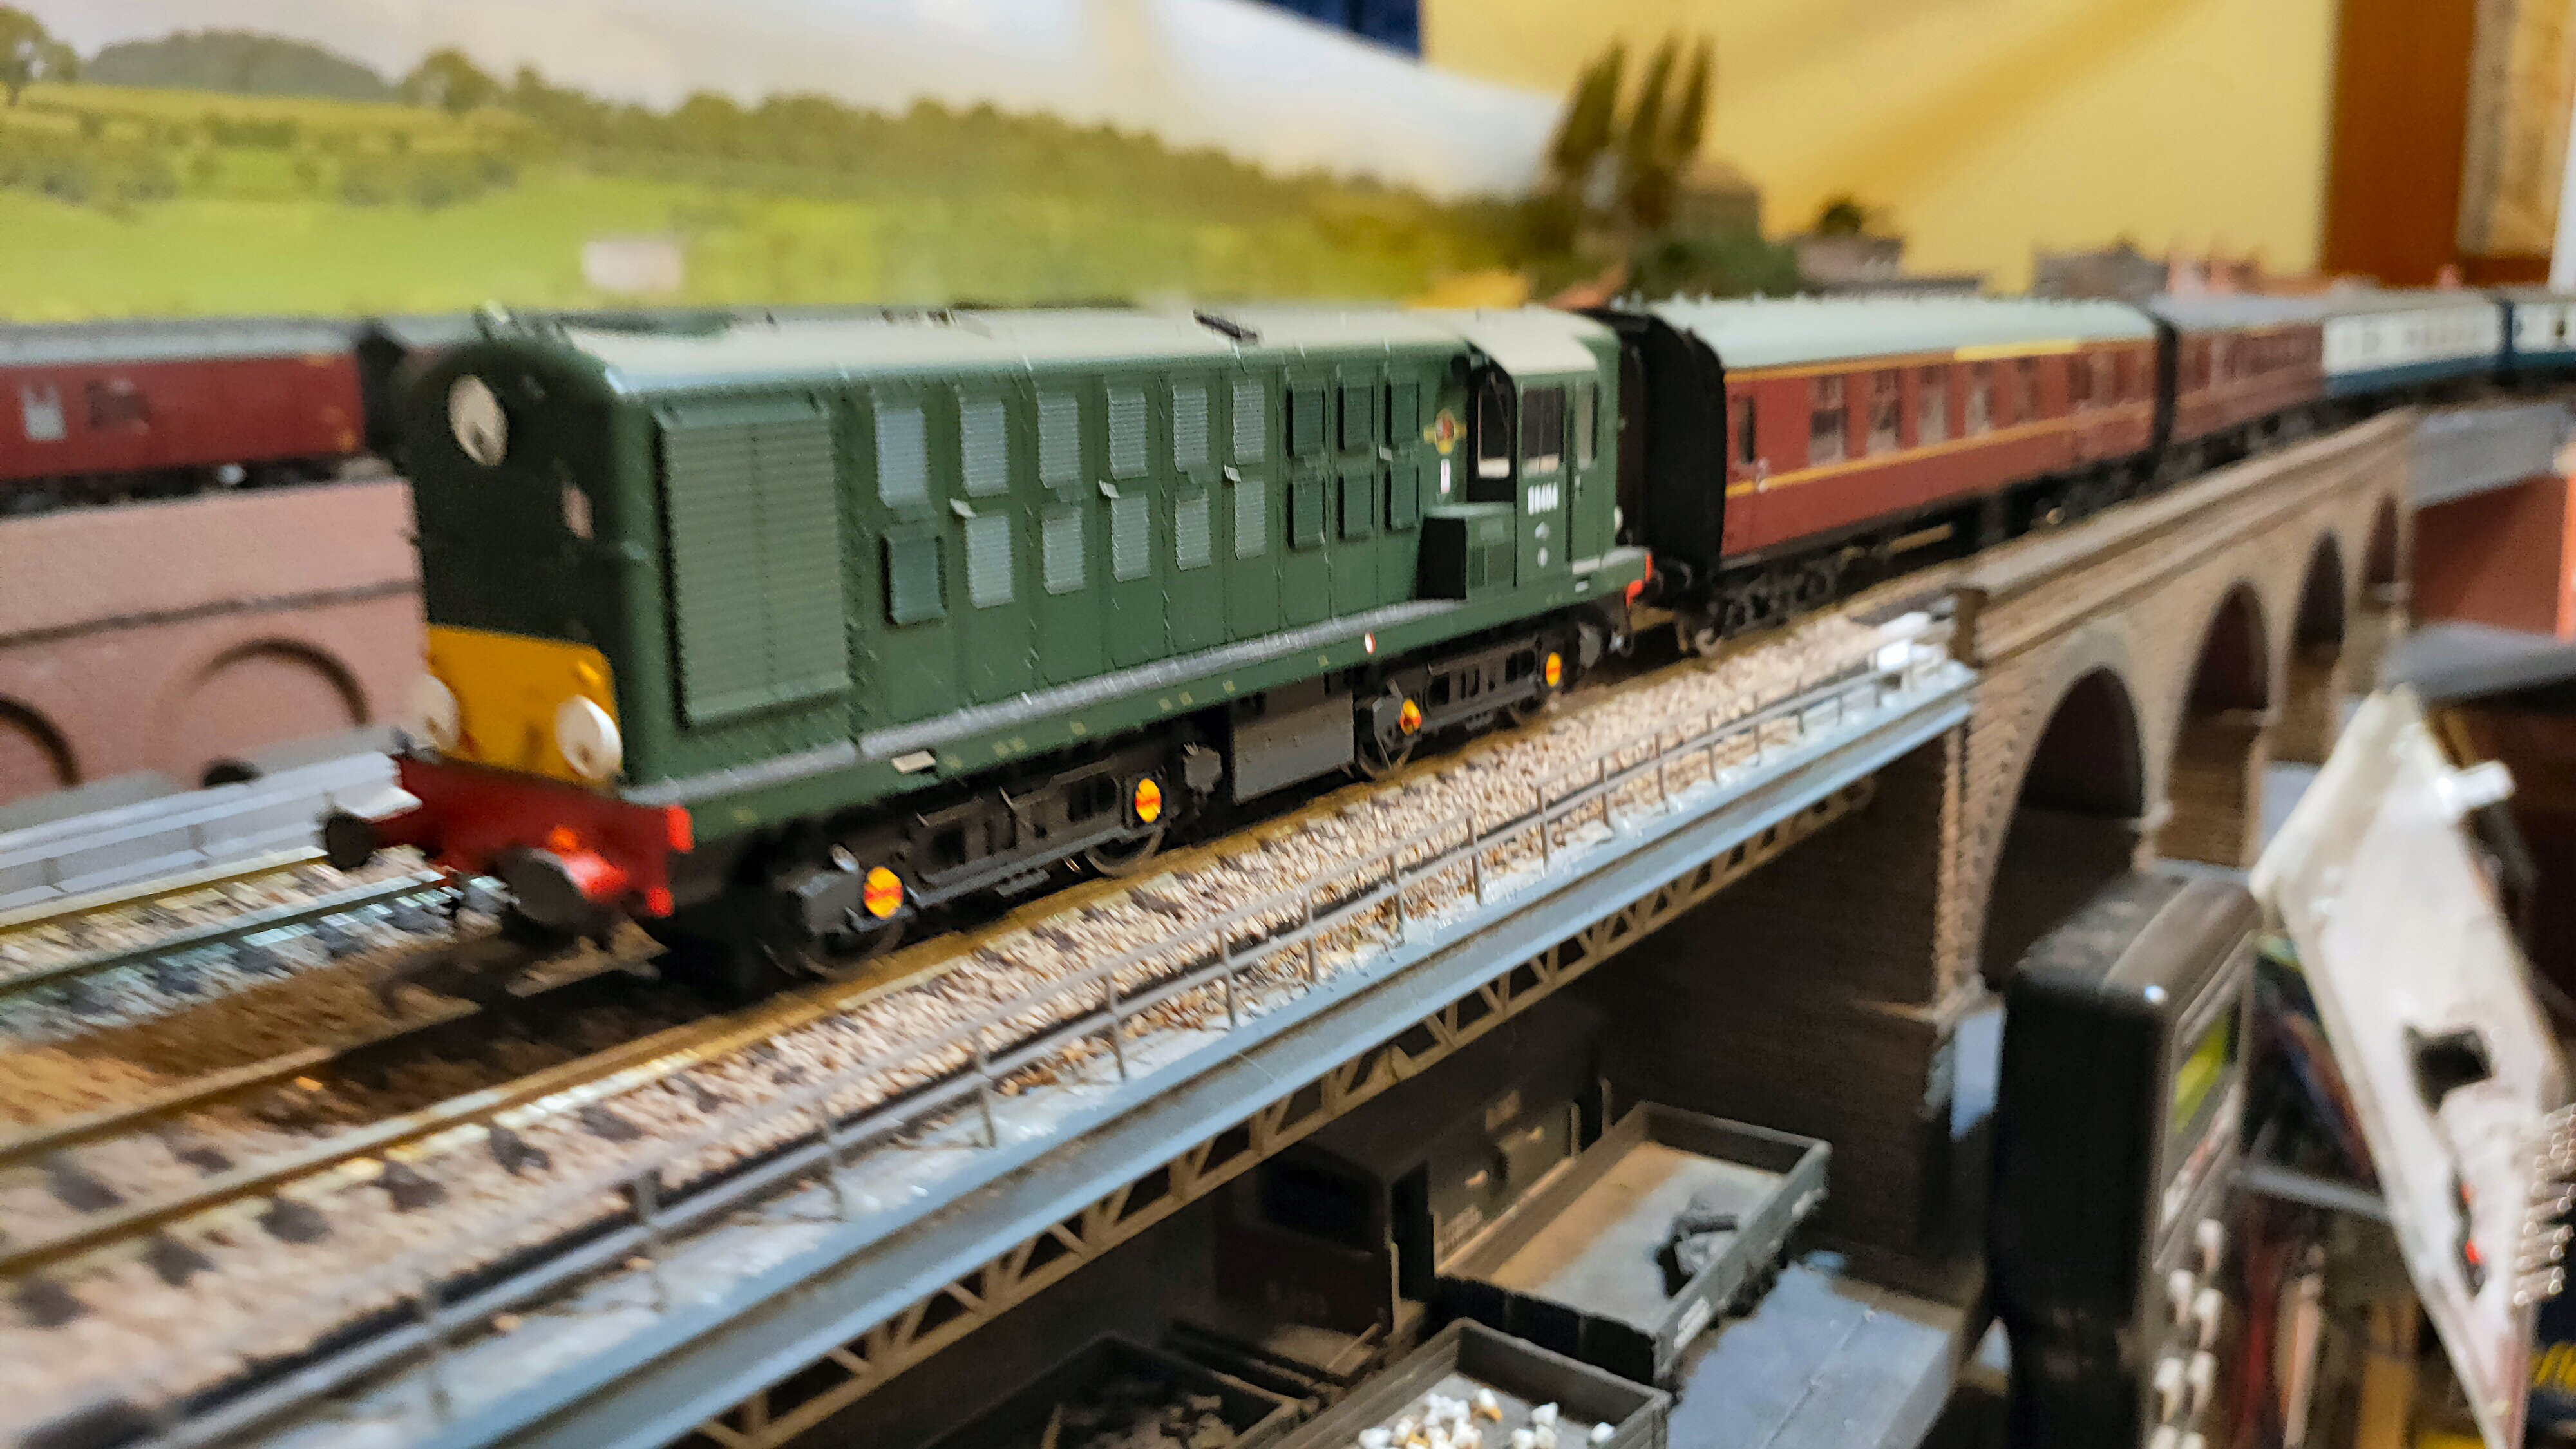
Wasn't familiar with the NBL Class 16 and had to look it up.
I was surprised there was a model available for such a short lived locomotive, so well done Heljan.
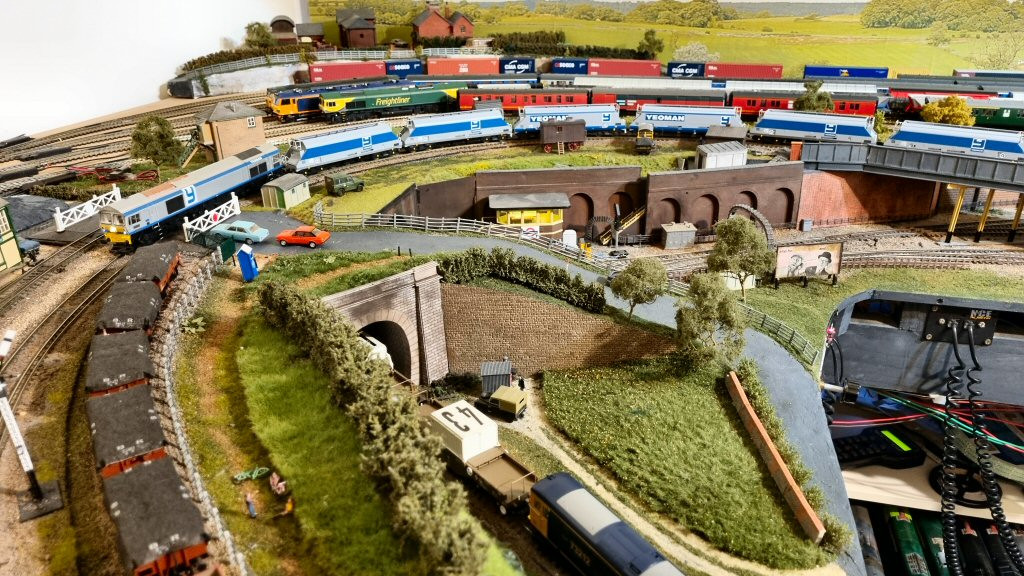
The working semaphores look great 👍
I've only one question, where on earth do you store all your locos when they're not on the layout, you must have rather a lot by now.
Ed
Posted
Full Member
Ed said
Great pictures and videos Jeff.
Wasn't familiar with the NBL Class 16 and had to look it up.
I was surprised there was a model available for such a short lived locomotive, so well done Heljan.
The working semaphores look great 👍
I've only one question, where on earth do you store all your locos when they're not on the layout, you must have rather a lot by now.
Ed
From “Post #288,446”, 17th August 2023, 12:14 pm
I have several Ikea Alex drawer units - the wider ones with castors. I lined the drawers with felt (or other materials with the earliest ones).
Also, for less used items that are not too delicate, I recently hit upon the idea of using some file boxes, which also get a backing inside of felt, and at present use some strips of corrugated cardboard to separate items so the wheels don't scratch the roofs of the ones under them.
Once again, photos will have to wait until the site allows me to upload more.
Jeff Lynn,
Amateur layabout, Professional Lurker, Thread hijacker extraordinaire
Amateur layabout, Professional Lurker, Thread hijacker extraordinaire
Posted
Full Member
Here are the 4 EPB conversion photos of the progress to date.

Jeff Lynn,
Amateur layabout, Professional Lurker, Thread hijacker extraordinaire
Amateur layabout, Professional Lurker, Thread hijacker extraordinaire
Posted
Full Member
Still running into an upload limit. I'll try again in an hour or so.
Last edit: by SRman
Jeff Lynn,
Amateur layabout, Professional Lurker, Thread hijacker extraordinaire
Amateur layabout, Professional Lurker, Thread hijacker extraordinaire
1 guest and 0 members have just viewed this.