GWR AEC Railcar in 7mm
Posted
#221600
(In Topic #12085)

Full Member
Kit bashing a GATANEAL kit from the 1980`s
I`m one of those modellers that has always been `gratefull` for whatever kit designers throw at us good or bad.I suppose, making a number of `bad` kits in 4mm has if nothing else taught me how to make ` a silk purse out of a sows ear` and therefore taught me a lot problem solving techniques and constructional skills.
I would say that the 1980`s were the great years in kit manufacturing in both 4 and 7mm modelling and it was during those years I learnt the most in making difficult and poorly designed kits. So, as i have always wanted a GWR `flying Banana` railcar, I took a chance in snapping up a 1980`s Gataneal models 7mm AEC kit knowing full well that Gataneal kits are notorious for their difficulty.
However, I also have a liking for `complete` kits which this one is, so no hunting for motors, gears, wheels and seating.
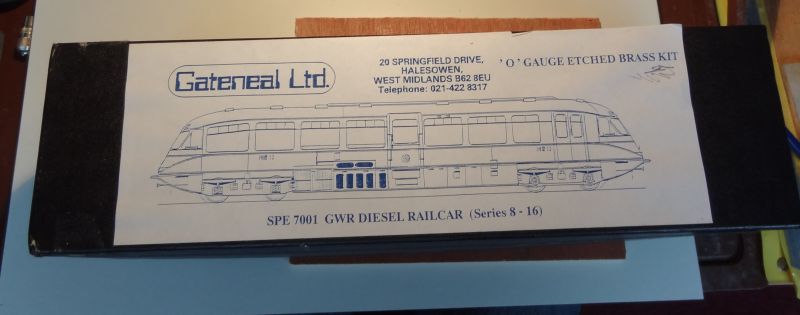
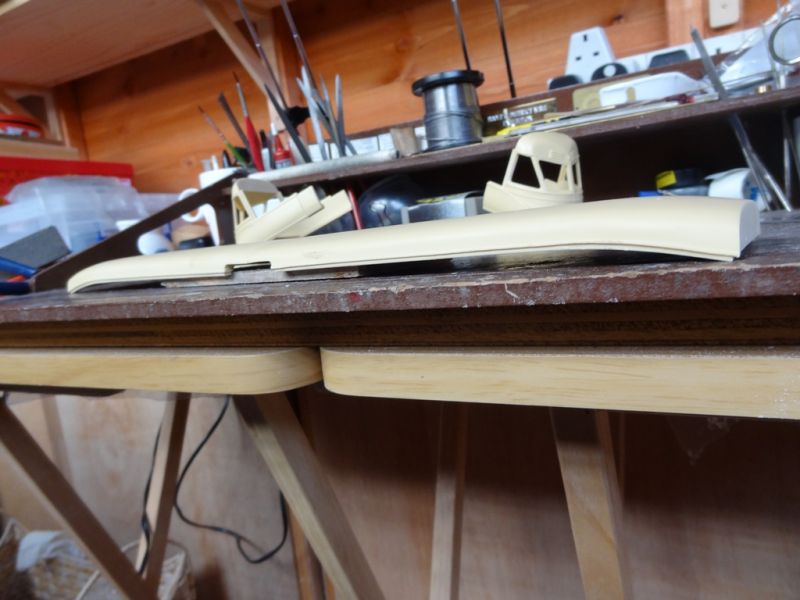
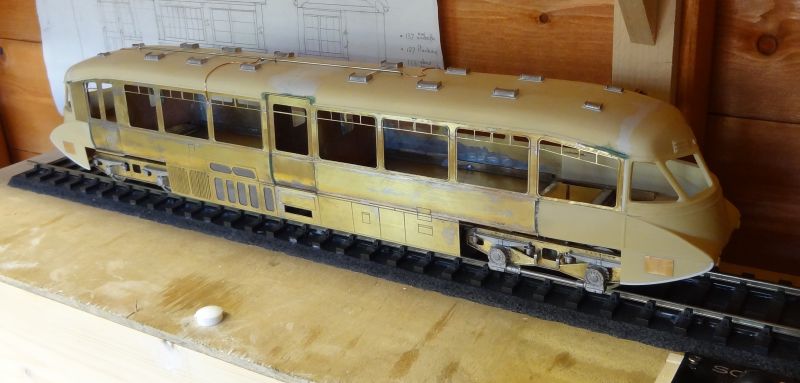
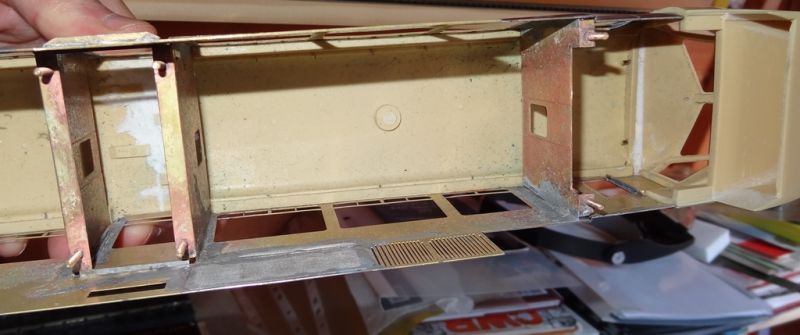
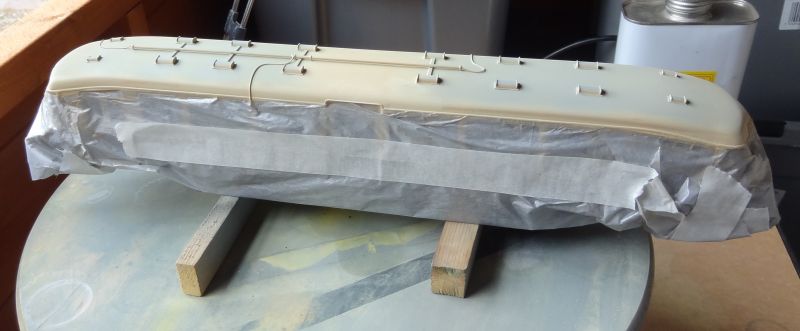
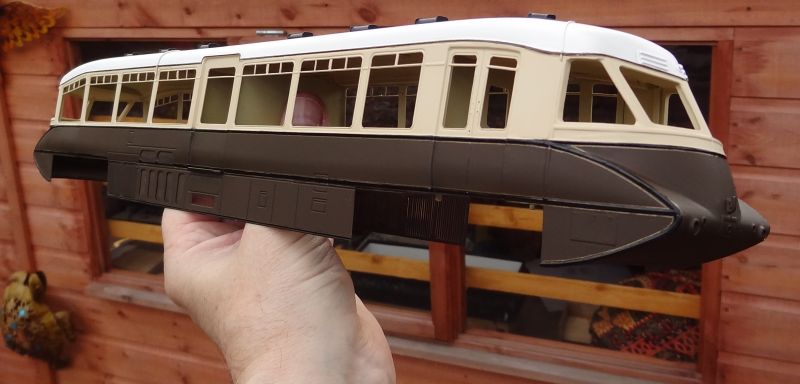
The kit is a mixture of etched brass sides and chassis parts with resin roof and front and rear ends. I`m not a great fan of resin as I dont really get on with how to solder the parts to the brass :roll: and in this kit there was the problem of warped parts over time.
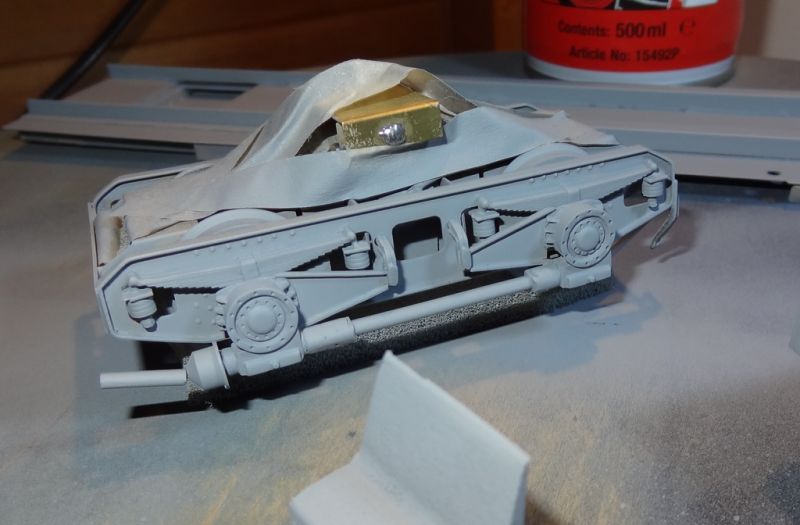
The chassis bogies and power mechanism is very basic in todays standards………

but with a little effort and extra rivet detailing…..scrubs up well……………………….
It took a while to solve the warped roof problems and just how to fix it all together…………..
 Last edit: by Twobolt
Twobolt John

Posted

Full Member
I too like the idea of kits being complete, I guess with the consistent standards across wheels and such there is less of a need for the builder to choose his ancillaries.
John
John
Posted
Inactive Member
Now I've finally started a model railway…I've inherited another…
Posted

Full Member
That looks nice. The ends look more like the earlier series - is it the photo perspective?
Nigel
©Nigel C. Phillips
Posted
Full Member
Twobolt John
Posted
Full Member
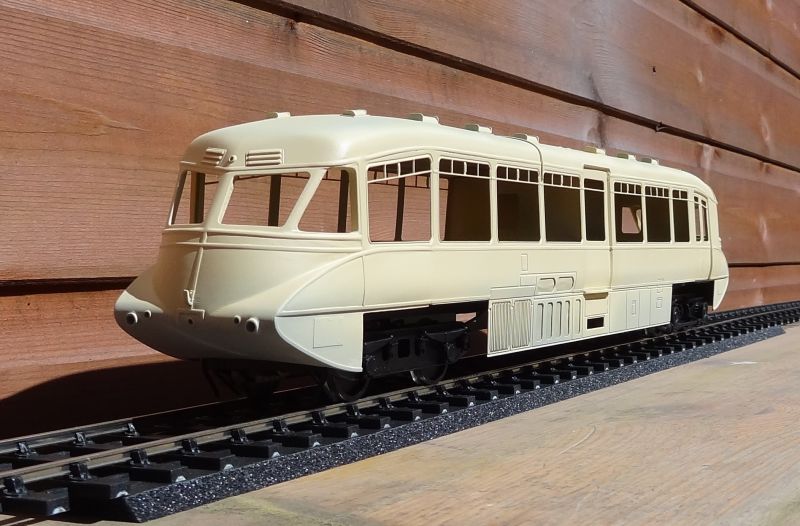
I think there were four railcar styles…. two curvy and two angular. This one is the last of the curvy style and is aimed at being this……………………………………..
Twobolt John
Posted
Full Member
The problems with resin parts in this kit have been……….

…….. warping of the roof sections…….
My wife suggested dipping them in boiling water and tweaking them straight.
When the third degree scalds had healed……… things looked encouraging…………
However, resin seems to have a `memory` and after about three days when I had glued the roof to the sides and ends, the roof sections returned to their warped state and the glue holding them to the sides gave up the struggle to hold everything in place…………..
So…………….
Another course of action was called for………… pining with wire !!!!!!!
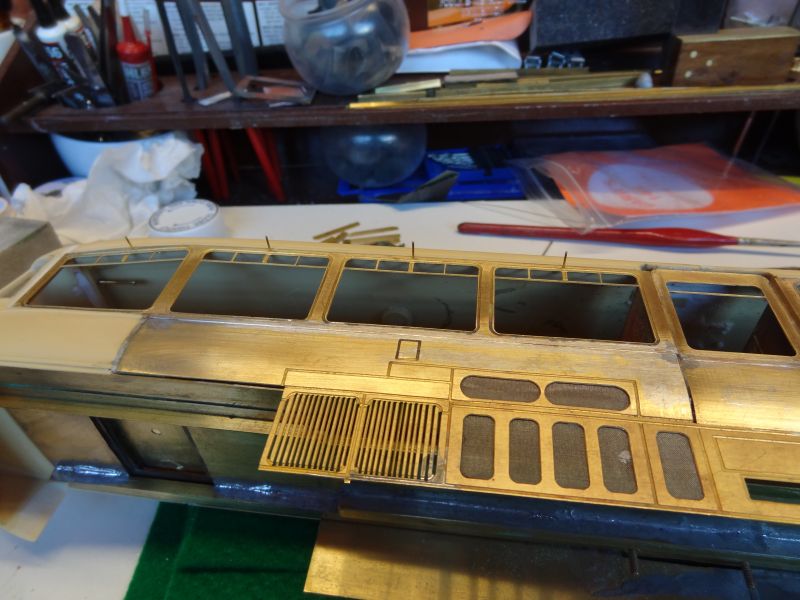

Success !!!!!
I`m still taking medication…… and the hospital have advised I never make contact with resin parts again…….. ;-)
Last edit: by Twobolt
Twobolt John
Posted
Full Member
John
John
Posted
Full Member
Hi John,Thanks Nigel,
I think there were four railcar styles…. two curvy and two angular. This one is the last of the curvy style and is aimed at being this……………………………………..
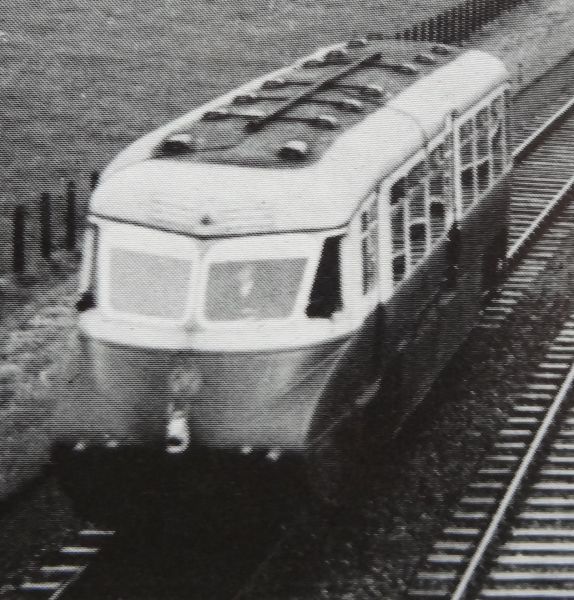
Bit more than that re the body styles. Four curvy (5 if you include No. 18), the angular Swindon ones, and the 2-car twin-sets with one angular end, one flat end. Grab handles, etc, were moveable feasts on the 'Flying Bananas". Those wires on the roof are interesting - one to a switch in the cab, the other to a switch in the passenger compartment?
Last of the curvy ones would be No. 16 (17 was a parcels car). Pre-WW2 the klaxons on No. 16 were positioned just under the cab side windows (those black lumps above), later they were under the front just above the wire air filter.
Nigel
Save
©Nigel C. Phillips
Posted
Full Member
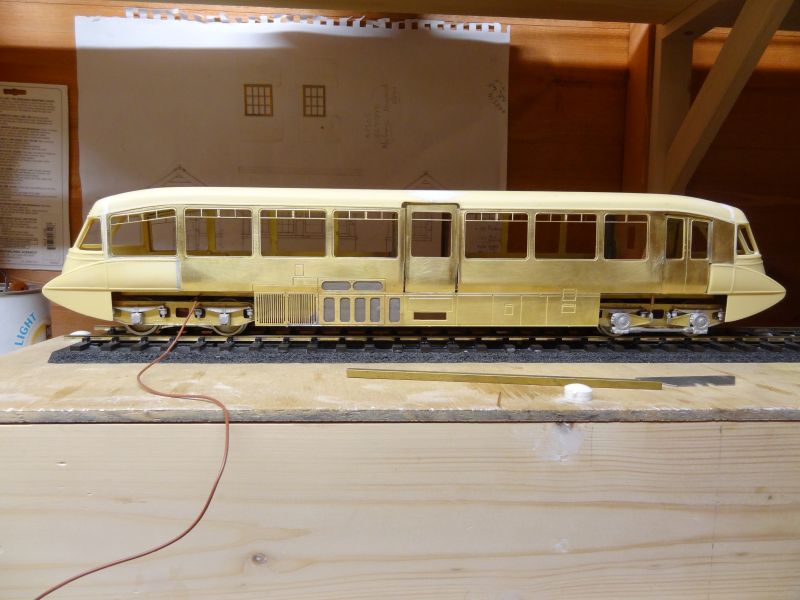
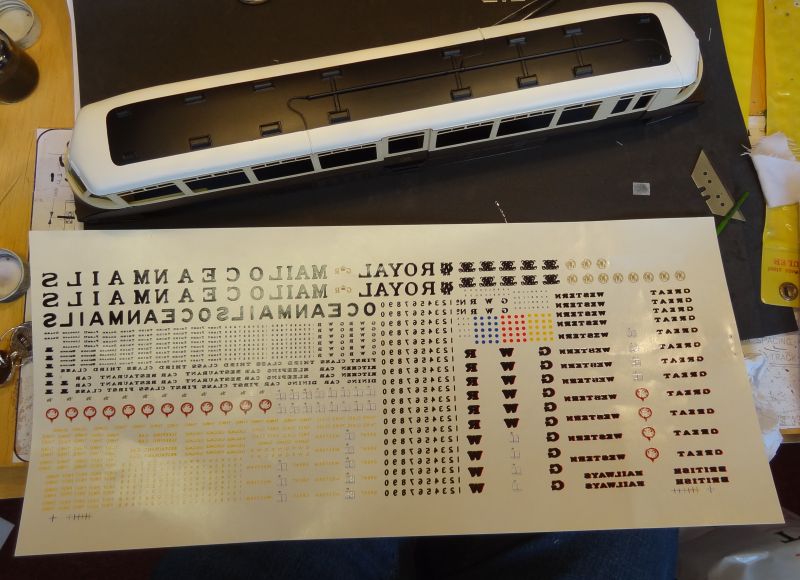
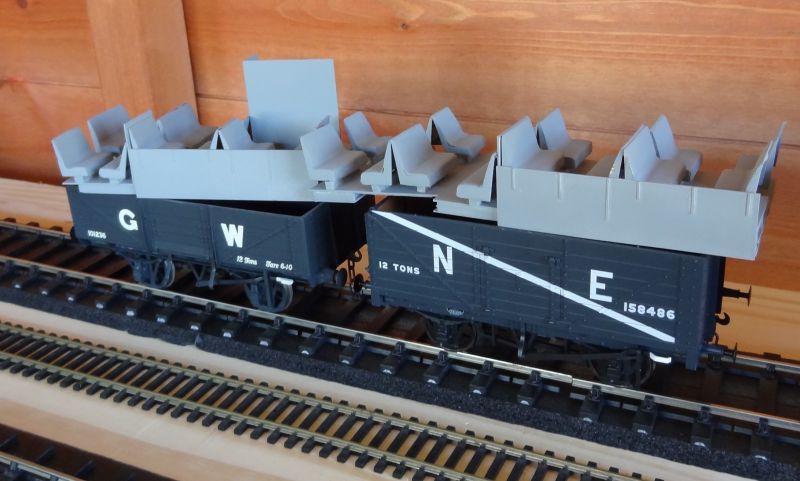
Then it was on to filing and filling and addding bits and bobs to the sides……….

Last edit: by Twobolt
Twobolt John
Posted
Full Member
John
John
Posted
Full Member
I liked your approach to straightening the roof. Does it come off now? You may need some study partitions to keep the body straight. (Bin there…). It might be an idea to make a silicone mold, just in case. And maybe add some brass I-beams inside
Roof top view of No. 14 in the 1950's (from Russell, Copyright OPC, now Ian Allan). Plus those shaft straps.Just in case the universals or the cardan shaft splines went walkies.
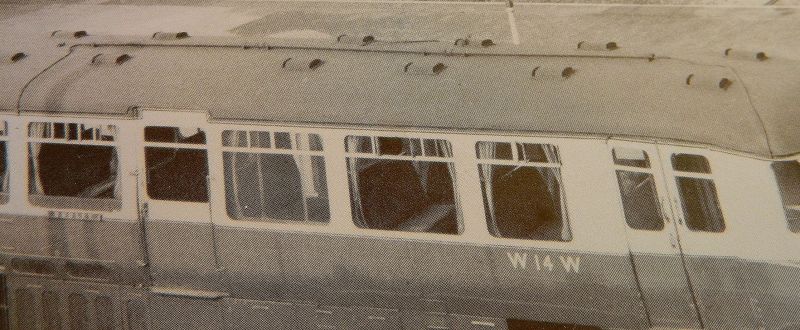
NigelSave
©Nigel C. Phillips
Posted
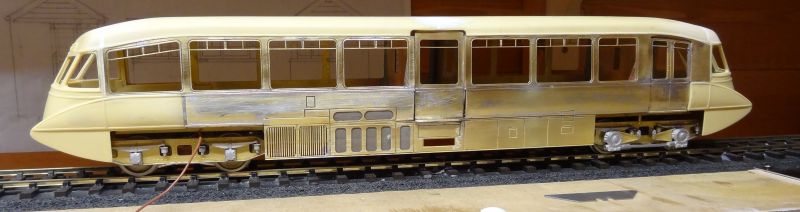
Full Member
The roof is now solidly fixed and needed to be, to prevent `the joined` sections from fracturing. What i did do was complete a strong `box` shape by making the removable chassis and seating a much sturdier structure by adding some brass angle.
I also discovered that the `ride height` of the bogies needed reducing hence those indented squared areas.
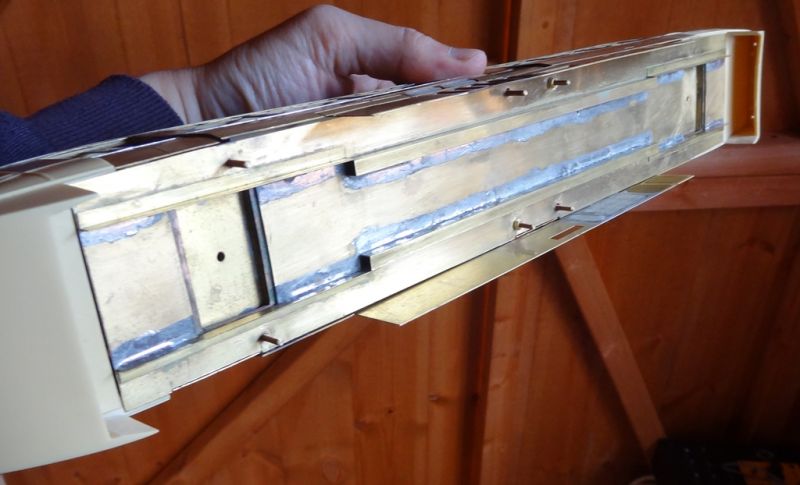
This all fits in neatly with the roof and side section………………………………………………
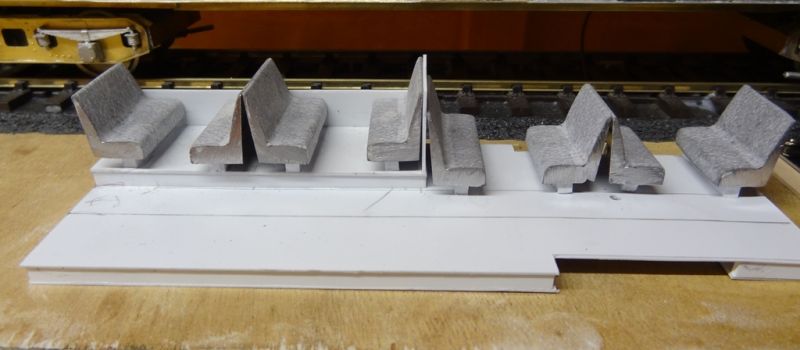
I`ve made all the seating sections removable for painting…………………….
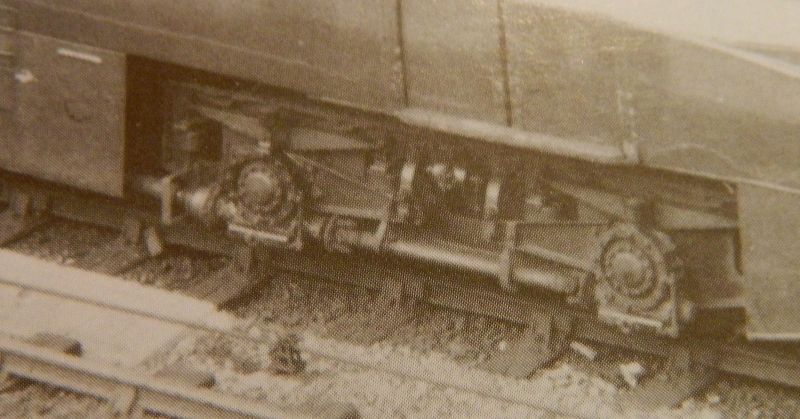
As for the bogie detailing…………………..
I did`nt think the bogies are that good and I had to really work on them to get a reasonable representation with the parts supplied………….
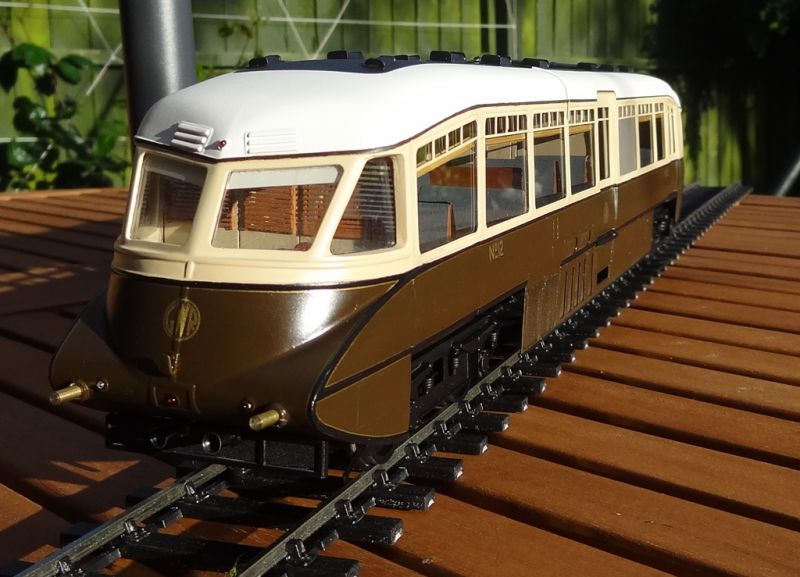
And they have already been through the paint shop……………………………..

And so has the bodywork………………………………………….

Last edit: by Twobolt
Twobolt John
Posted
Full Member
:thumbs :thumbs :thumbs
Looking very good. I shall get my 4mm banana kit out and have a ponder (or three).
What's the intended paint scheme? (I'd take the easy one and go for strawberry and cream).
Nigel
©Nigel C. Phillips
Posted
Full Member
john
Twobolt John
Posted

Full Member
Looking forward to seeing the results, and of hearing how it was done, with this one.
Nice work John
Posted
Full Member
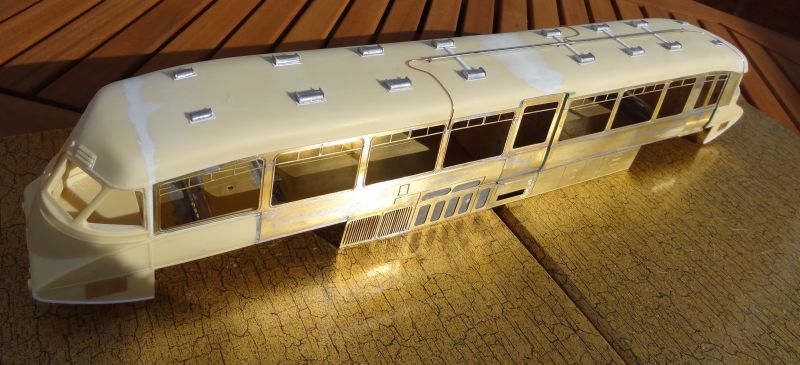
Hi John,No Nigel…… she is on her way to being a 1930`s GWR lined beauty………
john
That should be interesting. GRW totem then.
Nigel
©Nigel C. Phillips
Posted

Full Member
Bill
At 6'4'', Bill is a tall chap, then again, when horizontal he is rather long and people often used to trip over him! . . . and so a nickname was born :)
Posted
Full Member
I`d better finish the story then……………..
Thank goodness Tamiya produce their low tack masking tape and their low tack masking tape sheeting !!!
I think it`s brilliant stuff…….
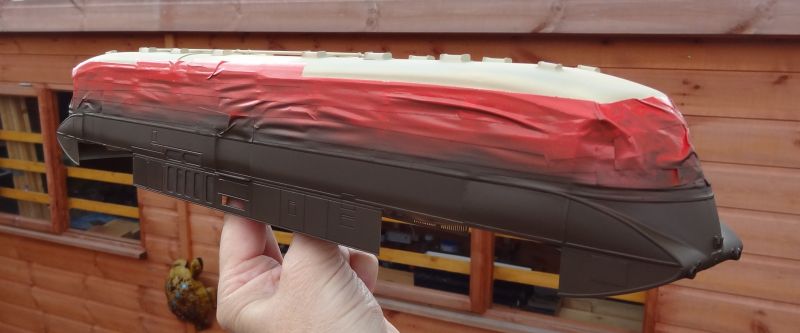
I finally have been able to use Precision paint I bought in the early 1980`s !!!! Yes she has a single lamp bracket that was fitted for a single plug in lamp as the trio of lamps originally fitted drained the batteries……
I used a lot of masking tape !!!!!
The roof painting was a challenge and then after forking out for a sheet of transfers there is only enough to do ONE side of the model !!!!!!!
I was going to use a lining pen to do the GWR gold lining using Acrylic gold but in the end I used 4mm PC Pressfix gold lining……..
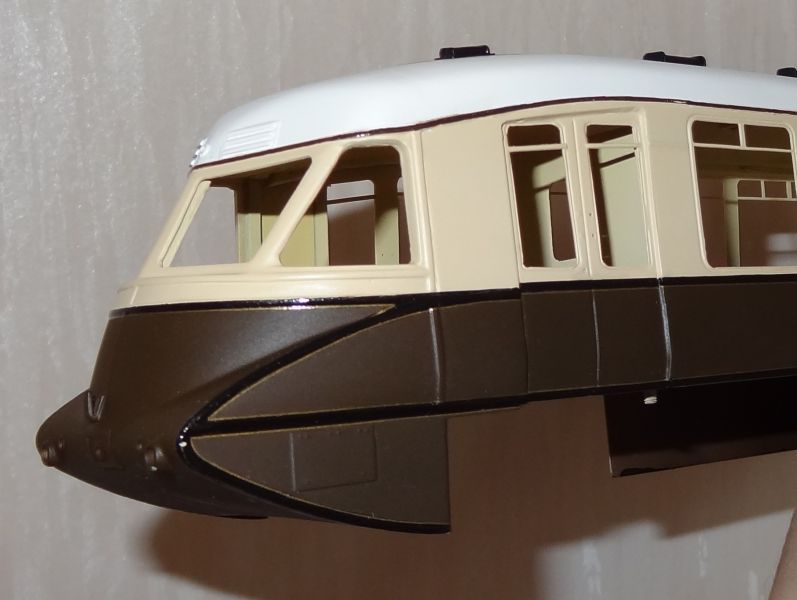
I think I got away with it !!!!
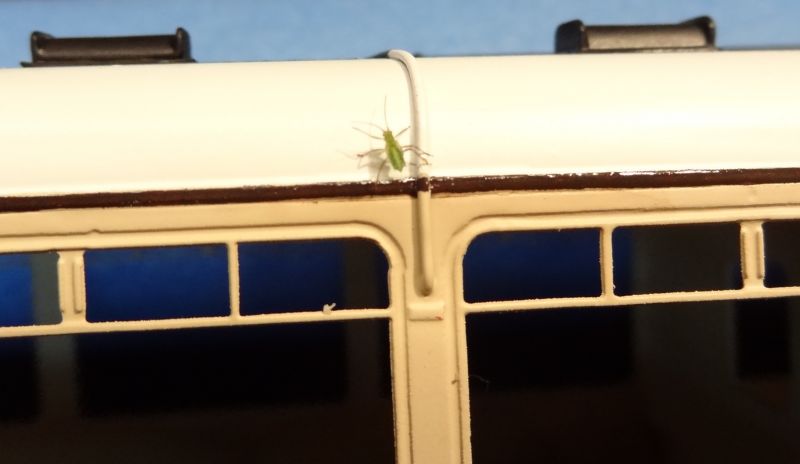
All good modellers have a pet fly that helps with painting …..don`t they ???
Last thing is to use Phoenix /Precision satin varnish….

Internal seating and detailing is attached to the chassis……

Here she is all dressed up and nowhere to go…………………………………………..

Next installment………. fitting DCC sound………….
Last edit: by Twobolt
Twobolt John
Posted
Legacy Member
Allan
1 guest and 0 members have just viewed this.