A Village General Shop after John Ahern.
Posted

Full Member
Another Ahern classic in card.
Same here, I find cheap glue sticks from Poundland work far better than the branded Pritt ones, I can get 5 large sticks for a pound.
Cheers
Andy
Andy

Posted
Full Member
Before adding the windows, brown watercolour was painted at the bottom of the front wall. This is part of the colour scheme for the front of the shop whereby the downstairs window, shop window, shop door and lower wall are all painted brown. All other paintwork is white.

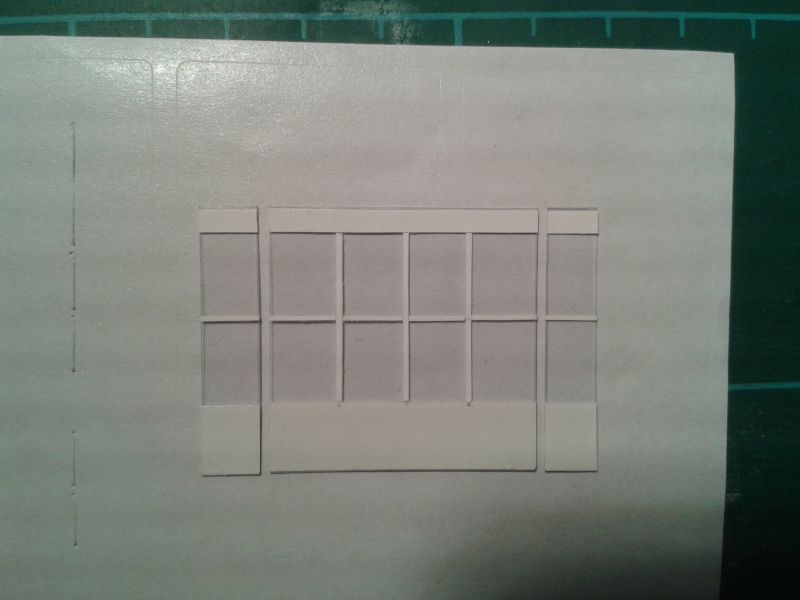
The lintels were added next. Some of the Scalescenes stucco paper was glued to postcard. The lintels were cut out and the edges coloured with felt tipped pen, before being glued in place above the windows. Stucco paper was also glued to thicker card and narrow strips were cut to make the sills. The front wall was placed onto postcard and a pencil run around each opening to give the dimensions for each window frame. The card was cut just inside each pencil line. You can see the lintels, sills and window frames in this photo. One frame has been glued behind its window…
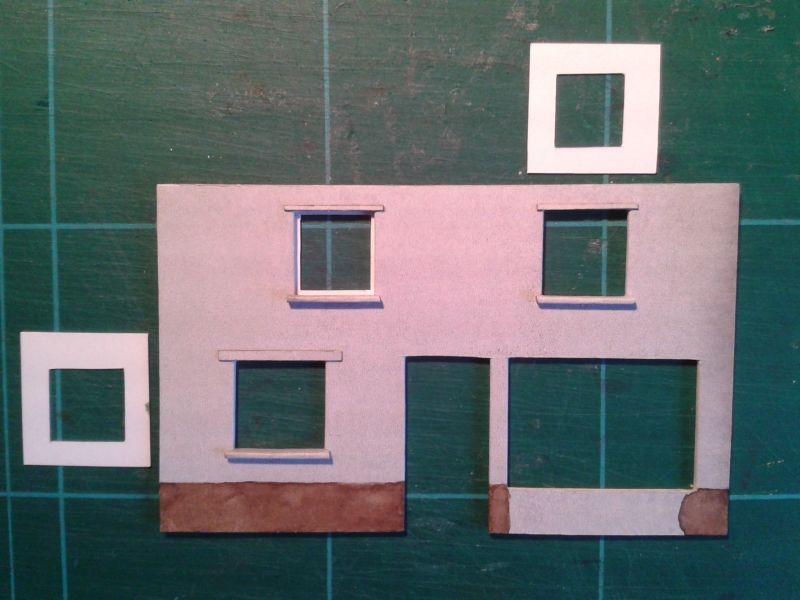
I had a second attempt at fitting the downstairs window frame as it looked a bit narrow. Here is the replacement having been given a wash of brown watercolour before fitting in place.
Terry
 Last edit: by col.stephens
Posted
Full Member
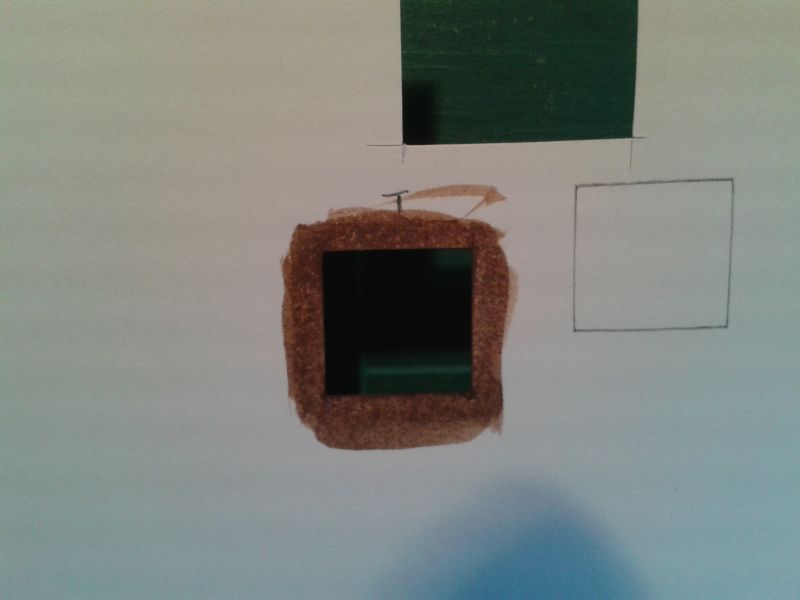
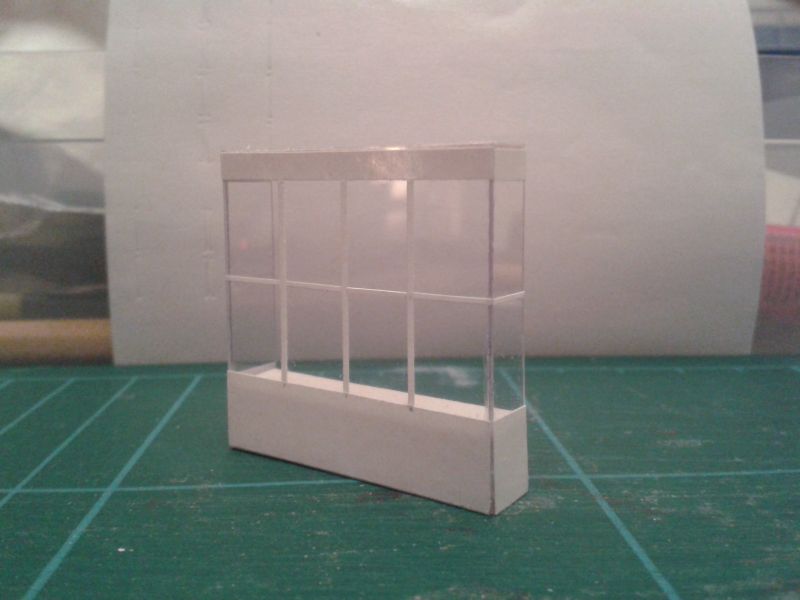
I used clear plastic from discarded packaging for the glazing. Problem: how to reproduce the glazing bars inside the window frames? A couple of books in my possession suggested scribing the glazing with the back of the craft knife. One suggested then rubbing a white coloured pencil over the scribed mark. This didn't work for me, I'm afraid. I was left with rather blotchy looking glazing bars. I pondered the problem for a couple of days and in the end decided to go with the method previously described by Chubber on this website - the self-adhesive label method. Here, the label has been stuck onto the clear plastic and the glazing bars have been drawn and the window panes are in the process of being cut out…
Next, each pane was removed by digging at a corner of each pane with a cocktail stick until sufficient had been raised to grip with a pair of tweezers. Some adhesive from the label remained on each pane so I gently rubbed each pane with a cotton bud moistened with methylated spirit to remove most of it.

Each set of glazing bars/panes were cut out with a wide border all around before being glued behind each window frame…

More soon…
Terry
Last edit: by col.stephens
Posted

Full Member
Shaun.
Posted
Full Member
Thank you Shaun.
Terry
Posted
Legacy Member
An inspiration surely for all scratch builders.
Allan
Posted
Full Member
Thank you Allan, very kind of you.
Regards,
Terry
Posted
Full Member
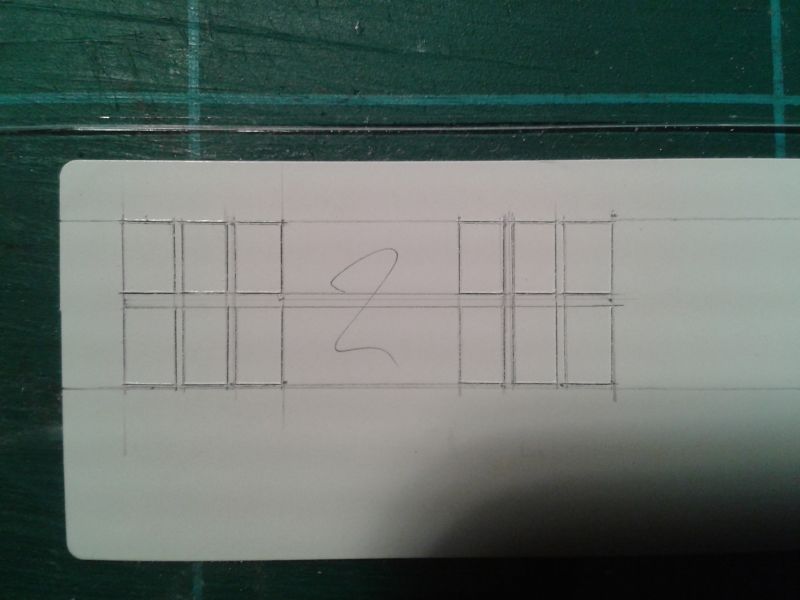
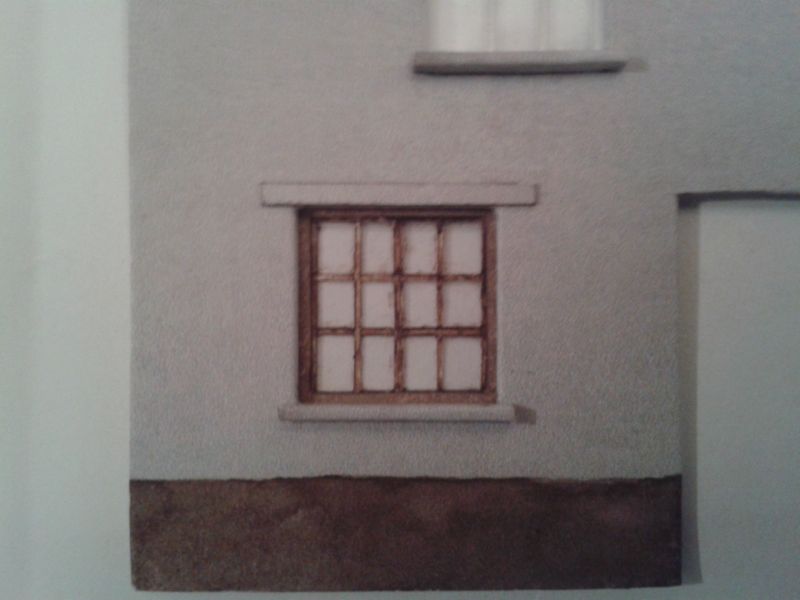
Quick update on progress. Work continues to complete the windows. This is not a long job, each window taking about five minutes but finding time is my current problem. Meanwhile, I offer you this picture of the front, downstairs window, photographed against white paper. The window measures only 15 millimetres square. Each pane is only 3 millimetres wide!
More soon.
Terry
Last edit: by col.stephens
Posted

Inactive Member
Max
Port Elderley
Port Elderley
Posted
Full Member
Thanks Max.
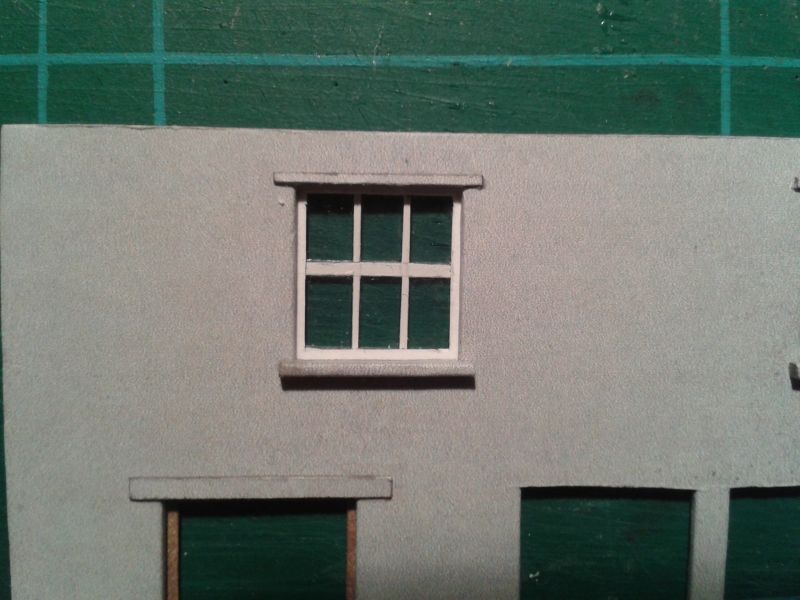
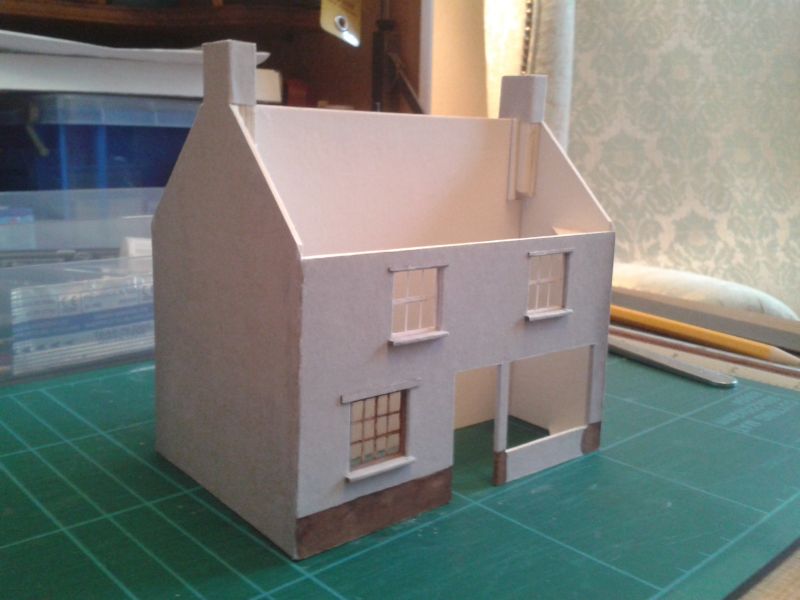
All windows have now been completed. I glued the walls together and carefully trimmed the overlapping paper at the corners. (Thanks for that tip, Doug). On looking at the building it was quite apparent that the end walls were curving inwards at the top. A central wall was installed to sort out that problem. It then dawned on me that I hadn't fitted curtains to the windows, so that job is now taking place. Curtains have been sourced from the Scalescenes' Small Terraced Houses kit. This is how it is looking at present…

More soon.
Terry
Last edit: by col.stephens
Posted
Guest user
I work in O gauge and use a textured brick paper i get from Greece (!) via ebay. It has a fairly thick paper so i use a rubber glue called Fixo-Gum made by Marabu in Germany. It is expensive if you buy it at shows but again cheaper supplies are available on ebay. I initially used PVA but found it made the paper too wet and lost some of the texture. This was worse on Howards Scenics which are not particularly heavy embossed to start with.
I made a goods shed for my new O gauge exhibition layout - Docklands - pictured here. The red-oxide walls are home made resin castings which are waiting for the final painting.

Rgds Andrew
Posted
Full Member
Hello Andrew. Very nice work. Thanks for posting the picture. I once saw a layout on which all of the buildings were Scalescenes card kits, enlarged to 7mm scale. I must say, they looked superb.
Regards,
Terry
Posted
Full Member
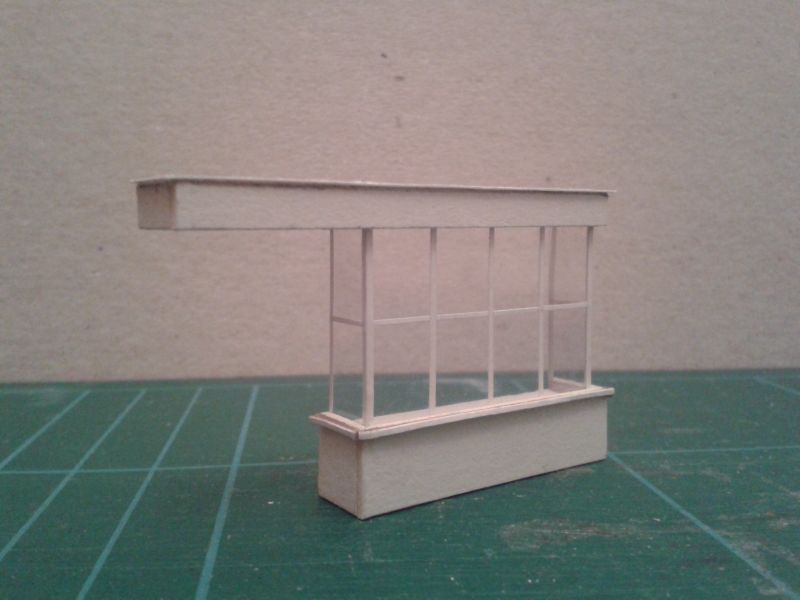
Progress update. All curtains have been fitted. I decided to make the shop window next. Whilst viewing the rather cruel enlarged photos, please bear in mind the length over the windows is only 35 mm. Three pieces of clear plastic packaging were cut to size…

The window frames were built up with strips of self-adhesive label…
Card was used to build up the facia and the foot of the window…
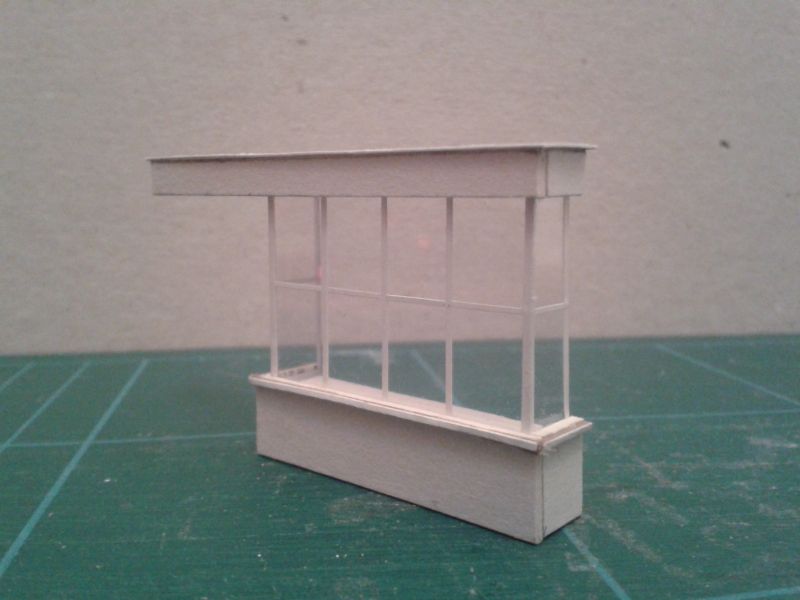
A wash of brown watercolour…
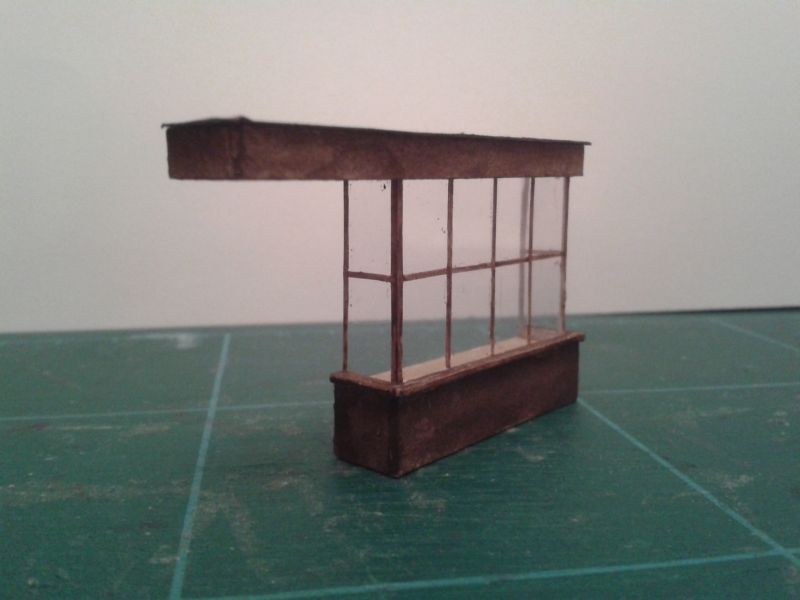
The window requires dressing and the shopkeeper's name applied to the facia before fitting in place. However, I am going to fit the shop doors first.
More soon.
Terry
Posted
Inactive Member
Max
Port Elderley
Port Elderley
Posted
Full Member
Or even part of the box…Another good use of materials from outside the box, Terry. :cool:

Great work as usual Terry!
Posted

Full Member
'Petermac
Posted
Full Member
Thank you all.
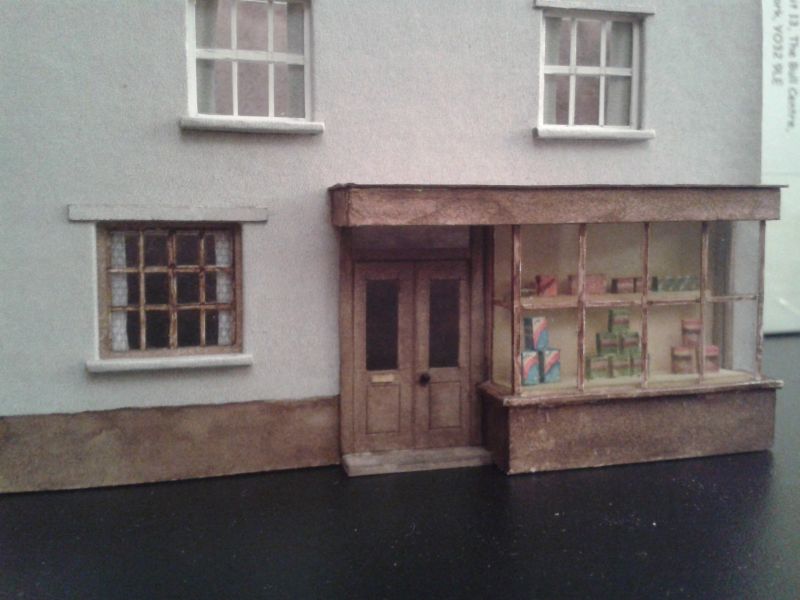
The shop window was fixed in place, but what to do about dressing it? The plan by John Ahern contains a small drawing showing jars and boxes, which can be copied and painted. I photocopied, painted and fixed it in place. However, it looked rather flat and had a 'Toy Town' look about it. Acceptable in the 1940's but not to our more discerning 21st century eyes. I ripped (literally) it out and sat down for a rethink. I decided to make a window display from small rectangles of card. They were arranged and glued onto a false floor and a shelf, before being painted with watercolours. The whole scene was then pushed into place from the rear of the window opening and secured with glue. Here is a picture of the rather weather-beaten window…
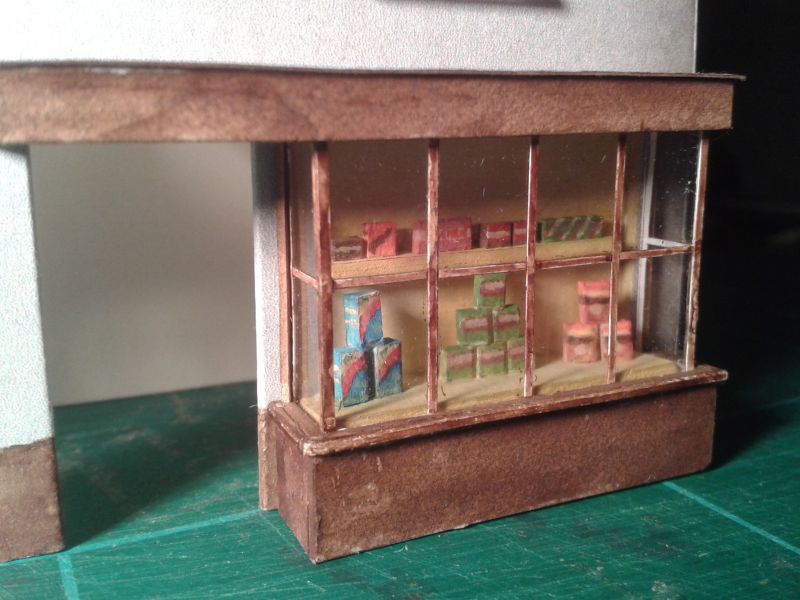
Terry
Last edit: by col.stephens
Posted

Full Member
http://yourmodelrailway.net/view_topic.php?id=12168&forum_id=62&highlight=dooferdog+shop
Post 11 gives a good view of Owididit.
Doug
Last edit: by Chubber
'You may share the labours of the great, but you will not share the spoil…' Aesop's Fables
"Beer is proof that God loves us and wants us to be happy" - Benjamin Franklin
In the land of the slap-dash and implausible, mediocrity is king
"Beer is proof that God loves us and wants us to be happy" - Benjamin Franklin
In the land of the slap-dash and implausible, mediocrity is king
Posted
Full Member
Thanks Doug. I wish I had thought of that!
The shop doors were cut from a piece of thin card. The lower panels were scribed and the upper panels were cut out. The door frame was slightly built up with more thin card.
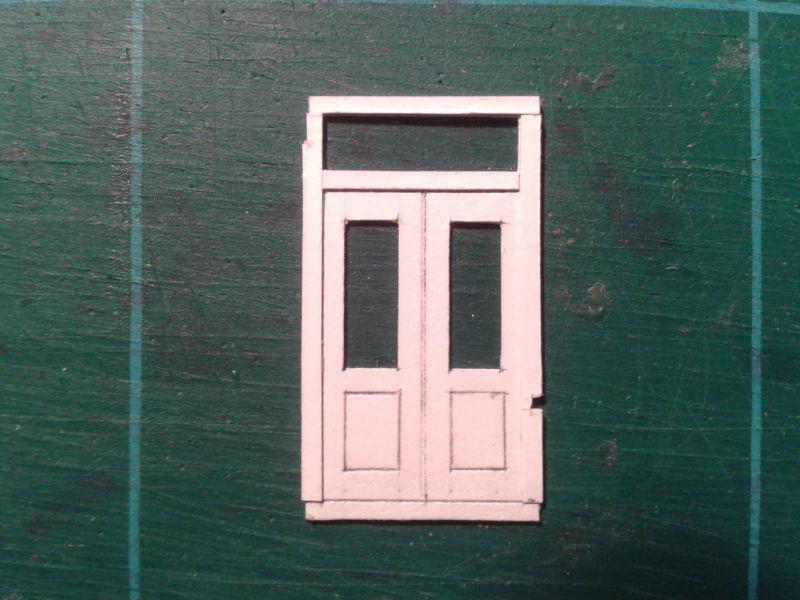
The whole was then glued to some acetic sheet for the windows and to give the doors some strength. A wash of brown watercolour followed and the door knob was added, this being the head of a Peco track pin. (Make a hole with a scriber, push the pin through, add glue and when dry, snip off the pin behind the door.) A slither of thin card was added for the letterbox and a dab of watercolour finished it off. The front doorstep, a rectangle of card, was painted and glued in place. This is how the shop frontage looks at present…
At this stage I gave the inside of the building a wash of dark watercolour.
More soon.
Terry
Last edit: by col.stephens
Posted
Full Member
'Petermac
1 guest and 0 members have just viewed this.