Rob P's Rolling Stock Workbench
Posted
#222668
(In Topic #12145)

Full Member
As alluded to on my member introduction thread, amongst other things, I do quite a lot of scratchbuilding aided by the use of a Silhouette Cameo. This thread will illustrate what I have been up to and how I went about it.
For the first post please bear with me while I set the scene for my current projects.
Back at the beginning of October, I decided that I wanted some 1:43 scale cars as loads for wagons and looking at some of the suppliers I was quite astonished at how much some of the O Gauge whitemetal kits fetch. Whilst browsing eBay I chanced upon some Danbury Mint pewter cars that were in need of TLC I got the 3 cars below for £15 including delivery. A bit of soldering of wheels/axles and straightening of window frames later and I had a Rolls Royce Silver Ghost, a Jaguar SS100 and an MG TC ready for painting.

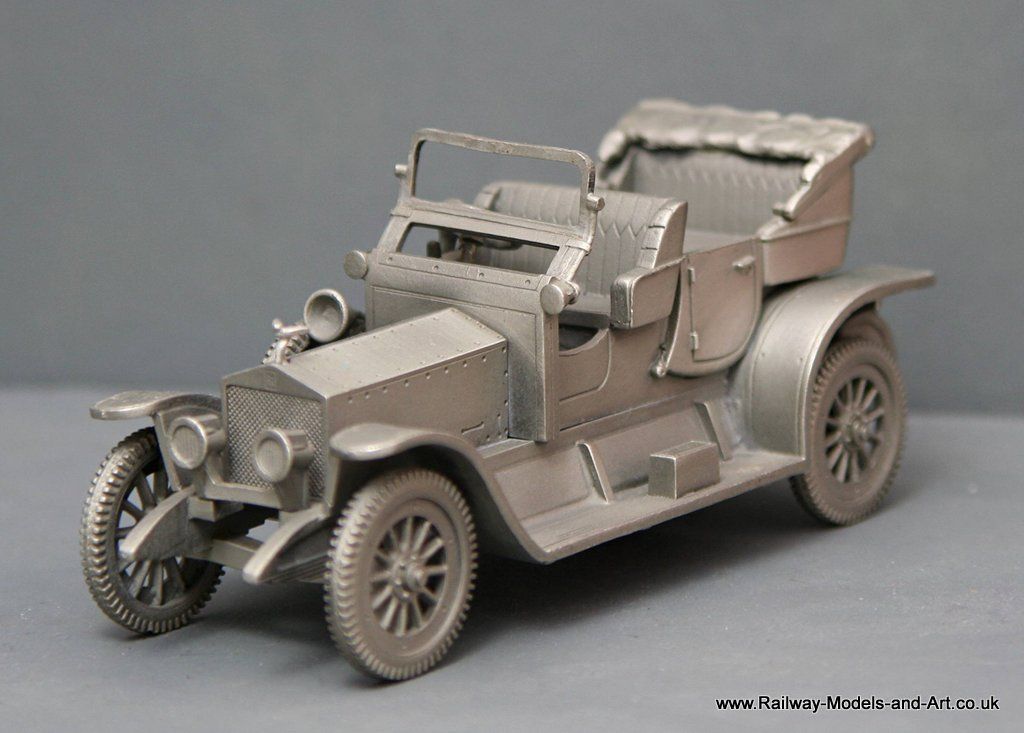
(Click to enlarge)


Nothing at all to do with scratch building I hear you cry, as I say, bear with me.
Regards Rob

Posted
Full Member


The Jag from the side looks like it's been in an accident that scrunched it up a little. Thankfully it doesn't look too bad from above which is where we will view it from once it's in it's final position.

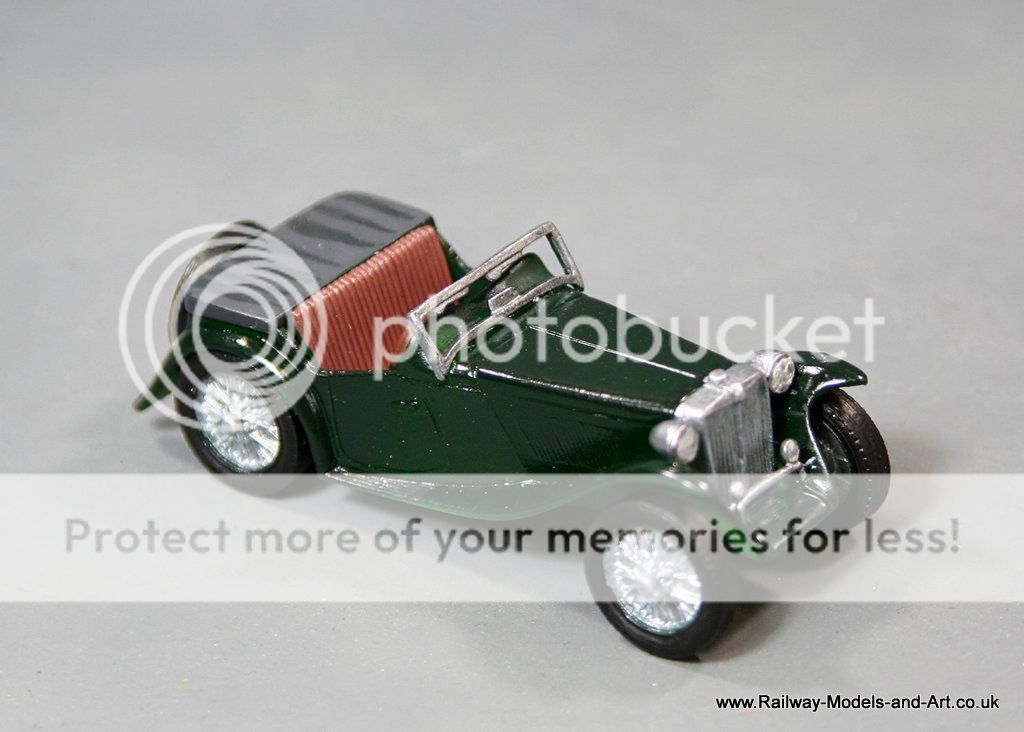
Since these photos were taken, I have given the Jag and the MG wheels/radiators a wash of dilute black to create shadows and take away the shiny newness.
Regards Rob
Posted
Full Member
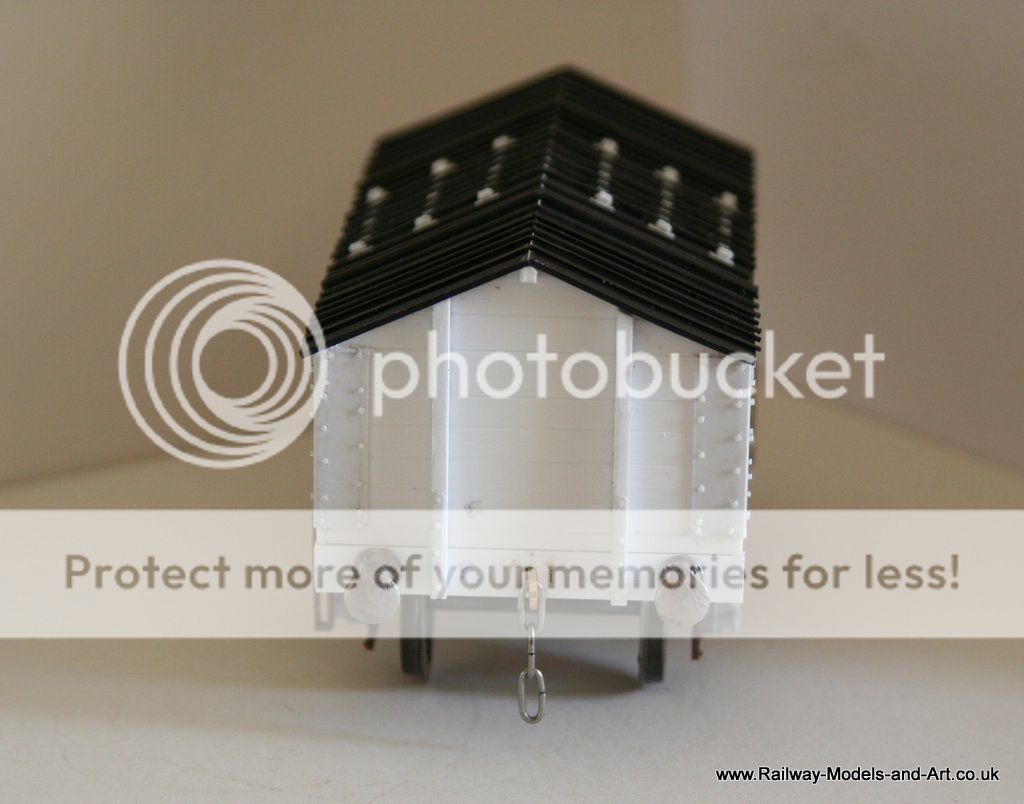
A look through my trusty Historic Carriage volumes gave me examples of GNR and NER so I made start on a couple of GNR examples.
First the 21' version whose Diagram number I cannot recall and I left my book up north.

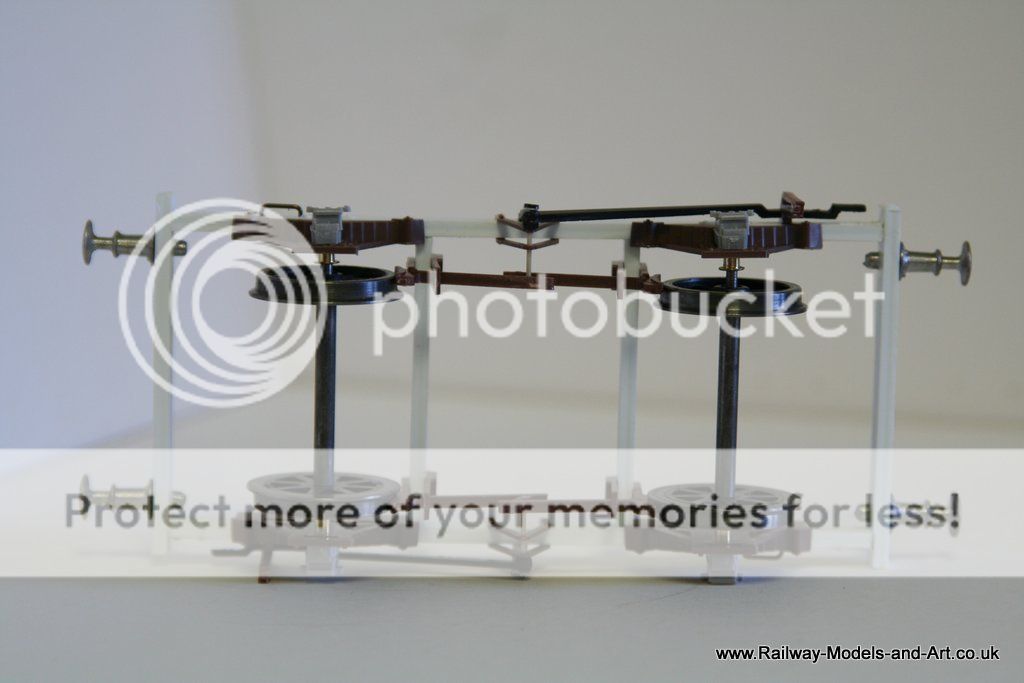
The J hangers/W Irons and axleboxes are spares from the Parkside LNER Horsebox which are available from Parkside by the sprue.

Followed by the earlier and shorter (18') Diagram 375


I have another 21 footer started too. All the hinges and details were drawing in Inkscape and cut on the Cameo.
Regards Rob
Posted
Full Member
Although last week was a bust from a modelling perspective due to being ill. When I started to feel better I did get a bit of drawing and cutting done which allowed me to make a start on what I think are the last two open carriage trucks for now.
First I made up the body and basic underframe for the GER OCT that I had enquired about the origins of on the LNER forum and RMWeb


The plan is to finish this with an A Type container (which I have made start on drawing up in Inkscape).
Last but by no means least (because it's a bit of a beast at 34' 8") is a former NER 6 wheeled OCT. Apparently in 1917 these had their sides removed and bolsters added for the conveyance of Aeroplane parts.


Regards Rob
Posted

Full Member
Going together very nicely, the advantage of 7mm is you can get that extra level of detail
Posted

Inactive Member
Compared to a 3D printer which will do the same quality work.
Max
Port Elderley
Port Elderley
Posted

Full Member
What thickness of styrene can that cookie cutter cut?
Nigel
©Nigel C. Phillips
Posted
Full Member
Hi Max,
I agree, although 3D printers are coming down. The downside is that there is a whole new learning curve to learn how to do it in 3D. I have tried to get to grips with it but much like previous attempts at 2D I really need somehting to give me the impetus to get on and do it which the Cameo gave me for 2D drawing. That and Inkscape is so much easier to learn (in my experience) than AutoCad/Turbo Cad and Draftsight packages that I have tried to get to grips with in the past (and failed miserably….).
Hi Nigel,
Although I haven't cut any myself the thickest I am aware of being cut through is 15 thou. I use 10 thou for the details like hinges etc. and multiple layers of 20 thou which I heavily score and then snap. For example the sides of the GER OCT are 3 layers of 20 thou.
To put them together I have a sheet of plate glass (a shelf from a fridge that died) along the long edge I have stuck a strip of Aluminium (stuck with PVA). I also have some flat T squares from Eileens Emporium follow link - T Square which I clamp to the glass sheet using cheap clamps from the pound shop which gives me one or more right angled edges to but the layers up against while they are glued and the next layer positioned on top. I use Limonene as the solvent of choice these days and then once all the layers are stuck together I have a second shelf that I place over them to compress them and keep them flat until the solvent dries.
I have a couple of the 3 inch squares and a 4 inch version which because they are flat and easily clamped I use for all sorts of modelling applications. I have a couple of small standard squares too but I don't find them quite as versatile.
For plain items like the sides floor of the GNR carriage trucks I just score and snap 40 or 60 thou without using the Cameo at all.
Regards Rob
Posted
Full Member
Thanks. At that thickness I'm sort of tempted, as I could use CorelDraw for preparing the vector files, 10 thou' or less for the structures (black UV stable styrene), and decal rivets as required. Slab sided freight cars with the sides and doorways cut to size (or passenger cars with the windows and doorways cut to size in the sides and ends) could be interesting.
Nigel
©Nigel C. Phillips
Posted
Full Member
It's certainly addictive, in a good way. I really like making things.
Regards Rob
Posted
Full Member
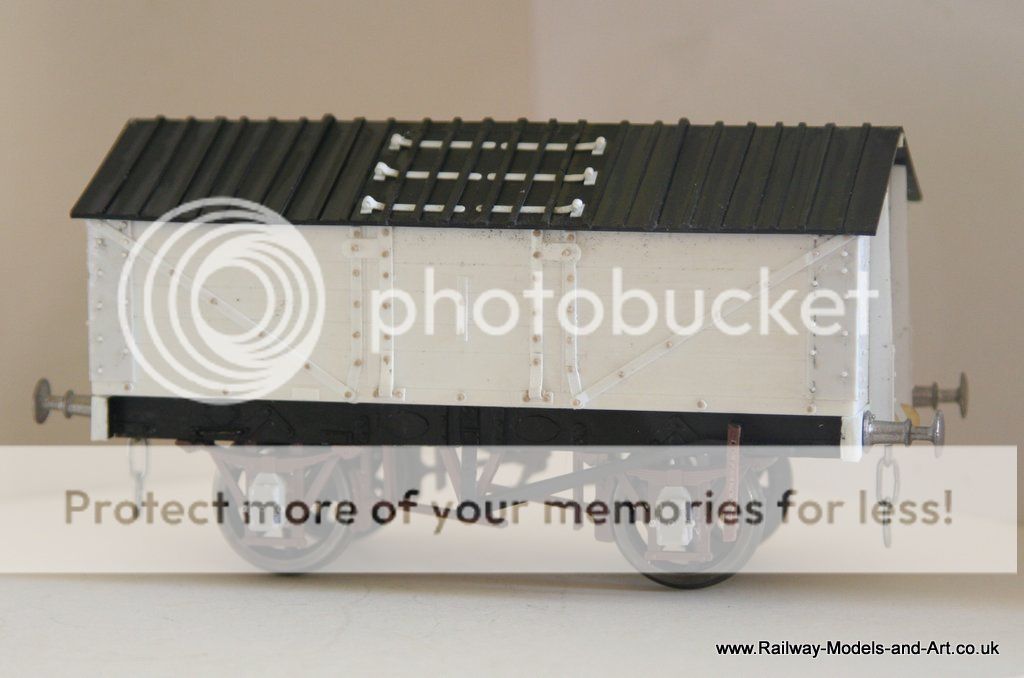
I have a collection of drawings of various items of rolling stock and locos so I chose a Lime wagon as being a bit different (I had recently built a Slaters Salt wagon and liked the idea of another pitched roof wagon).
So I set to with an Olfa cutter and some sheet styrene.


The crown plates and washer plates were all cut by hand from either evergreen strip or sheets of 10 thou styrene and the underframe fittings cane out of the spares box. The hinges for the doors were the most difficult to cut four that looked remotely similar let alone identical near drove me to distraction.
You will note that the buffers are fixed not sprung. I had them in the spares box and at that point I didn't know how it would turn out so decided that if I ended up scrapping it then they were nothing lost.
Regards Rob
Posted
Full Member

Getting all the strips the same width was a bit of a challenge but the investment in a "Northwestern Shortline Chopper II at least helped me get the lengths all accurate.
Regards Rob
Posted

Full Member
John
John
Posted
Full Member
Nigel
©Nigel C. Phillips
Posted

Full Member

Posted
Full Member
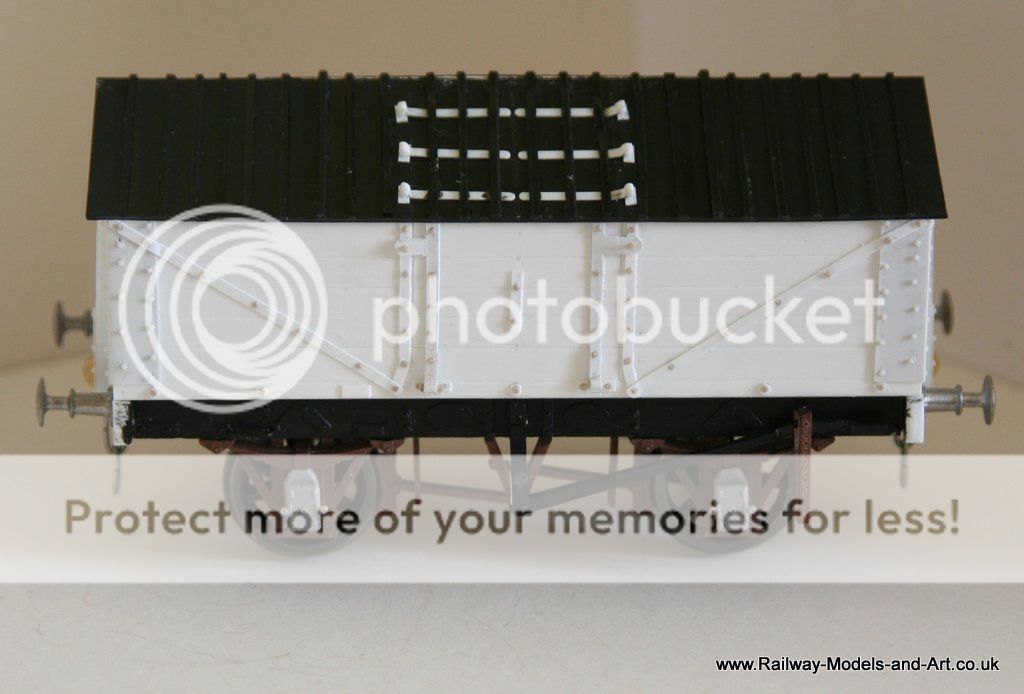
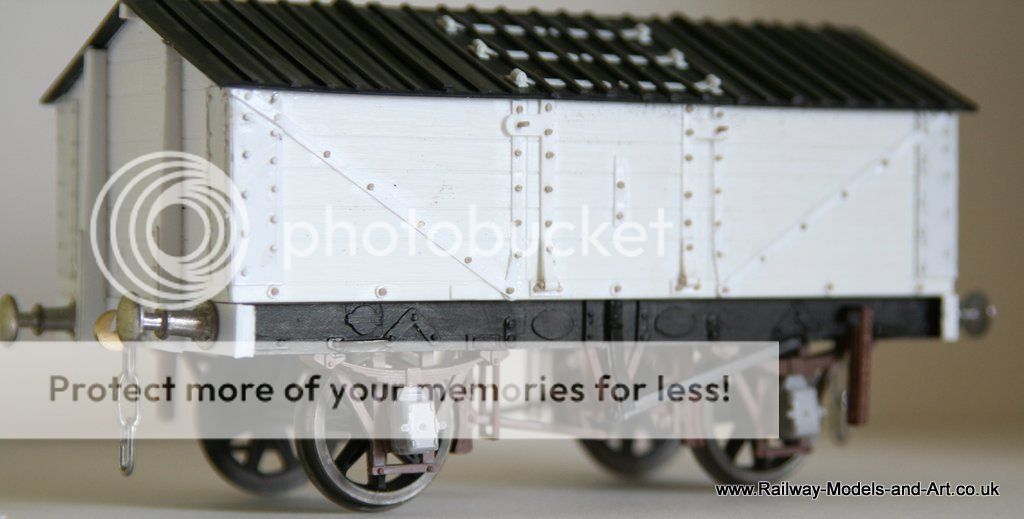
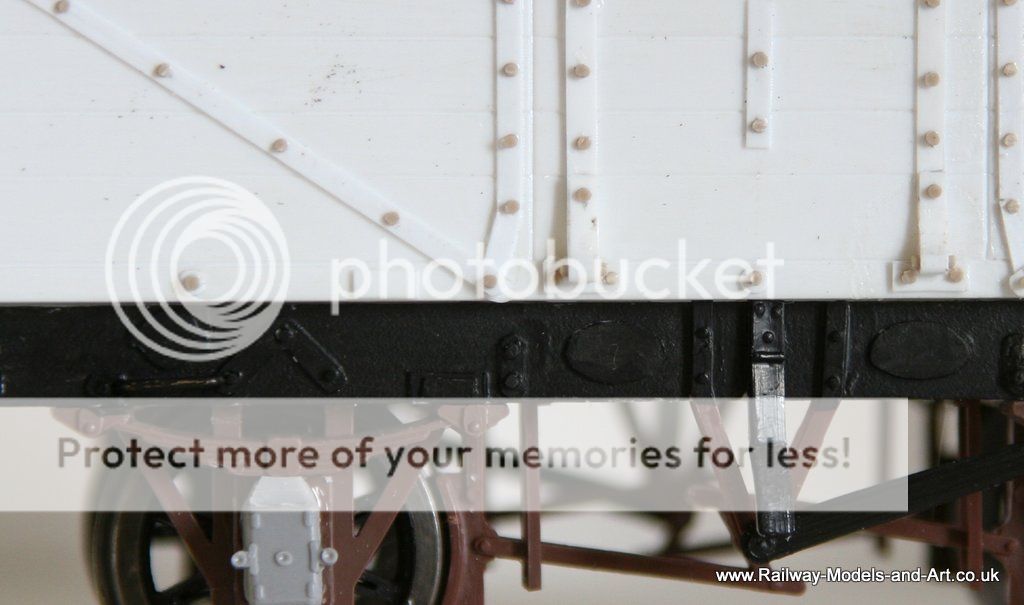
Not an area I know a lot about - what are the various plates on the sole bar of the wagon? This looks to be a pre-RCH wagon (from the Skinley drawings no less sez your blog).
I'm guessing the sequence (left to right) is registration plate, label clip, makers plate, plus of course any repair plates. I'm intrigued by that corner plate (normally a semi-circular plate) above the axle boxes - strengthening?
Are you going to add horse hooks?
Nigel
©Nigel C. Phillips
Posted
Full Member
They are stubbs of plastic into holes drilled into the wagon side. I then used a scrap of sheet with a hole drilled in it to pop over them as a filing guide to get them all the same length.
Regards Rob
Posted
Full Member
Thanks Nigel,Hi Rob,
Not an area I know a lot about - what are the various plates on the sole bar of the wagon? This looks to be a pre-RCH wagon (from the Skinley drawings no less sez your blog).
I'm guessing the sequence (left to right) is registration plate, label clip, makers plate, plus of course any repair plates. I'm intrigued by that corner plate (normally a semi-circular plate) above the axle boxes - strengthening?
Are you going to add horse hooks?
Nigel
I think that the corner plates on the sole bar are crown plates but angular instead of the more usual semi circular crown plates - they still have the three bolts which I assume bolt the curved top of the W Iron in place much as they would on the more standard variety.
I have added horse hooks they are just visible in the last close up photo - replacing the bolt head on the left hand leg of the angled crown plate. - I just followed the drawing adding the detail that was visible.
Regards Rob
Posted
Full Member
I produced the transfers myself printing them onto white laser decal paper.


Once it was finished I was really pleased to be contacted by Paul Bartlett (HMRS Wagon Steward) who offered that although he didn't have a photo of the specific wagon he did have a photo of a wagon in Dowlow Lime livery and I had it spot on.
Note the solebar registration plate transfer was a spare from a Slaters sheet (I think).
Regards Rob
Posted
Full Member
I do like your transfers. I've made them before but with a cheap laser printer which tended to overheat the transfer sheet causing smears. I now have a much better ink jet printer (HP 8270 Office Pro) but have yet to try making transfers with it.
John
John
1 guest and 0 members have just viewed this.