An engine shed for a friend
Posted
#206542
(In Topic #11327)

Full Member
Robyn

Posted
Guest user
:thumbs
Toto
Posted

Site staff
Ron
NCE DCC ; 00 scale UK outline.
NCE DCC ; 00 scale UK outline.
Posted
Full Member
Posted

Full Member
I print brick, stone tile etc onto A4 labels using a colour laser, no problems with ink running, and using self adhesive label saves a lot of messing about with glue and waiting for it to dry. (you do need to take a bit of care positioning it unlike glue where you can usually slide it around)
A4 is fine for N gauge and smaller buildings in 00, but you can also get A3 self adhesive paper and A3 colour lasers for the bigger stuff. Some of the colour lasers can also print to banner paper, mine will do 215x1200mm, ideal for backscenes
 Last edit: by Dorsetmike
Cheers MIKE
I'm like my avatar - a local ruin!
I'm like my avatar - a local ruin!
Posted

Inactive Member
Max
Port Elderley
Port Elderley
Posted
Full Member
Looks good Robyn. Do you cut by hand, or do you use a plotter cutter like some of us on this forum?
I print brick, stone tile etc onto A4 labels using a colour laser, no problems with ink running, and using self adhesive label saves a lot of messing about with glue and waiting for it to dry. (you do need to take a bit of care positioning it unlike glue where you can usually slide it around)
A4 is fine for N gauge and smaller buildings in 00, but you can also get A3 self adhesive paper and A3 colour lasers for the bigger stuff. Some of the colour lasers can also print to banner paper, mine will do 215x1200mm, ideal for backscenes
All hand cut, mind you I have used the grey card for the trusses and that takes quite a few cuts with the knife to get through. I also find my blades get blunt rather quickly. I am sure the laser printer would be better than inkjet, I have had some problems with self adhesive labels which don't seem to keen on the humidity we have here in sunny Queensland.
Robyn
Last edit: by RobynT
Posted
Full Member

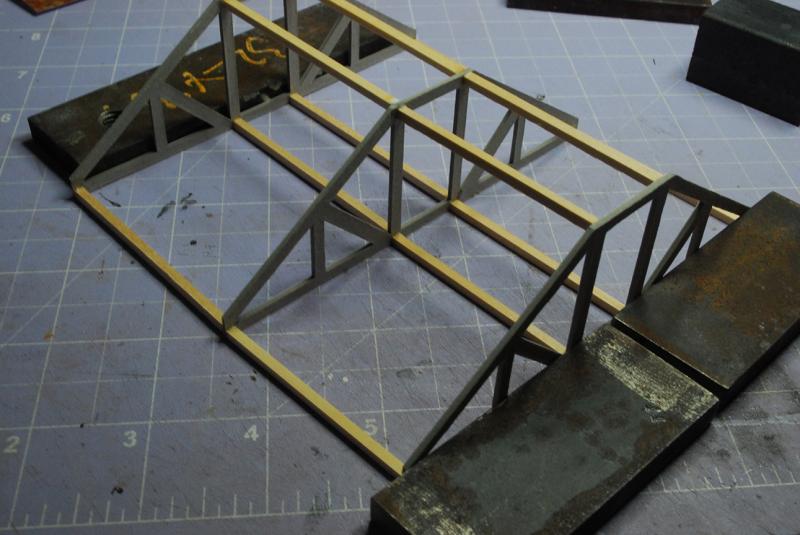
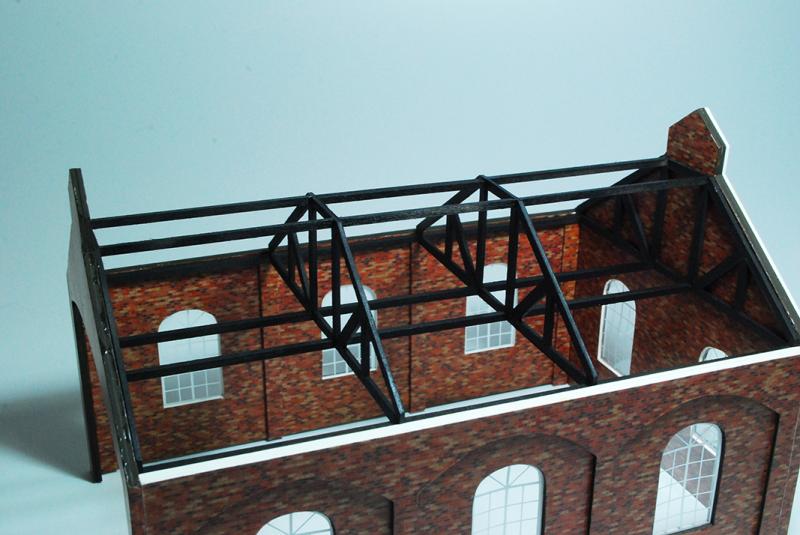
Now for the part that has caused me some grief. The roof trusses are to be joined together with some strip wood and I have had a reasonable amount of issues trying to get the sticks to stick to the card, the problem is no doubt the end grain so I decided to try sticking them with superglue. The sticks did not stay in place but the superglue soaked through the card and glued it to my cutting mat! I think I may have found a solution of sorts and that has been to apply a dollop of pva to the endgrain and set them aside to dry. After drying I have then glued them to the card trusses and this seems to have worked…YAY! YIPEE! etc. I did find that I do not have enough hands to hold it all together so I have used some steel blocks and this seems to have worked. If anyone else has a better and quicker method to build these I would love to hear from you.
Robyn
Last edit: by RobynT
Posted
Full Member
Robyn

Posted

Full Member
Nice looking shed, wish my fingers were up this standard. Are you planning on a kit?
It looked familiar, especially the brick, check out:
http://www.28dayslater.co.uk/adderbury-milton-g-w-r-engine-shed-and-quarry-pump-house-february-11th-2012.t75031
Not quite the same, but replete with original details.
Incidental to the shots are some nice details of the roof trusses and window frames (still there after over 50 years). Plus the inspection kit.
Nigel
©Nigel C. Phillips
Posted
Full Member
Hi Nigel,Hi Robyn,
Nice looking shed, wish my fingers were up this standard. Are you planning on a kit?
It looked familiar, especially the brick,
Not quite the same, but replete with original details.
Incidental to the shots are some nice details of the roof trusses and window frames (still there after over 50 years). Plus the inspection kit.
Nigel
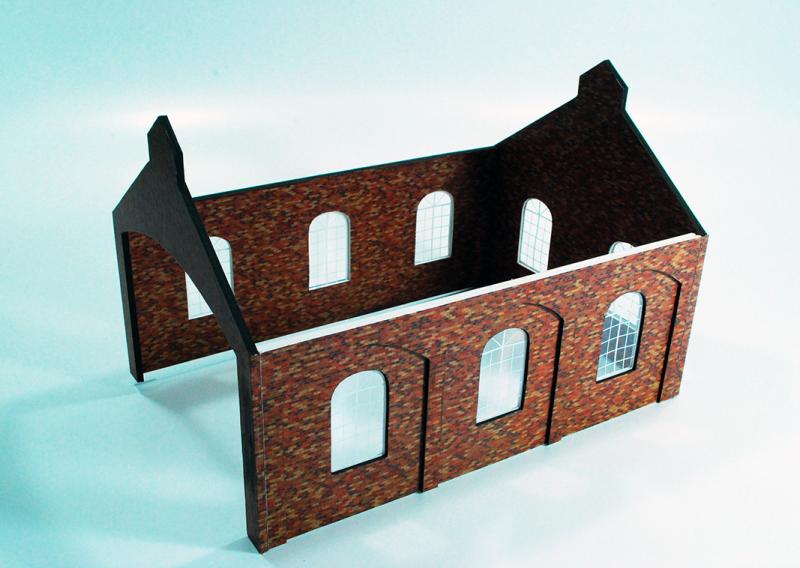
This is a design it as you go model, I have created the drawings to fit a space on my friends layout. A freelance design that is plausible ???? I am sure that some of the details may be incorrect when compared to real engine sheds but I think it will look ok when finished. Your photos are a great help thank you for the link. As far as a kit is concerned I doubt anyone would buy it, I have over twenty card model kits on my computer that I have developed since 1998 but there are so many people doing this now that I doubt there is room for more. The line drawings for this model were created in CorelDraw and are very basic.
Robyn
Posted
Full Member
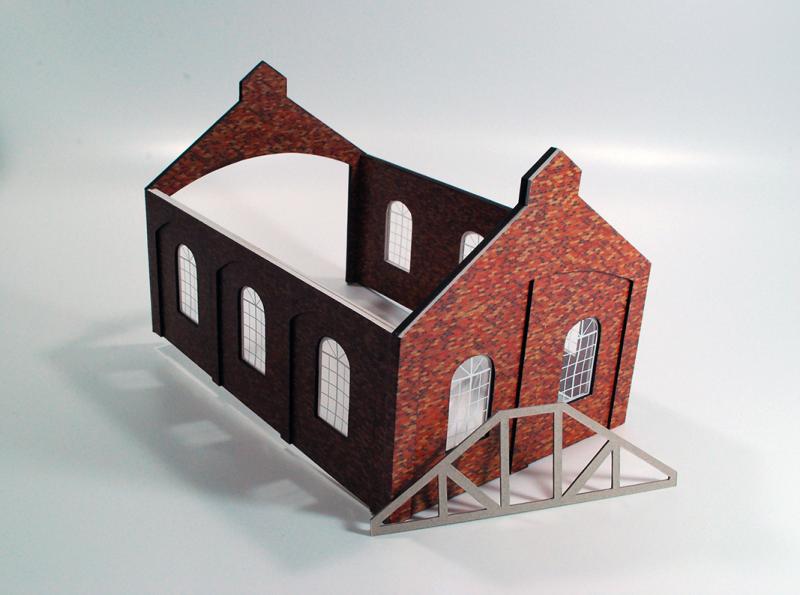
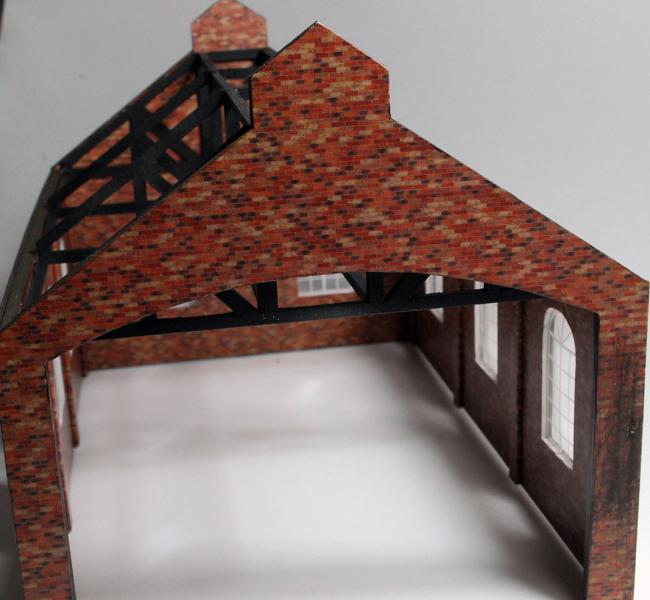
There is always a little gremlin that works its way into these sort of projects and I feel like a bit of a dummy. The roof truss at the opening is lower than the arch I cut.. oh poop, it is too late now to redo this so I have decided to fit a timber panel across the front and "square up the arch" I will amend my drawings just in case I ever make another one of these. It is such a silly mistake and annoys me greatly but I am sure it will be alright once I do the infill panel.
Robyn
Posted
Site staff

Ron
NCE DCC ; 00 scale UK outline.
NCE DCC ; 00 scale UK outline.
Posted
Full Member
Plans are meant to be changed Robyn
Thanks Sol, I appreciate your support. I usually don't do models on the fly like this and making it up as you go is a bit scary for me. I always want my work to be really good and silly mistakes are a bit annoying. I'm sure it will be alright on the night.
Robyn
Posted
Full Member
Robyn


Posted
Inactive Member
Max
Port Elderley
Port Elderley
Posted
Full Member
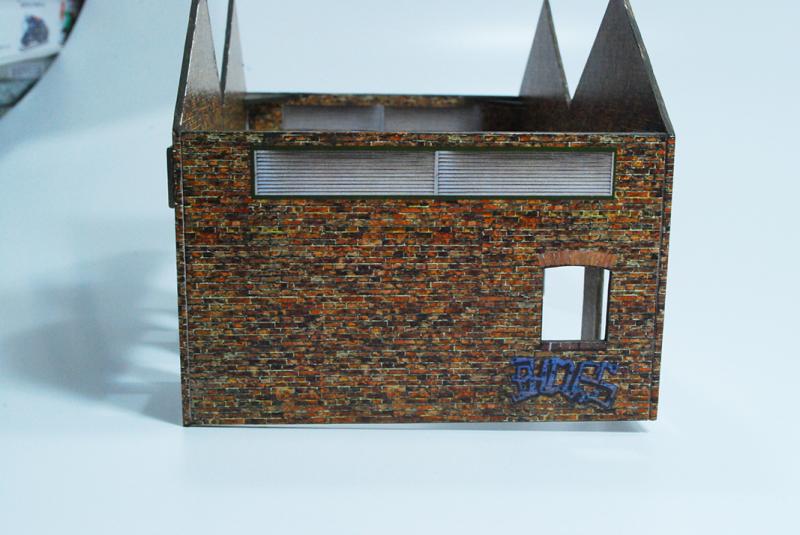
As always the quality of your work is excellent. Love the brickwork.
Andrew
Posted
Guest user
Ian
Posted
Guest user
Cheers
Matt
Posted

Full Member
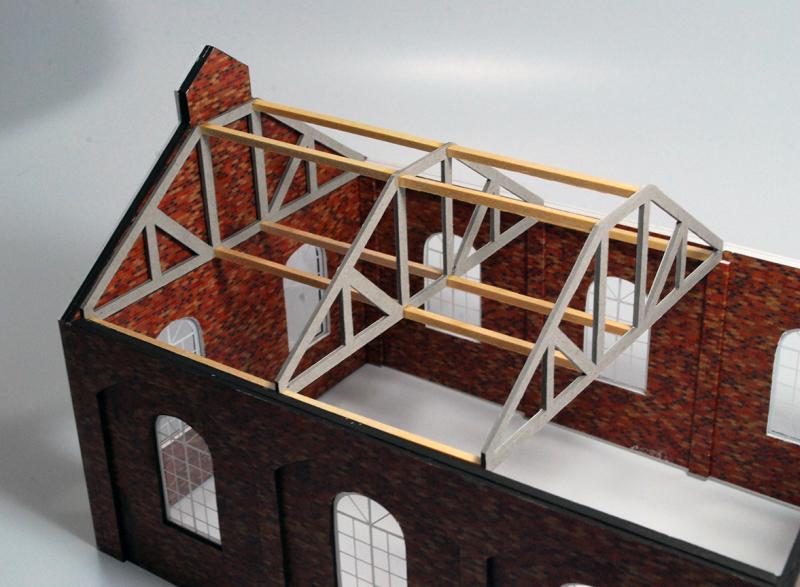
Regarding the roof trusses, I think I would have made the wooden beams the full length of the building and cut out square notches in the card trusses to take the beams, you would then not be trying to glue onto the end grain.
Cheers
Andy
Andy
1 guest and 0 members have just viewed this.