Improving the look of Hornby's Skaledale Cement Hopper.
Posted
#202118
(In Topic #11168)

Banned
Adding the details that were left off...
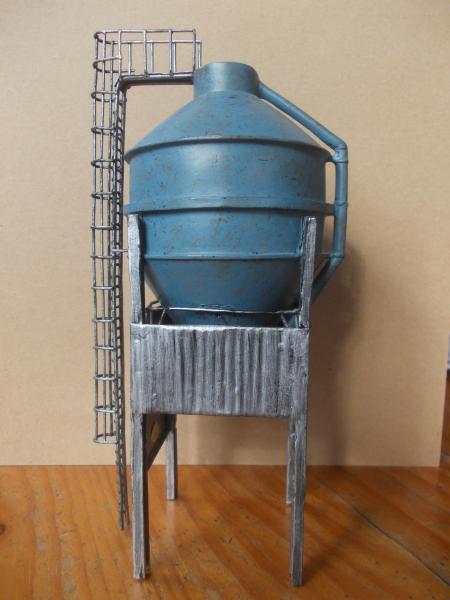
I have recently done a little research into the use and position of the Hornby Slaledale cement hopper. What I had found with this model is that it is not used as the outside packaging dispalys. The other thing I found was how much smaller detail is lacking off the model. I am in the process of improving the look of this model, to make it look a lot more prototypical than what it is out of the box. Now one thing for sure is that I'm not knocking Hornby in producing a model with such lack of detail, as this model is probably aimed at the 'purchase and plonk' (ready to plant) modellers out there, including myself ! ;-)This is what comes in the box :
These two links will provide a pic of what the real 12":1' hopper looks like :
http://www.rmweb.co.uk/community/index.php?/topic/69772-poole-station-progress-is-made/?p=1048354
http://www.rmweb.co.uk/community/index.php?/topic/101538-how-do-you-properly-use-the-hornbyskaledale-cement-hopper/?p=1967354
As can be seen in the pics in the links, there is substantial rbbing on the body of the hopper. This is the first part of the model which needs rectifying.
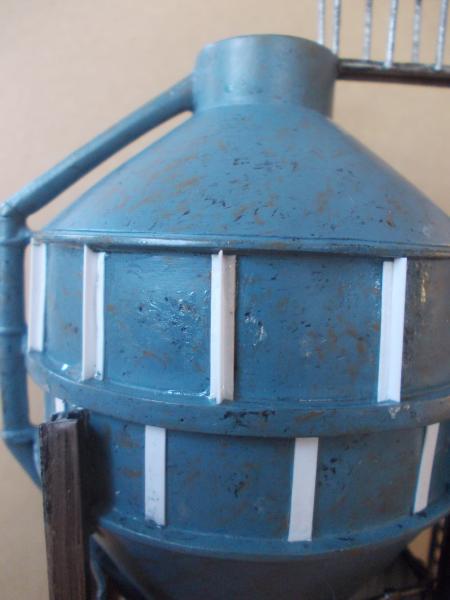
I used Evergreen Styrene for the ribs. Individual lengths of 0.25 x 2.5mm strip was cut to length and glued to the hopper. These vertical strips are spaced approximately at 4'8" centres. These are positioned in the off-set position on each horizontal section of the hopper.

After allowing this to dry, Evergreen Styrene 1.5 x 0.25mm strip was glued in the cetres of these strips (shown above) to form a T section. I could have used Evergreen Styrene angle for this, but the smallest right angle is 1.5mm x 1.5mm. Personally I thought that would make the ribbing look too wide, although I have used 2.5mm strip for the top of the T section…
After completing the T sections on both rows of the horizontal section, the top conical section (roof) requires ribs. This again was completed with 2.5 x 0.25mm strip and 1.5 x 0.75mm strip.
I chose to model only four ribs in the roof of the hopper. These line up centrally with the lower ring of the hopper sides. I can't quite tell if there are any ribs on the throat/funnel (lower) section of the hopper or if it is rust causing streaks. Maybe they should be modelled regardless, keeping it similar to the top/roof.
One section that is lacking in any detail is the top, where the walkway ends.
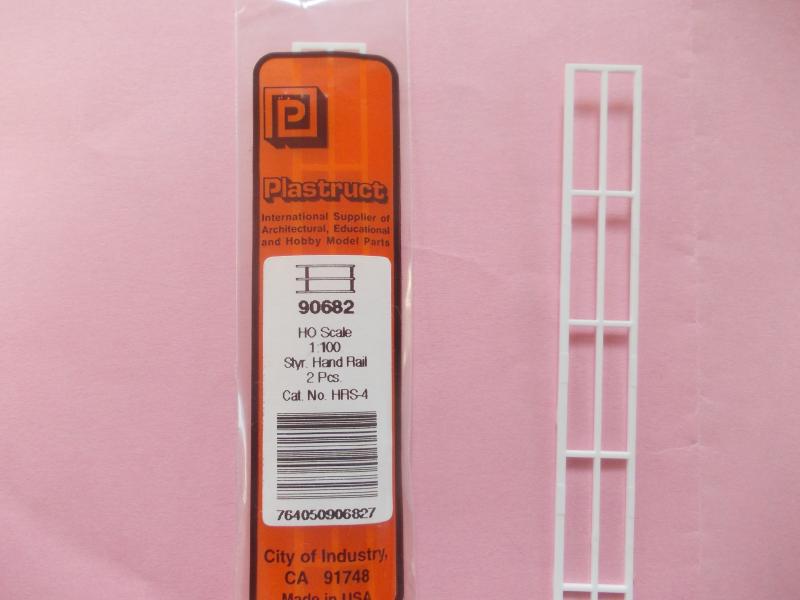
This area will be treated with a walkway around the sunken area. I'm awaiting delivery of a packet of Plastruct handrail, to which I'll bend to shape and secure to a mesh walkway/landing. Inside the sunken area a hatch will be modelled. I guess that this would contain some form of a screw down wheel locking system. I had a look in the spares box and I have the odd piece that should do the job.
Anyway, that's it so far, part 1, until my Plastruct railings arrive.
Cheers, Gary.

Posted
Banned
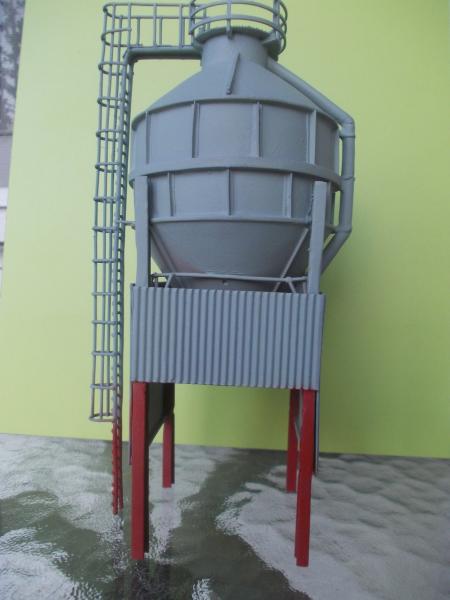
Following on from last week, I have added the ribbing to the lower funnel section of the hopper, added new corrugated sides to the frame, added a decent landing/walkway/accessway to the top and an inspection hatch in the sunken area at the very top.
The inspection hatch is from an old white metal turntable kit which I didn't need anymore. It fits the bill quite nicely, although I was going to use an old brake wheel from a defunct wagon, but I never did find one.
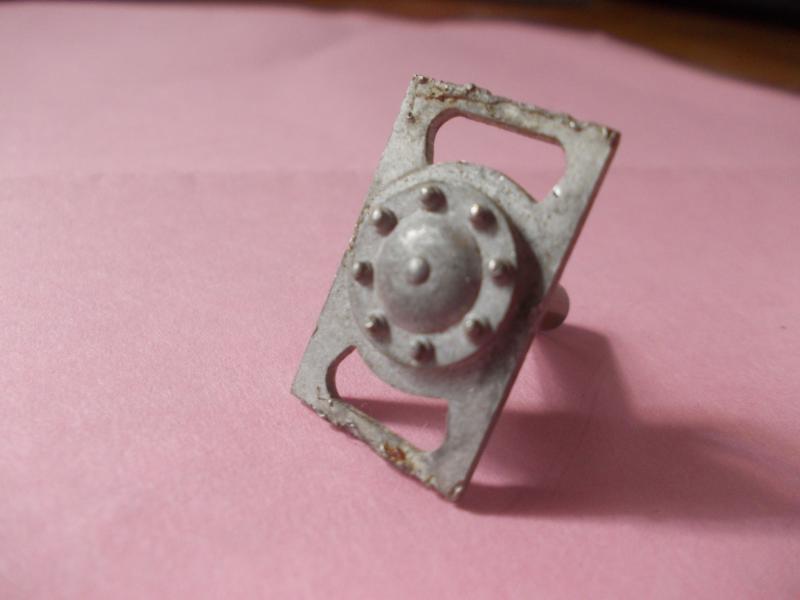
Above. The two extensions were removed and the rest was put into a drill and filed round, back to the circular section below the bolted detail ring. Further along in the post is a pic of it installed.
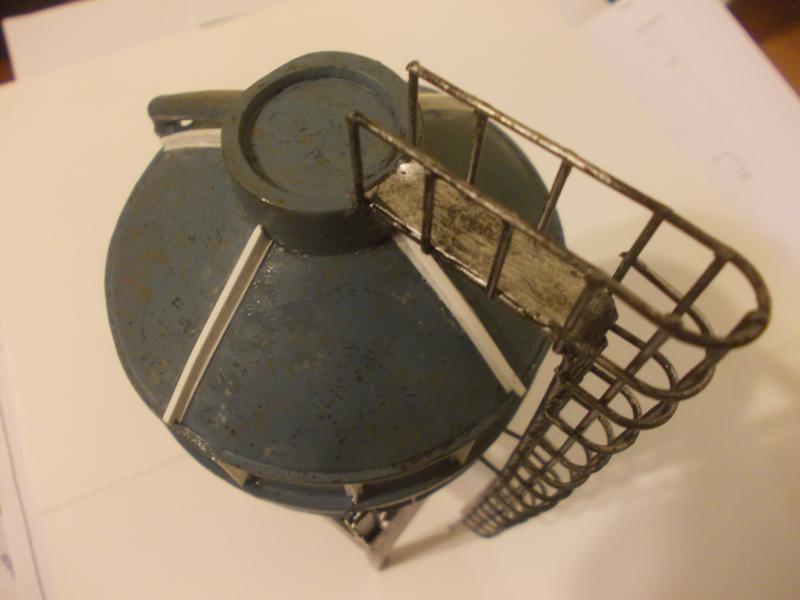
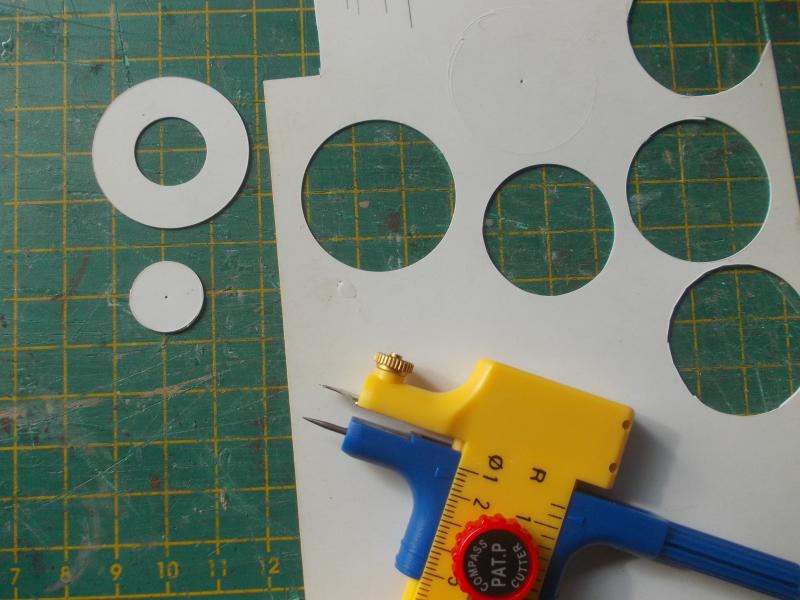
The walkway was cut from styrene sheet after several attempts with a scapel and a template. I will say that I'm not that good at cutting perfect circles, especially when the centre section needs removing. In my stash box, I have a compass cutter which I never had used, until now. After two attempts with this, I got what I was after.
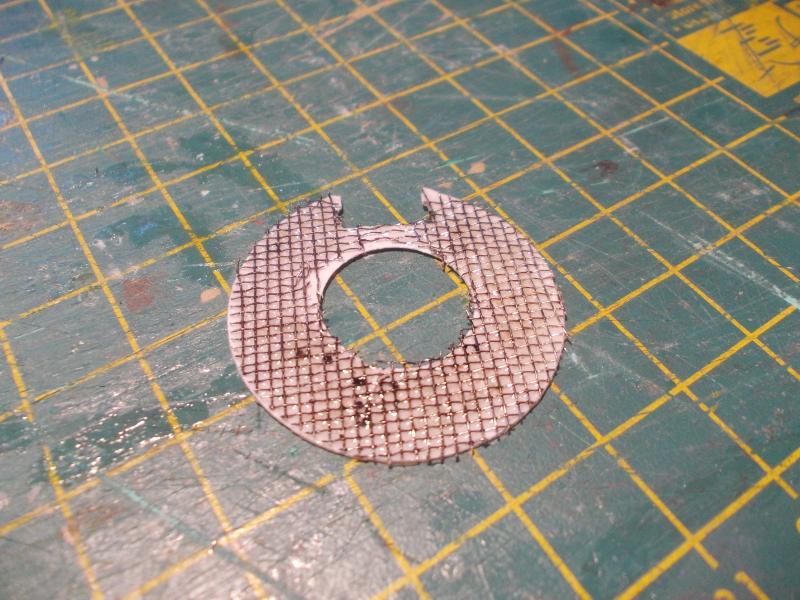
This circular section was trimmed up to fit around the existing handrails and the a piece of fine wire mesh was glued to the top, then trimmed to shape. The only way I could get the mesh to stick to the styrene was with heat, then glue. I had used Zappa Gap, Araldite and also Super Glue, but heating the mesh up on the stove then pressing onto the styrene worked best, followed by a flooding of Zappa Gap.
The above chequer plate walkway was glued centrally on top of the raised area and the hatch cover glued in place.
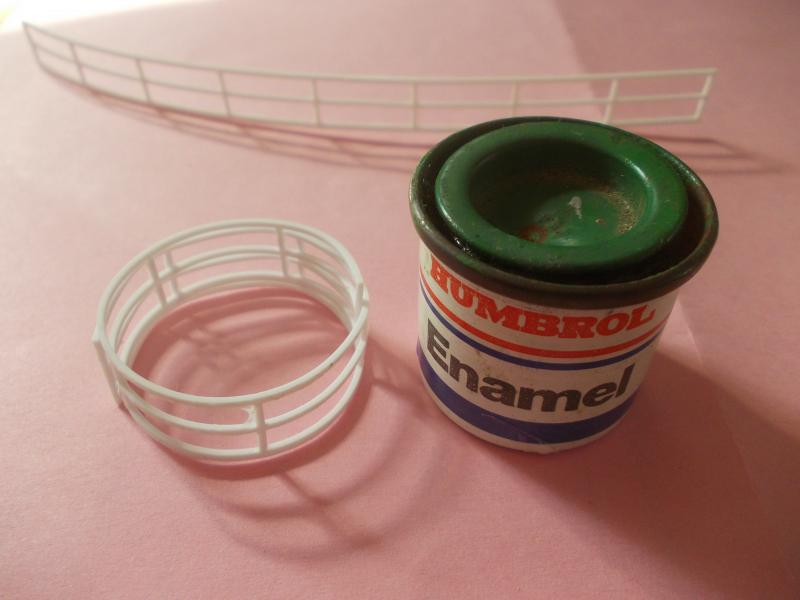
The handrail for the top walkway is made from Plastruct handrails. These were bent to shape by soaking in boiling water and wrappping around a Humbrol paint tin, tapped in place until cool.
To bring the handrail up to the same height as the existing wire handrails, 14mm long 1.2mm diameter rod was glued to the inside of the circular handrail, after trimming to the correct length to fit the walkway.
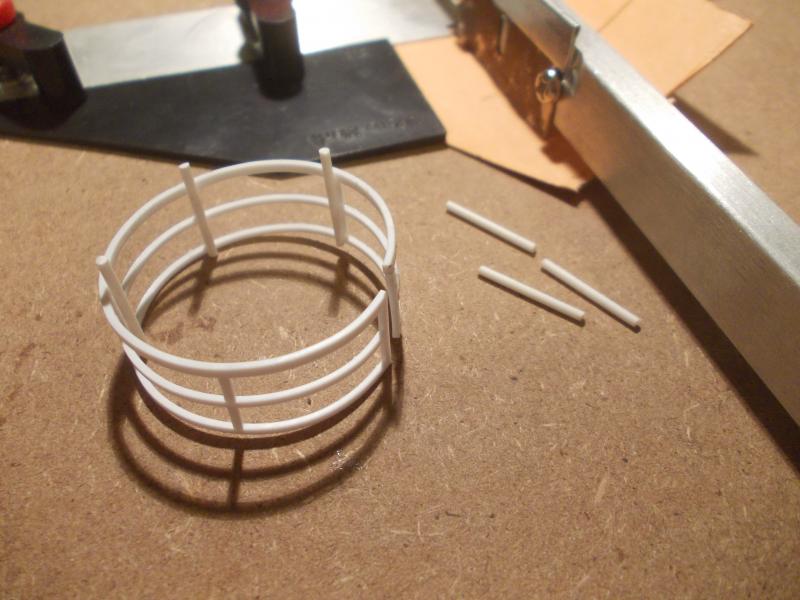
This was then glued to the edge of the walkway where I had glued in some bracket supports.

Following this, corrugated card was cut to the correct size and glued over the top of the existing dodgy looking iron work prior to painting and installing the ribs on the lower funnel section.

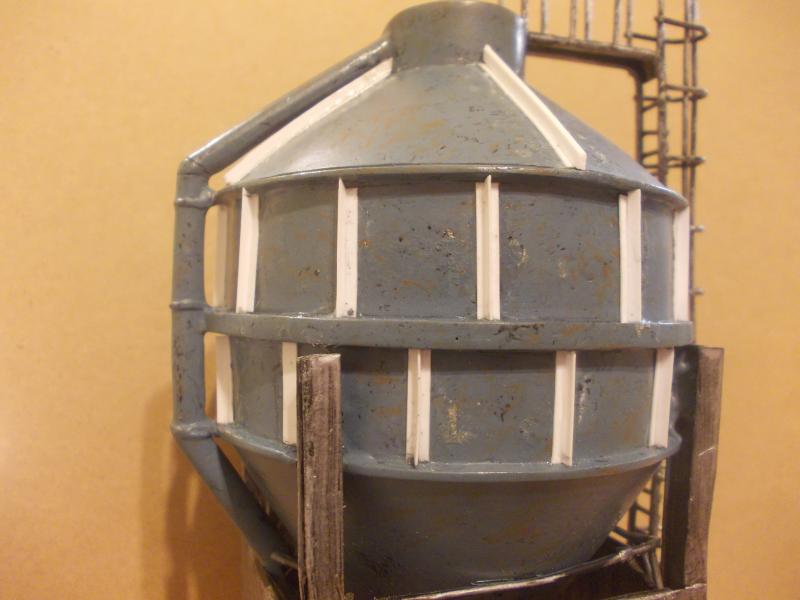
I had painted the model with automotive spray putty first, before applying a coat of grey (automotive) primer. Thes pics (above and below) are the result.
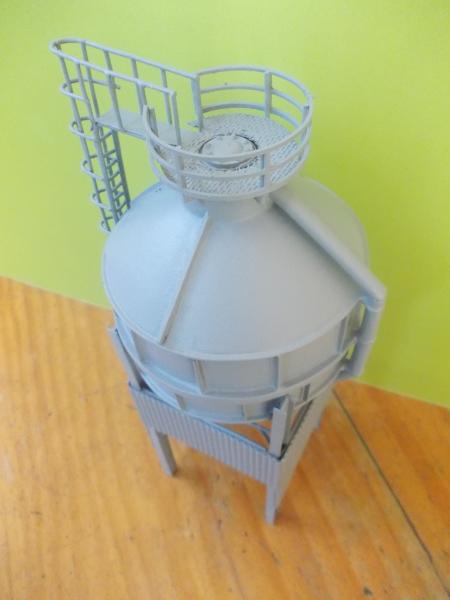
I'm happy with the result so far. I have considered adding extra pipe work to the model, but further investigation of the prototype will be warranted. After this, a final spray and weathering is required before installation on Industry Lane.
Cheers, Gary.
Posted

Full Member
The chequer plate walkway construction is inspired…
cheers
Marty
Posted

Inactive Member

Max
Port Elderley
Port Elderley
Posted
Banned
Could have saved me some time by purchasing a sheet of Wills or Evergreen Styrene chequer plate, but no local shops had any in stock. Imagination is a wonderful thing, especially when it comes to fruition. ;-)
Thanks Max.
I'm honoured to be awarded an Elephant Stamp from you. Thankyou.
Cheers, Gary.
Posted

Site staff
:pathead
I guess some of the detail may not be seen unless the loader is close to the operator side of the layout.
Ron
NCE DCC ; 00 scale UK outline.
NCE DCC ; 00 scale UK outline.
Posted
Banned
Thanks for your kind words.
As can be seen, the hopper will be situated not more than 3" to the very front of the layout. It's there for all to see… ;-)
Cheers, Gary.
Posted

Full Member
Bob
Posted

Site staff
Ed
Posted
Guest user
Terrific work as usual and a very clear and understandable " how too "
Fantastic:thumbs
Cheers
Toto
Posted
Banned
Hopefully get some real paint onto it this afternoon/evening. Then give it a dust up with weathering powders.
Cheers, Gary.
Posted

Full Member
Cheers
Andy
Andy
Posted

Inactive Member
Posted
Banned
The idea of using the foil from paracetemol is a great. I'll have to remember that next time. Then again, not that much medication in our household.
Cheers, Gary.
 Last edit: by Gary
Posted
Guest user
don't worry about the paracetamol foil. I have plenty for when Paul phones for one of his gizzmotronics chats.

It looks really great.
cheers
Toto
Posted
Guest user
 great Job Gary, looks the business :thumbs
cheers
Matt
Posted
Banned
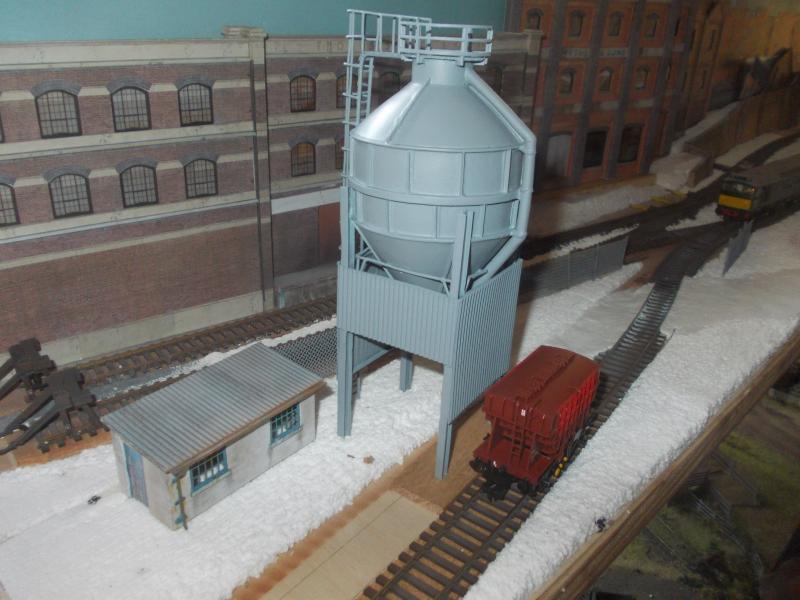
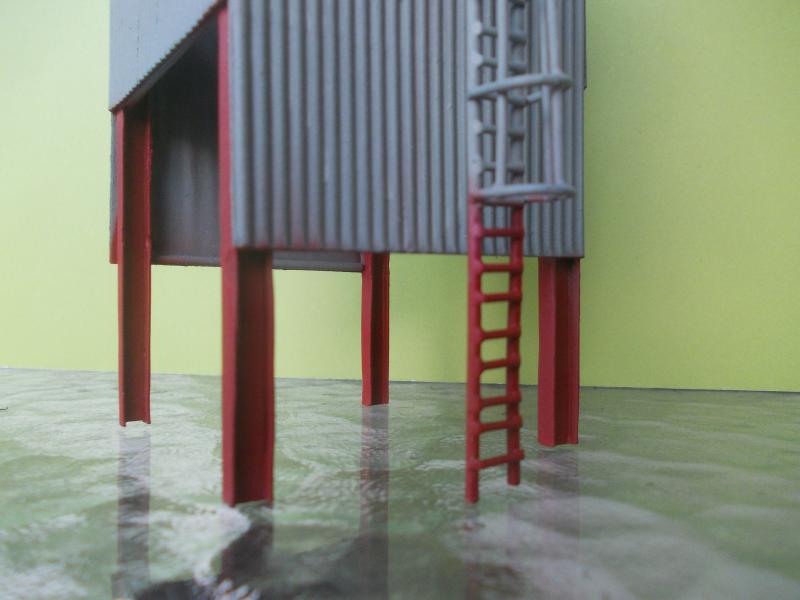
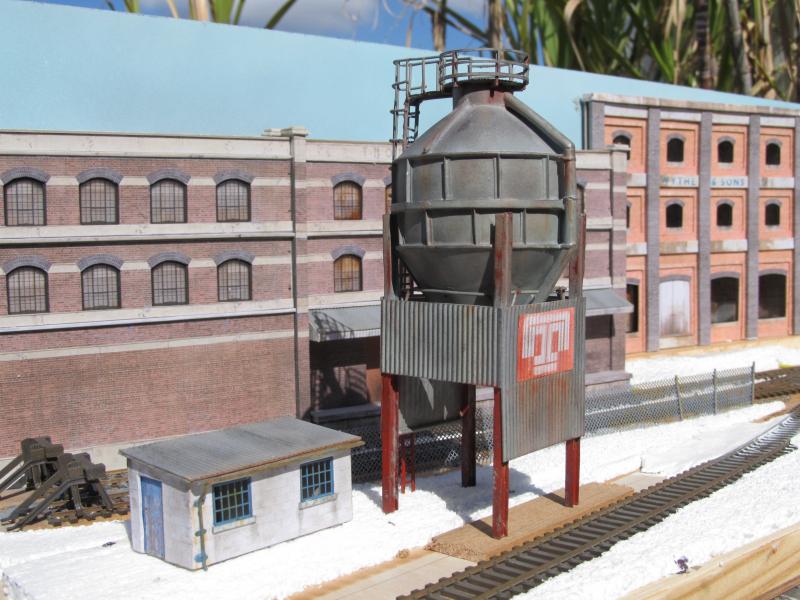
The bottom of the ladder was painted red to match the legs of the hopper. Yes, there is a little overspray, but this will be well hidden with weathering powders. In the pic below, you can clearly see that the steps are not equally spaced !
A Tunnel Cement symbol was mounted onto the corrugated wall. This was copied/pasted then reduced and printed. After printing I applied a few light coats of matte varnish before lightly wetting and pressing onto the corrugated sides. Once the 'wet' paper had dried with corrugations in it, a thin layer of PVA was applied to the back, then glued to the model. To hold it firm, another piece of corrugated card was placed over the top and pressed upon for 10-15 minutes.
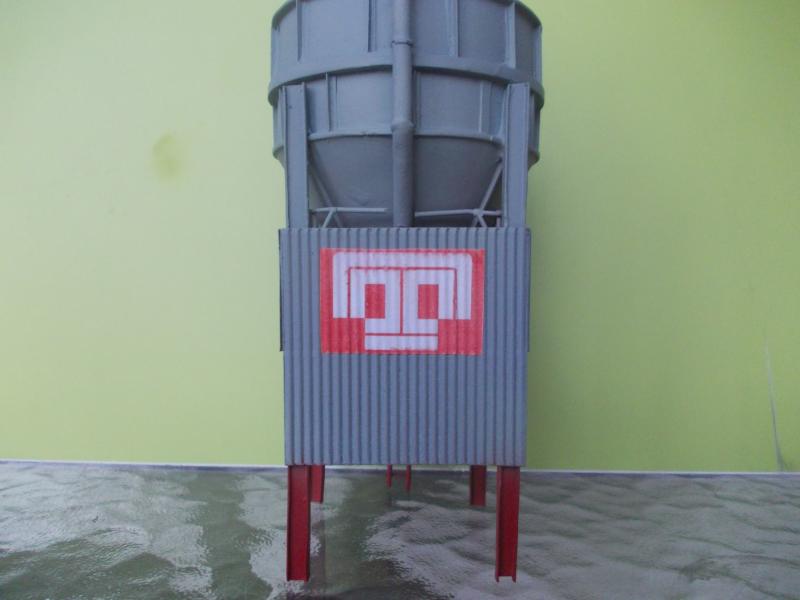
Quite a few applications of weathering powders were applied from top to bottom. Powders were also applied on the inside as well. Finally, the whole lot was sprayed with matte varnish to lock the powders in. The orange-red of the Tunnel Cement (T symbol) sign matches in well with the sign writing on the wagon.
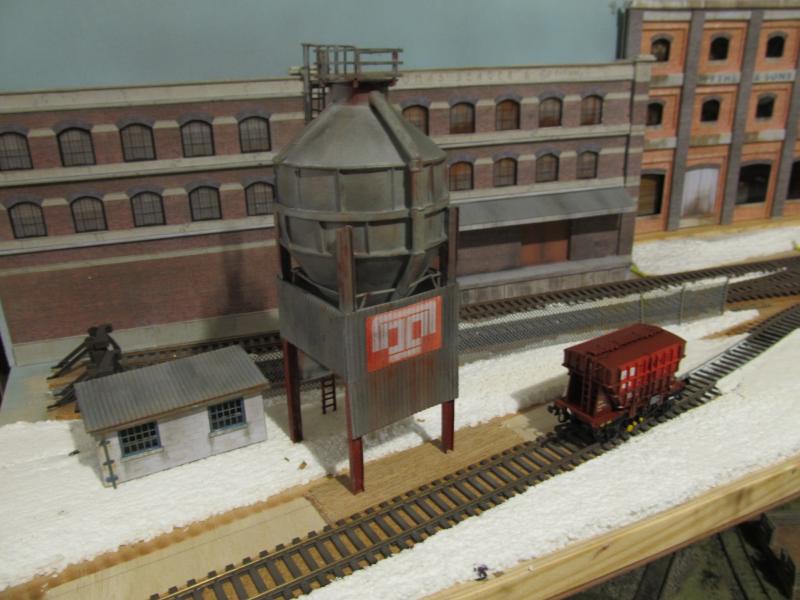
I really need to take a pic in natural daylight rather than electric light. It certainly looks different (better) in natural light.
That's it for now until scenics begin…
Cheers, Gary.
Posted
Banned

Cheers, Gary.
Posted
Inactive Member
Max
Port Elderley
Port Elderley
Posted

Full Member
Always try to look on the bright side of life!
Barney
Barney
1 guest and 0 members have just viewed this.