goods shed from Wills bits and Plasticard
Posted
#196495
(In Topic #10897)
Full Member
creating a goods shed using various Wills panels, Plasticard of all thicknesses... and gutters/downpipes from Ratio
Still getting the hang of the forum, but here goes, my first bit of scatchbuilding since returning to railway modelling - I think this is scratchbuilding… although some may reckon it is kitbashing… Having checked some of the other projects on the forum I'm a bit concerned about reaching the high standards of others.First a look at my workspace :
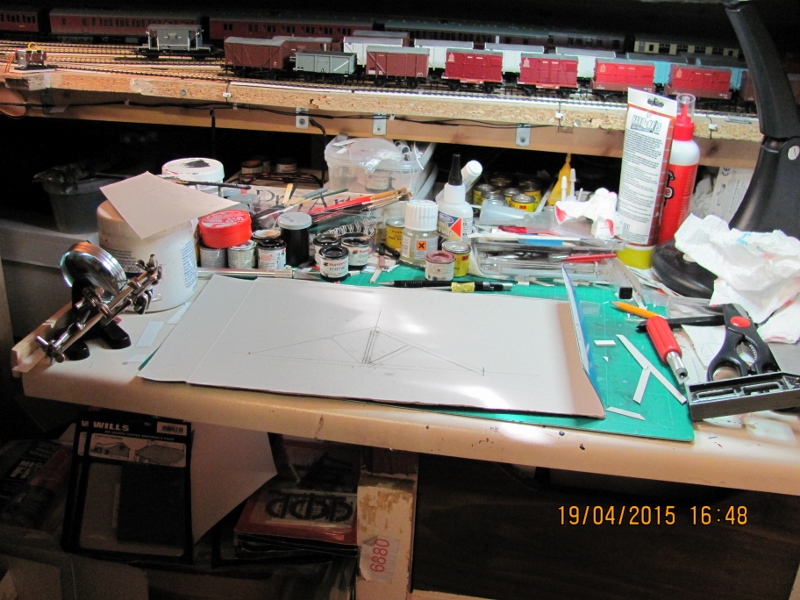
… which explains why most of the work is done on the floor, and all photos use unfinished parts of the layout, and a tray balanced on one of the fat contoller chairs. That's the west end of the main fiddle yard behind by the way.
My original idea for the goods shed was a two road shed, open at the front, central platform, with sliding doors at the rear opening onto a loading bay for lorries… but when the track went down, I had clearly underestimated the the space required for all the pointwork and so the goods shed has been reduced to just the front portion, with the rest and loading bay somewhere inside the two foot of stone wall behind the loft panelling. When we were on Mull we did acually build a house, just the two of us, so I'm using the same processes again for the goods shed - walls, main beams, roof trusses, roof and rooflights, facia, soffit and barge boards, and finally gutters and downpipes.
I started though by painting the rails and laying some cork as a foundation for the platform
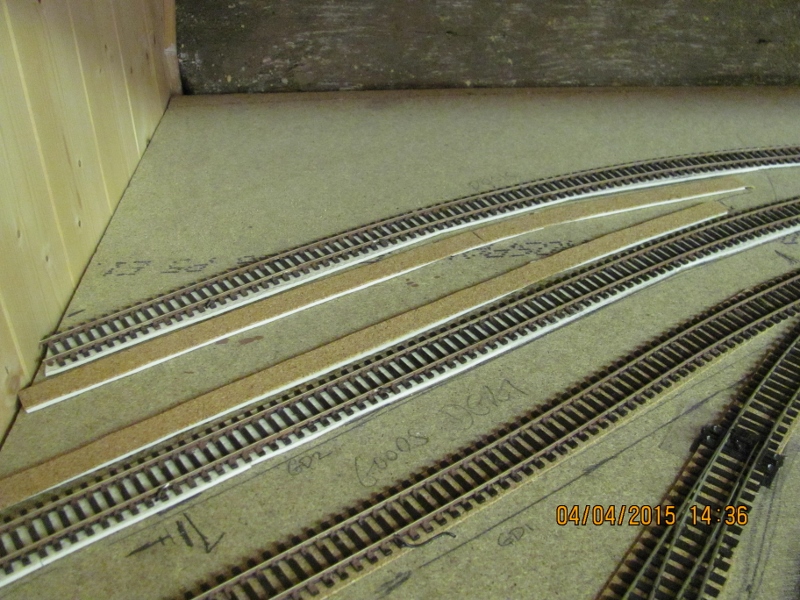
I know I've shown bottom two lines as the site for the shed - that was before I decided on a fuel depot as well, that's the right hand track - I do everything according to the Miuayga method (more of that later). The track was then ballasted and a start made on the shed. First job was to build the platform, using Metcalfe bits left over from Birkenhead - I find the Metcalfe platforms a little low - hence the foundation mentioned earlier - a bit tatty here but it will be tidied up before it gets weathered.
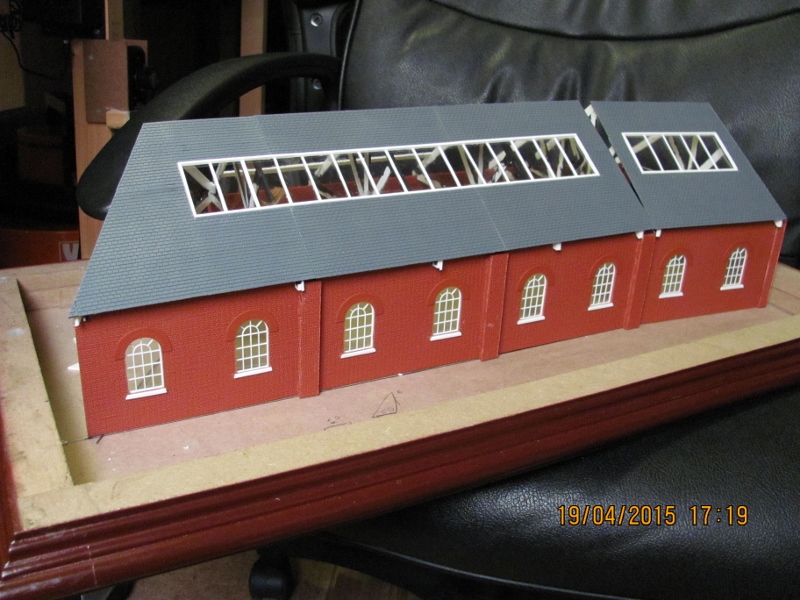
Then on to the building itself - I am using Wills SS71 (round top windows) - first glue the panels together. I always cut back the lugs on the edges of the Wills panels so as to get a good join, don't know if you are suppose to, but it fits better. Once they are set I add the piers at each join - because they hide the join and it looks better. If you look closely you'll see the piers are Plain Bond (which I had in), the walls are English Bond, but I'm not that particular.
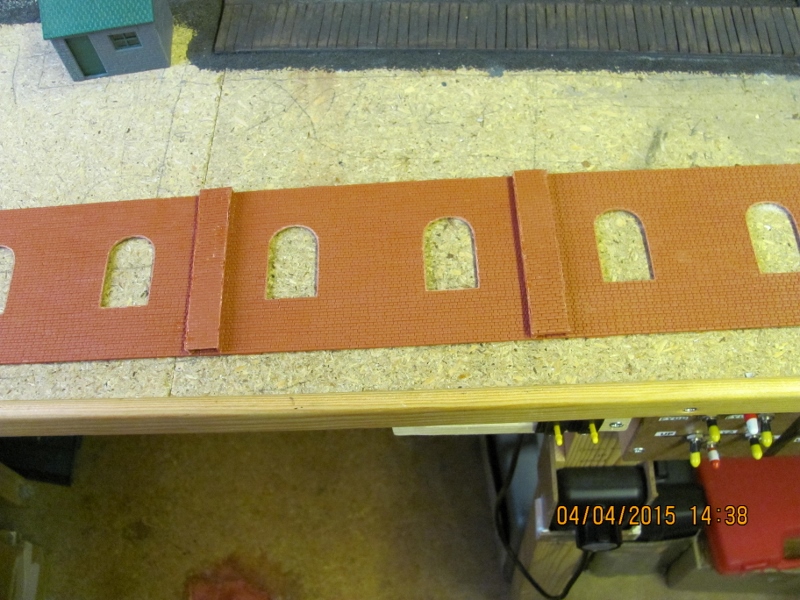
With both walls done, I cut, from 60thou Plasticard, a couple of main beams so as I could check how it fitted on the tracks.
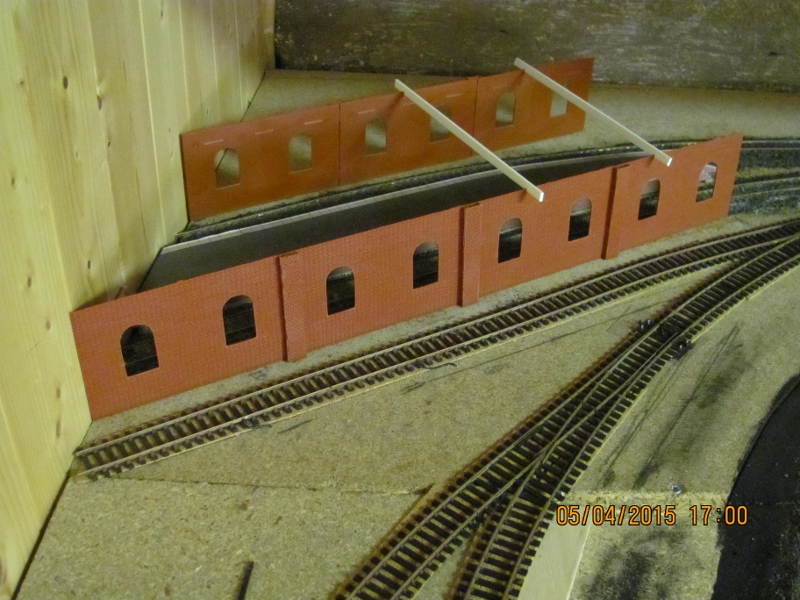
… which it didn't really, so I would need to crank the last panels… which would make it more complicated, particularly when it came to the roof……
More to follow…. I assume you've all figured out the Miuayga method by now….. Make It Up As You Go Along.
Do I have a plan? Na, if I did I'd spend most of my time trying to remember where I put it.

Posted

Full Member
Isn't it good to have made a start? Rhetorical question, obviously and I'm looking forward to clearing a little space somewhere and set up a work tray and do some modelling myself soon.
I see your production space doubles as drawing office as well and the diverging dimensions of those roof trusses will give your interesting build a bit of a twist :???:, but all within the guidelines of Miuaygo, so all power to you :)
Good luck with progress and I'll keep an eye out for the next instalment,
Bill
At 6'4'', Bill is a tall chap, then again, when horizontal he is rather long and people often used to trip over him! . . . and so a nickname was born :)
Posted
Full Member
"Dimensions" - you're getting a bit technical now! As I mentioned before the goods shed is finished, so the next instalment will follow this. Must admit my workspace did start as a clear area…. but stuff just seems to collect there, I'm sure if I'd started with a bigger space there would have been just more stuff. I know there's always the floor….. but even that seems to be getting smaller by the day.
Keith
Do I have a plan? Na, if I did I'd spend most of my time trying to remember where I put it.
Posted
Full Member
With the walls now making a better fit with the track, time to fit the windows. I've lined the far wall on the inside as it can be seen from the entrance and through the rooflights, also the first two sections of the near wall, the last two remain single skins as the only way they'll be visible is with a mirror. When gluing the back panel you will need plasticard spacers between the panels to allow for the windows. This is the inside of the far wall:
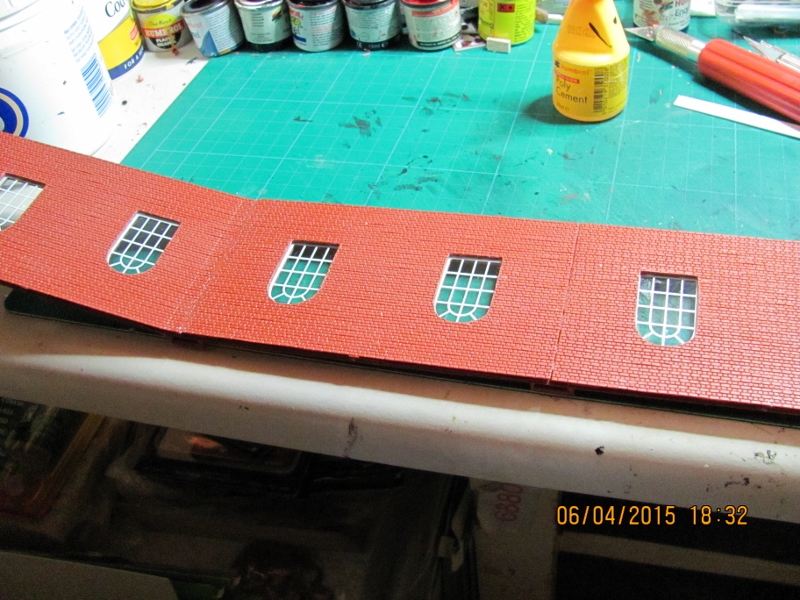
One other addition, I fitted window sills to all windows (plasticard) which I think improves the look no end. Also at the front of the building I added square brick pillars to finish off the walls. The remaining main beams were then cut for a final test of the position before gluing in place. For extra strength I added (a bit further on in the build, when I noticed one wall parting company from the beams) small angle pieces to keep the walls square with the beams. Also before gluing the beams were trimmed back to define the eventual overhang of the roof.

Now it is time for the roof trusses - the nearest thing I had to a plan was the outline of a truss shown on my workspace earlier, but in the end it wasn't symmetrical, the trusses were, well nearly. Made from 40thou plastcard. I did make them all the same size which meant with the crank in the wall, and no extension to the back wall the front truss was ever so slightly short, which was no bad thing as it brought the back wall in a bit. I did make the back truss later in the build once the roof was fitted, too difficult for my brain cell to work it out in advance, but I mention it now in case I forget later. With the other trusses glued to the beams (ends of the trusses should match the beam ends) it starts to look a bit more like a building.
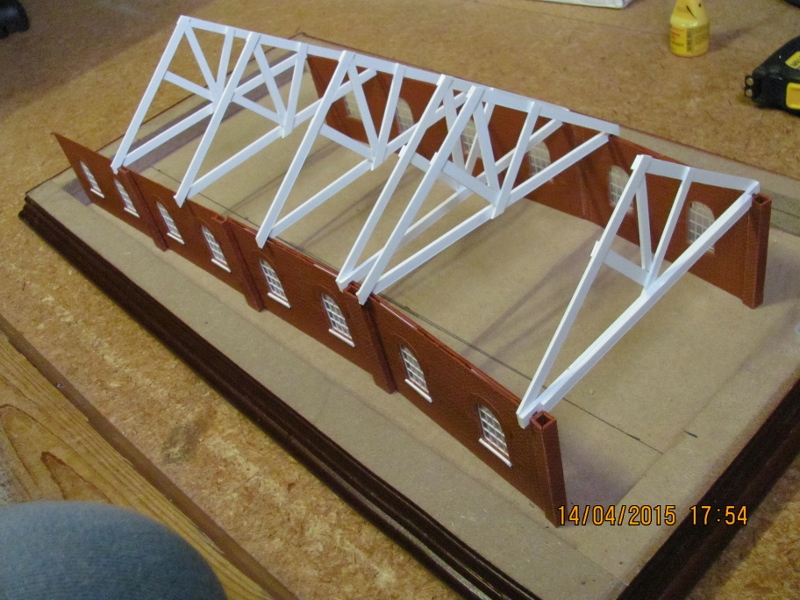
You can see the square pillars I mentioned, also on the front main beam I've added a second length of plasticard - this will eventually become the "supporting" beam for the wood panelling which I'll use above the entrance.
So now the roof.
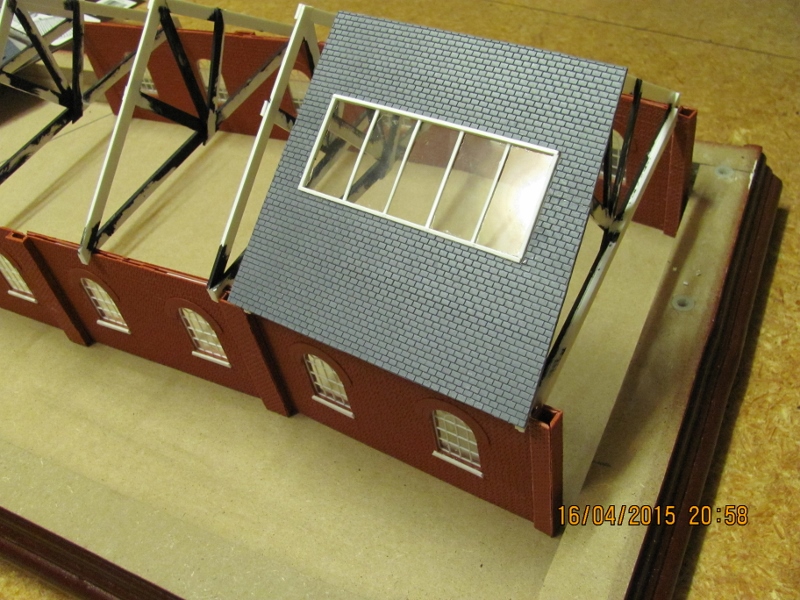
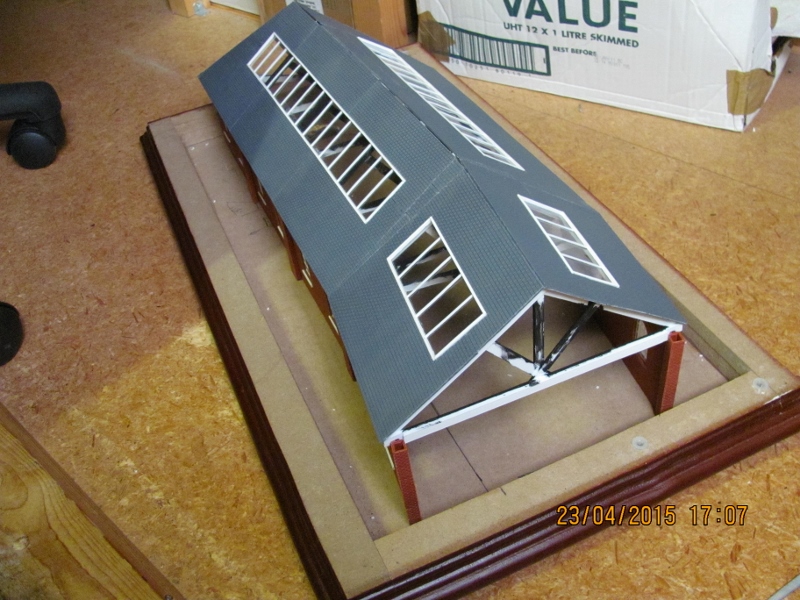
I used Wills slates (SSMP203), and added roof lights on both sides. The frame for the rooflights was made from strips of 40 thou plastcard, the glazing bars from 20 thou, the glass from the Wills packaging - make the joins in the glass line up with the glazing bars. I painted the top edges of the trusses which will be visible through the lights, and also all other upward facing edges of the trusses before fitting the roof sections. This is the first one fitted, on the sides the roof should overlap the beam/truss ends enough to allow the facia board and the gutter which is added later, and on the gable end the overlap should cover the wood panelling and the barge board. This is the first section in place
Right, that'll do for now…time to feed the hedgehogs, really.
More very soon.
Keith
Do I have a plan? Na, if I did I'd spend most of my time trying to remember where I put it.
Posted
Full Member
Just back from a village soiree at the Town Hall organising the annual Grand Prix Retro meeting, where we close off some roads and race vintage cars and bikes over a summer weekend, really. How many hedgehogs visit you to eat all Fido's food?
Your shed may be finished, but I'm still enjoying your build, so please excuse any daft questions I might ask, despite knowing all challenges have been met.
The windows and cills work well and I'll be using my own set in due course. I downloaded a freebie 'dirty window' sheet from somewhere, which you use to photocopy onto clear plastic to make your dirty glazing from. I think it should work.
Looking forward to the rest of your rapid build. Will there be cranes and road transport visible through the roof lights?
TTFN,
Bill
At 6'4'', Bill is a tall chap, then again, when horizontal he is rather long and people often used to trip over him! . . . and so a nickname was born :)
Posted

Full Member
Jeff Lynn,
Amateur layabout, Professional Lurker, Thread hijacker extraordinaire
Amateur layabout, Professional Lurker, Thread hijacker extraordinaire
Posted

Full Member
Cheers
Marty
Posted
Full Member
Thank you for the clear pictures and step by step instructions. Looking great, please keep posting as progress is made.
Andrew
Posted

Full Member
Just been having a look at your last post. Being a past master of the 'Miuaygo' method myself in my opinion things seem to be coming along nicely.
Keep up the good work.
Always try to look on the bright side of life!
Barney
Barney
Posted
Full Member
Apologies for the delay - had a bit of a fall last Friday - tripped when running out with the recycling rubbish - ended up projecting myself, horizontally, at speed, at a low stone wall around the flower bed, that takes real skill. Doc says torn shoulder muscles and probable cracked rib. Anyway had a few days feeling sorry for myself, so should complete the goods shed saga tomorrow…. unless I trip over something else. Bill, between four and six hogs, and it is the feral cats' food they eat, apart from their own "Hedgehog Bites"
Keith
Do I have a plan? Na, if I did I'd spend most of my time trying to remember where I put it.
Posted

Full Member
Posted

Full Member
Mike
Pig Hill Yard - a small Inglenook shunting layout for my boys, in 00.
Pig Hill Yard - a small Inglenook shunting layout for my boys, in 00.
Posted

Full Member

'Kev
Posted
Full Member
Many thanks for all the positive comments - I should point out that, as with my layout, all the photos seem to make things look better than they actualy are… but encouraged and still bruised (but a lot better thankfully) I'll continue this epic….
With the first roof section fitted I made the main roof section, similar to the shorter section, and fixed it with tape to the trusses so that I could measure up the end truss - there's no other way I could have figured out the dimensions, given I had no plan….. The end truss was then constructed as the others, with the overlap from the wall matching the original trusses, but with the end cut on the angle to fit the facia board later.

I did then include some additional supports between the end two trusses, given that the spacing was a little longer than the Wills panel, and then fixed the main froof panel.
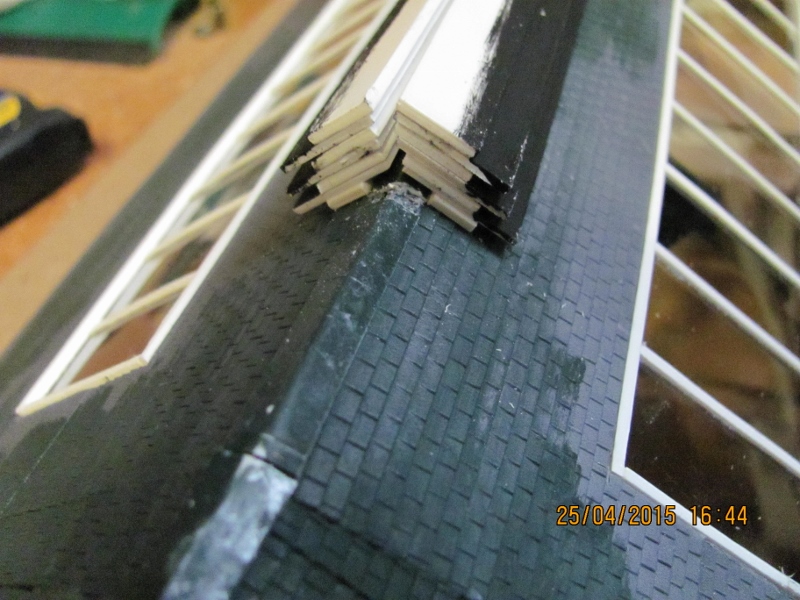
The other side was the assembled in the same way and fixed in place. Then followed the difficult job of filling in the gap between the roof panels…… which took some time…. but I managed it, not very neatly, but once weathered hopefully it will look OK - at least now it was starting to look something like what I intended.
I then daubed some roofing slate paint (P955, from the excellent Phoenix range) randomly on the roof, but especially the iffy join - I reckon it is better to vary the colour a bit prior to weathering, gives a better effect.
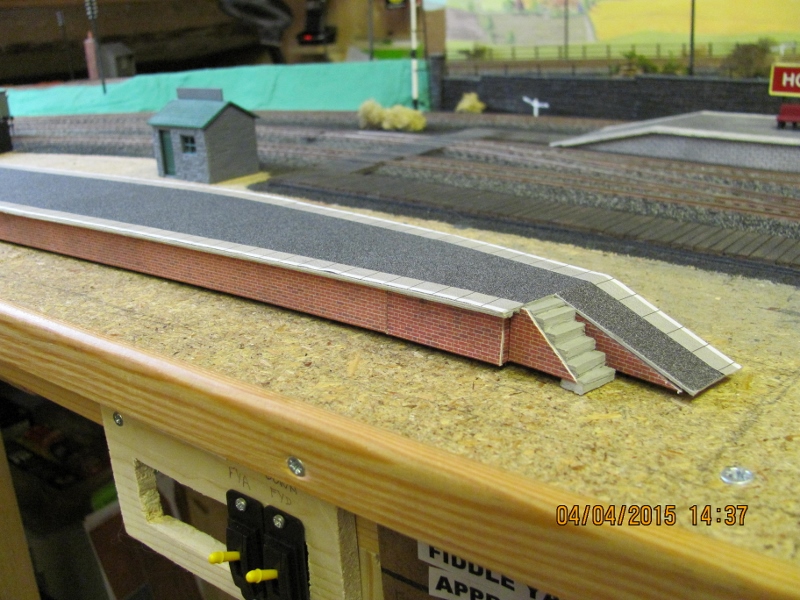
Then it was time to panel in the gable end with Wills Wood Planking (SSMP201), and then fit the facia boards, soffit boards and bargeboards - the bargeboards using 30 thou, the rest with 20 thou. Close up of the facia boards:

so now it is definitely starting to look the part

Time for a break…. too much sitting down is not good for me just now…back in a bit
Do I have a plan? Na, if I did I'd spend most of my time trying to remember where I put it.
Posted
Full Member
Next job was to paint all the plasticard bits that showed. For the facia boards and bargeboards, Phoenix P108, BR Maroon (Dull), and for the sills and the beam across the entrance, Phoenix P958, weathered Concrete. When painting the sills I painted the bottom edge of the wall behind the sill, looks better. I also used this for the topping off of the brick pillars - just a couple of squares of 60thou chamfered, rather like Metcalfe do in their card kits.
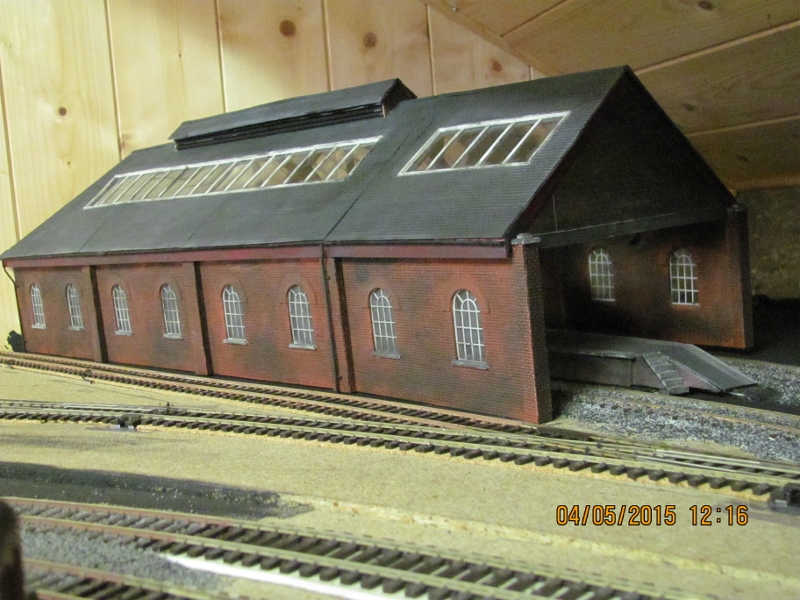
Then the final touch, some gutters and downpipes. This time it was Ratio 538, for once I prefer this rather than the Wills offering, but be warned each pack has only 17" of gutter. Not quite sure what all the lugs are for, but I just trimmed them off and stuck the gutter directly to the facia board….which then needed repainting… so perhaps paint after fitting would be a better idea. Then add the downpipes, and the shed is finished.

…well the building phase is finished.
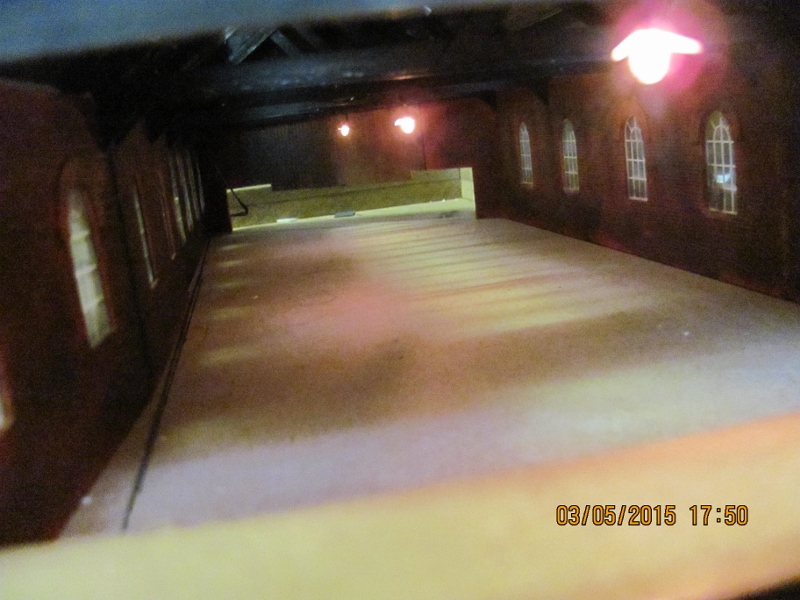
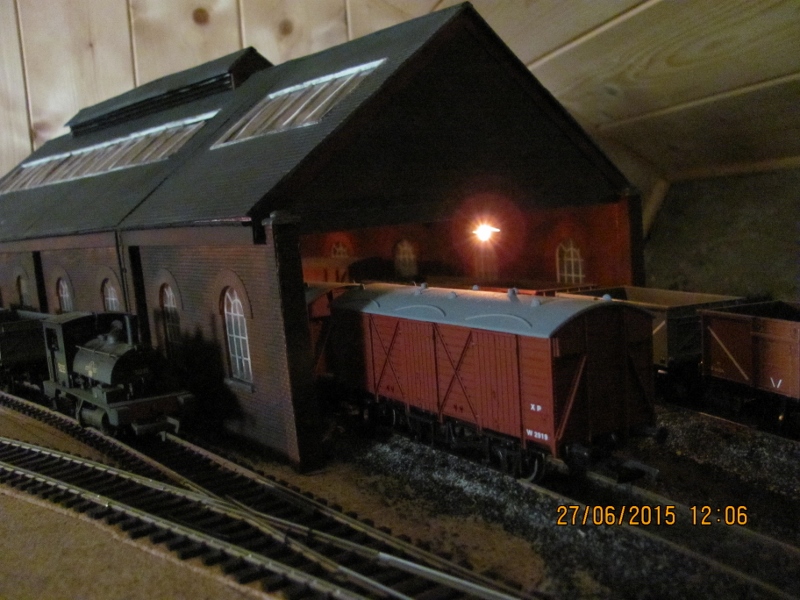
Now the lights. All main buildings on the layout have to have lights… so for the goods shed I used 12v GoW bulbs, three of them hung centrally from the roof trusses. I know there is some debate about using GoW bulbs in card kits (I do), but firstly I don't run the layout in the dark that often, and secondly provding the bulb isn't in conact with whatever it is illuminating all should be well. Having said that, with GoW bulbs, for external lights, I normally cut a small circle of 5 thou plasticard (sometimes just paper!) with a cross cut in the centre, then feed the wires from the GoW bulb through the cross until the bulb reaches the cross and then force the bulb through the cross (the four triangular sections act as grips) until it is halfway through. I then paint with matt black the top of the circle and all of the bulb through the cross - and there you have a light with a built-in shade. There's probably some of you out there screaming at the screen right now, but like I said I don't have the lights on for prolonged periods. I've used this for the coal stage at Birkenhead shed, outside the door of Hooton signal box and for the suspended lights under the roof at Woodside Station. I did also use the same idea with leds for Platform 5 at Woodside, which is not under the roof and is used in the main for parcels - they give a very good representation of gas lights.
It would probably be better with GoR bulbs… but way back I stocked up with GOW bulbs, and I have to use them.
Finally, yes we're nearly there, possibly the most important part of the process - weathering the whole thing. On plastic I use ordinary black emulsion, used to paint the beams in the house, and a very soft flat artist brush, no more than half an inch - better a bit smaller. I guess it is what they call dry brushing - just get the tips of brush in the paint and then dab onto the plastic and spread the paint round until there is the thinnest possible covering, and just keep repeating that over everything - and that includes window frames, the actual windows, everything. I had to practice a bit first but I seem to have got it now. Sometimes a bit more paint, sometimes a bit less, sometimes really worked in other times not - the idea is to get an overall sooty look, with no apparent pattern to it. And don't foget the inside too. For me it is the best part of the whole process, when an obvious model becomes a miniature building - if you see what I mean. I do use the same technique with Metcalfe kits - but you need to be a bit careful, you can't work the paint in quite as hard as the surface of the card suffers, so I water down the emulsion a lot - to something more like muddy water - but then you have to be careful not to overwet the card, otherwise once it dries you have curved walls. But it does work, best to practice first. I have weathered all the more recent Metcalfe kits I've used, including the roundhouse at Birkenhead, made from two straight shed kits, which now compares very favourably with the main shed (Townstreet, plaster cast). All the earlier Metcalfe kits which I did before getting the hang of this weathering lark will be attacked in due course.
So before a final view to end this saga, one other thing I do is battery test the lights :
And that is it! Done. According to the principles of Miuayga… if when you've finished you can say that'll do, then all is well…..
That'll do!
Hope this has given you all some ideas - this could easily be made into a half decent engine shed with some minor changes, but I recommend a straight sided shed, of whatever type, with sufficient space to allow you to model the whole thing!
I need a rest now…..
Keith.
Do I have a plan? Na, if I did I'd spend most of my time trying to remember where I put it.
Posted
Full Member
I had intended to add two more photos of the shed, once the lights were connected, just to finish things… but then 2015 had another go at us.
I was just getting used to the idea that a cracked rib wasn't going to heal overnight, when we ended up in the Acute Referrals Clinic at Shrewsbury hospital, this time it was Margaret's turn, with a possible partially detached retina. It wasn't, but she's been on light duties for the last seven weeks. Just getting used to that, when Fflo, one of our sixteen year old cats took a turn for the worse…x-ray, bloodtest, anti-inflammatory, antibiotics, and steroids followed…even an enema for good measure…. over five weeks. Now when our cats are unwell everything stops in this house, our problems become irrelevant, and regrettably so does the layout. However she is on the mend now, my rib has returned to normal and hopefully Margaret will get the all clear from the hospital on Friday… and I have finally connected up the shed lights!
… the night time one didn't really work out
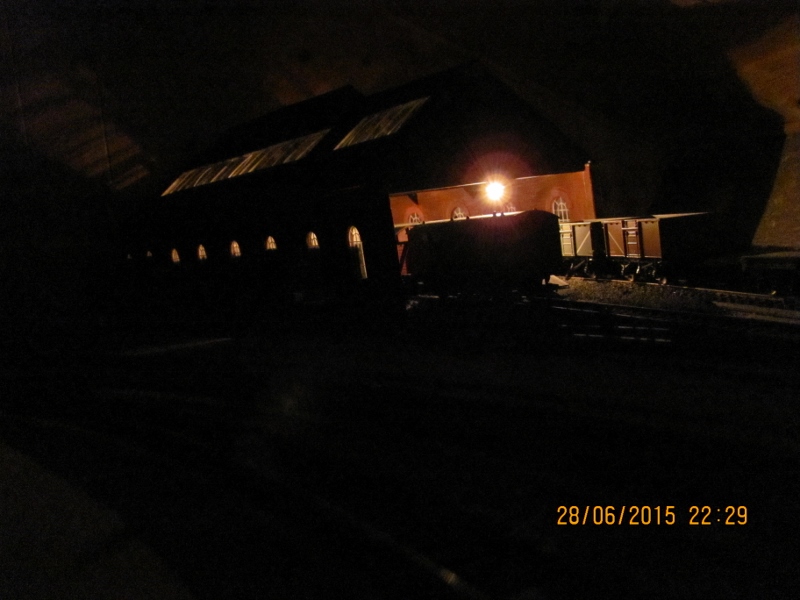
..that wasn't worth the trouble!
Provided no more emergencies, it is either the oil depot, or the final bit of baseboard to provide the two tunnel mouths south of Hooton…… fingers well and truly crossed.
Keith
Do I have a plan? Na, if I did I'd spend most of my time trying to remember where I put it.
Posted

Full Member
Cheers
Ron
Proper Preparation makes for Perfect Performance!!
http://yourmodelrailway.net/view_topic.php?id=13331&forum_id=21
http://yourmodelrailway.net/view_topic.php?id=13331&forum_id=21
Posted
Full Member
I'm sorry you and your loved ones have had a hard time of late, but so happy that you've knuckled down and the tough part is behind you. That rib must have been a nuisance!
The shed has turned out rather well and fills the corner perfectly and the scene is beginning to look authentically busy.
What's the next phase you'll be working on? We'll be watching with interest.
All the best,
Bill :)
At 6'4'', Bill is a tall chap, then again, when horizontal he is rather long and people often used to trip over him! . . . and so a nickname was born :)
Posted
Full Member
I may just run the layout for a week or so - it is just after 9.30pm on the layout….. not very busy just now…although there are still two trains from London (one Paddington and one T/C from Euston) to deal with, the local services to Chester and Helsby and the last arrival at Woodside at 11.50pm is yet another from Paddington. After that there is the coaching stock to prepare for the next day, then there's the freight… unloading and loading in that goods shed…. and a few overnight freights to set up and roster engines…. not very busy… but busy enough!
… or I could start on the oil depot… or the tunnel mouths… perhaps I'll wait to see how the second half of 2015 turns out!
Keith
Do I have a plan? Na, if I did I'd spend most of my time trying to remember where I put it.
Posted

Site staff
Regards
Alan
Born beside the mighty GWR.
Alan
Born beside the mighty GWR.
1 guest and 0 members have just viewed this.